

You're standing beside your motorcycle after fitting new front pads. The caliper pistons are back in place, the brake lever feels different, and the small tank beside the master cylinder suddenly looks more important than it did yesterday. You may be wondering whether to add fluid, replace the reservoir, or bleed the system again.
That small tank is the vaschetta olio freni, or brake fluid reservoir. It isn't merely a container for topping up. Its capacity, cap seal, mounting position, outlet geometry, fluid specification, and resistance to contamination all affect how reliably the hydraulic circuit works. A firm lever after maintenance depends on the entire system, and the reservoir is one of its most easily misunderstood parts.
Table of Contents
- What the Brake Fluid Reservoir Does
- Reservoir Types and Where Each One Makes Sense
- Materials, Build Quality and What to Inspect
- Matching a Reservoir to Your Motorcycle
- Maintenance Habits That Protect the Whole System
- Working Around the Reservoir During Mods and Track Prep
- Buying Checklist and Where Sixrace Fits In
What the Brake Fluid Reservoir Does
After fitting new front pads, you pull the brake lever and notice a different feel. Beside the master cylinder, the small tank now deserves attention. That tank is the vaschetta olio freni, or brake fluid reservoir. It feeds the hydraulic circuit, accommodates pad wear, and helps keep moisture and dirt away from the fluid.
The reservoir works like a small supply chamber above a sealed water loop. The master-cylinder piston pressurises fluid and sends it through the brake line to the caliper. As the caliper pistons move outward with pad wear, the circuit draws fluid from the reservoir. During maintenance, fluid displaced by piston movement can return to the chamber.
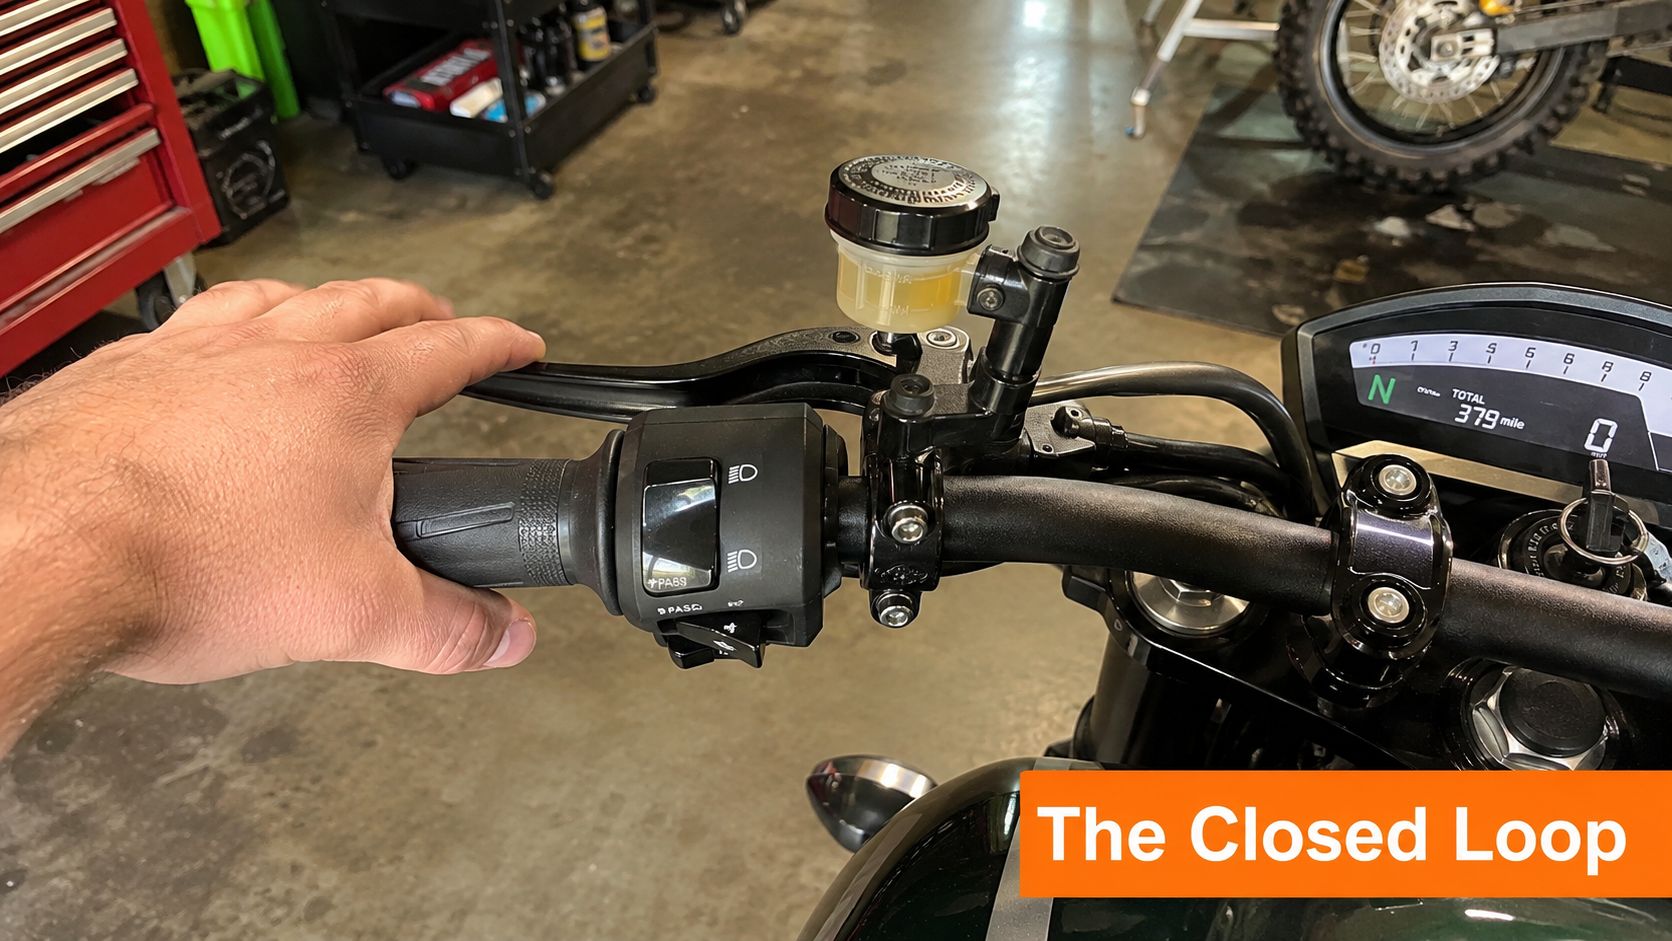
Three jobs happen inside that small housing
Reserve fluid: The reservoir provides extra DOT fluid as the pads wear. Its capacity is based on the fluid displacement between new linings with the pistons fully retracted and worn linings with the pistons fully applied. U.S. motorcycle safety rules require a minimum capacity of 1.5 times that displacement. The technical history and standards overview for brake fluid shows why reservoir sizing is a safety margin, not a styling choice.
Show the level: A sight window or translucent body lets you compare the fluid with the MIN and MAX marks. The level can fall as pads wear, but a sudden drop may indicate a leak. Inspect the pads, hoses, seals, and caliper before adding fluid.
Protect the circuit: The cap and diaphragm reduce direct exposure to dirt and moisture. Motorcycle reservoirs are generally vented to atmosphere, so humidity can enter over time. DOT 3 and DOT 4 fluids are hygroscopic, which means they absorb water. As moisture increases, boiling performance declines, so fluid condition affects braking under heat, not just appearance. Maintenance guidance on brake-fluid condition explains why this belongs in routine service.
The diaphragm beneath the cap allows the fluid level to change while limiting air contact. If it is damaged, distorted, or seated incorrectly, contamination can enter and fluid may leak around the cap. Those faults can also contribute to an inconsistent lever feel.
Workshop rule: Treat the reservoir cap as part of the hydraulic system. Clean the area before opening it, use the specified fluid from a sealed container, and do not assume clear-looking fluid is still in good condition.
After a pad swap or repeated hard braking, a spongy lever calls for a system check. Inspect the reservoir position, cap seal, fluid condition, and outlet routing before blaming the master cylinder. When comparing a replacement pump with its reservoir, review this front brake master-cylinder selection page to confirm that the parts are designed to work together.
Reservoir Types and Where Each One Makes Sense
A reservoir that fits the handlebar may still be wrong for the hydraulic circuit. Start with the master cylinder, available mounting space and hose path, then choose the tank format. A commuter using the original integrated unit has different requirements from a sport motorcycle with a radial pump and a remote tank. Appearance comes last, because mounting geometry determines whether the brake lever stays firm after pad work or hard riding.
An integrated reservoir is moulded or cast into the master-cylinder body. It saves space, keeps the fluid path short and usually matches the original motorcycle without extra hose routing. Production street bikes commonly use this arrangement because it packages the controls neatly and simplifies servicing.
A separate bolt-on reservoir mounts to the master cylinder or a nearby bracket. It may sit on the handlebar, a fairing stay or a dedicated support. A remote reservoir connects through a short hose, allowing the tank to move when clip-ons, bar bends or fairing panels prevent direct mounting. The hose becomes part of the installation, so its length, bends and height must suit the brake circuit.
Outlet direction changes the installation
A bottom-exit design often appears with radial master cylinders on sport-oriented motorcycles. It can keep the hose route tidy, provided the tank remains high enough for air to move back into the reservoir. A side-exit layout often suits axial master cylinders and naked bikes because the hose leaves laterally. Top-fill designs combine an upper filling opening with a lower hydraulic connection.
The MA Hydraulics Ltd oil tank guide offers useful background on tank construction, mounting and fluid containment. A brake reservoir still requires exact compatibility with the master cylinder, hose connection and specified brake fluid.
| Reservoir format vs typical use | Typical Bike | Best Suited For |
|---|---|---|
| Integrated master-cylinder tank | Production commuter or touring motorcycle | Straightforward road use and original-equipment replacement |
| Separate bolt-on tank | Naked bike or upgraded axial pump | Street customisation, bar changes and accessible servicing |
| Remote tank with hose | Sportbike with radial master cylinder | Clip-ons, fairing clearance and race-style layouts |
| Compact aftermarket unit | Track-focused or space-limited setup | Minimal packaging when capacity and routing are correctly verified |
Front reservoirs commonly fall within a roughly 9 to 45 ml range. Street arrangements often sit around 25 to 45 ml, while compact race-oriented units may be around 15 ml. These figures from motorcycle front brake reservoir selection guidance are application guidance, not a universal replacement rule. Capacity must leave room for pad wear without placing the diaphragm or cap under the wrong conditions.
An OEM plastic reservoir usually suits commuting and touring because it is light, familiar and shaped for the original motorcycle. Billet aluminium can provide a different finish and a rigid mounting body, but the material does not confirm compatibility. Check the diaphragm, cap, outlet size, hose angle and available space before buying. A tank that looks correct but sits too low, twists its hose or contacts the fairing can introduce installation problems and compromise inspection access.
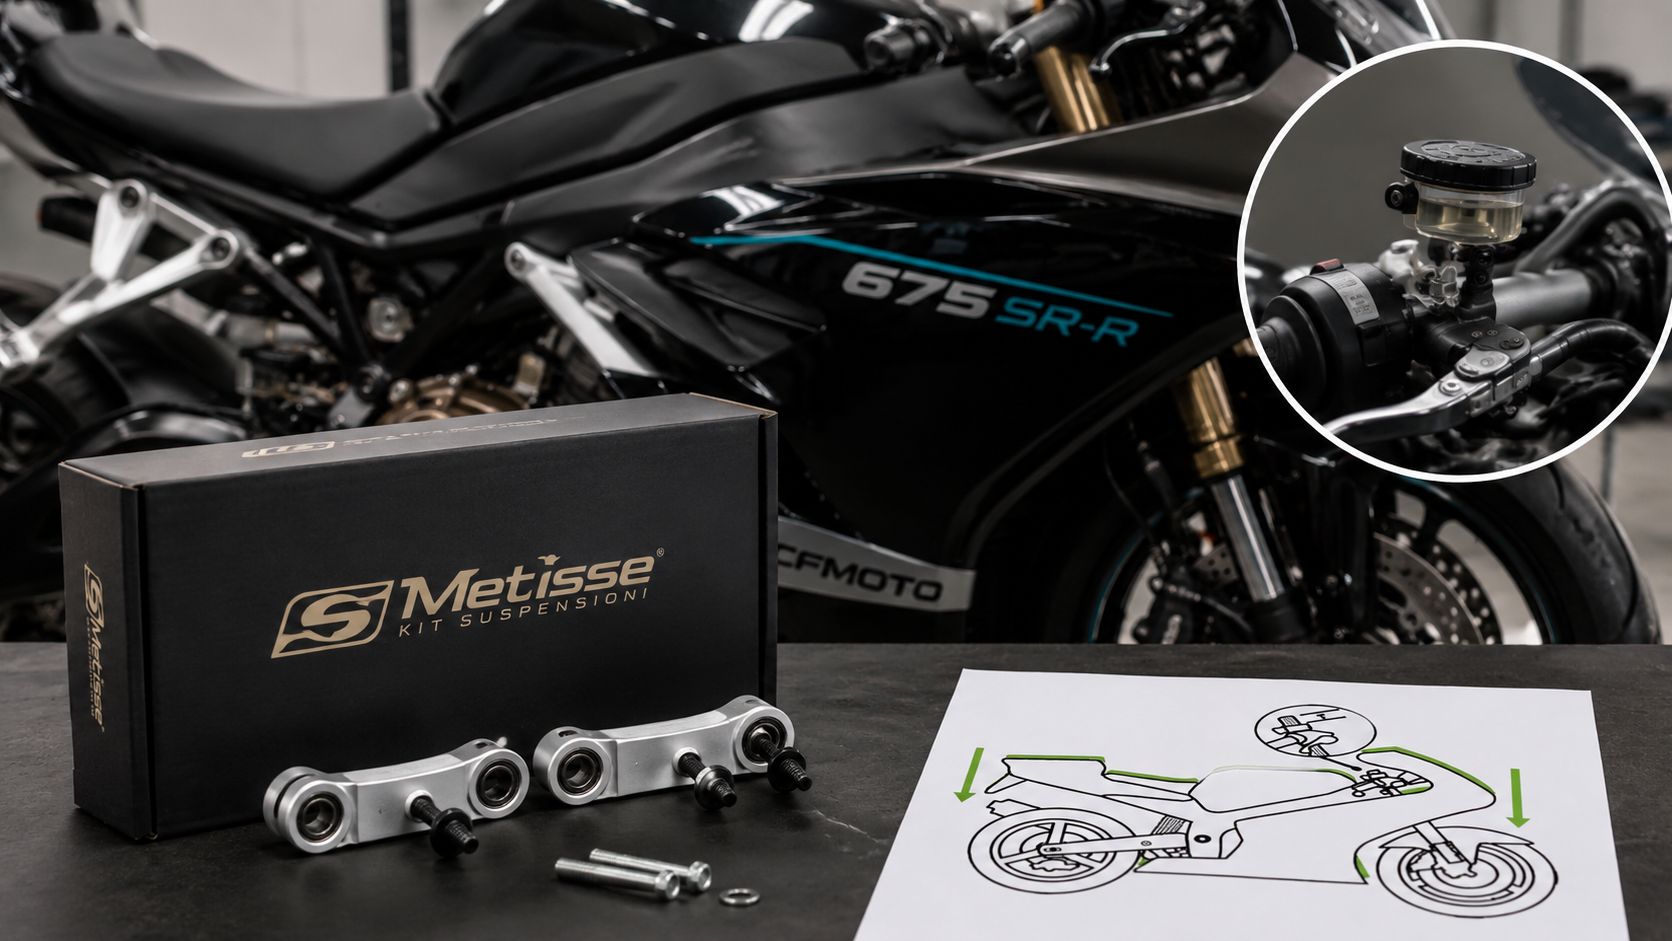
Materials, Build Quality and What to Inspect
At the workshop, a reservoir can look perfect in the box yet sit poorly once the bars turn or the hose is fitted. Start by checking the body and its interfaces. OEM units are commonly moulded plastic. Aftermarket tanks may be cast or CNC-machined aluminium, including 6061 or 7075 grades. These materials respond differently to vibration, ultraviolet exposure and repeated heat cycles, but the material label does not establish quality.
A plastic body can be durable, while an aluminium body can still be unsuitable for the motorcycle. The reservoir should stay stable at its mounting points, hold its shape around the cap and keep a clean seal at the hose outlet or sight window. These details matter because moisture management depends on a properly seated diaphragm. A cap that admits air or water can change the fluid condition and, after pad work or a track session, contribute to a lever that feels less firm.
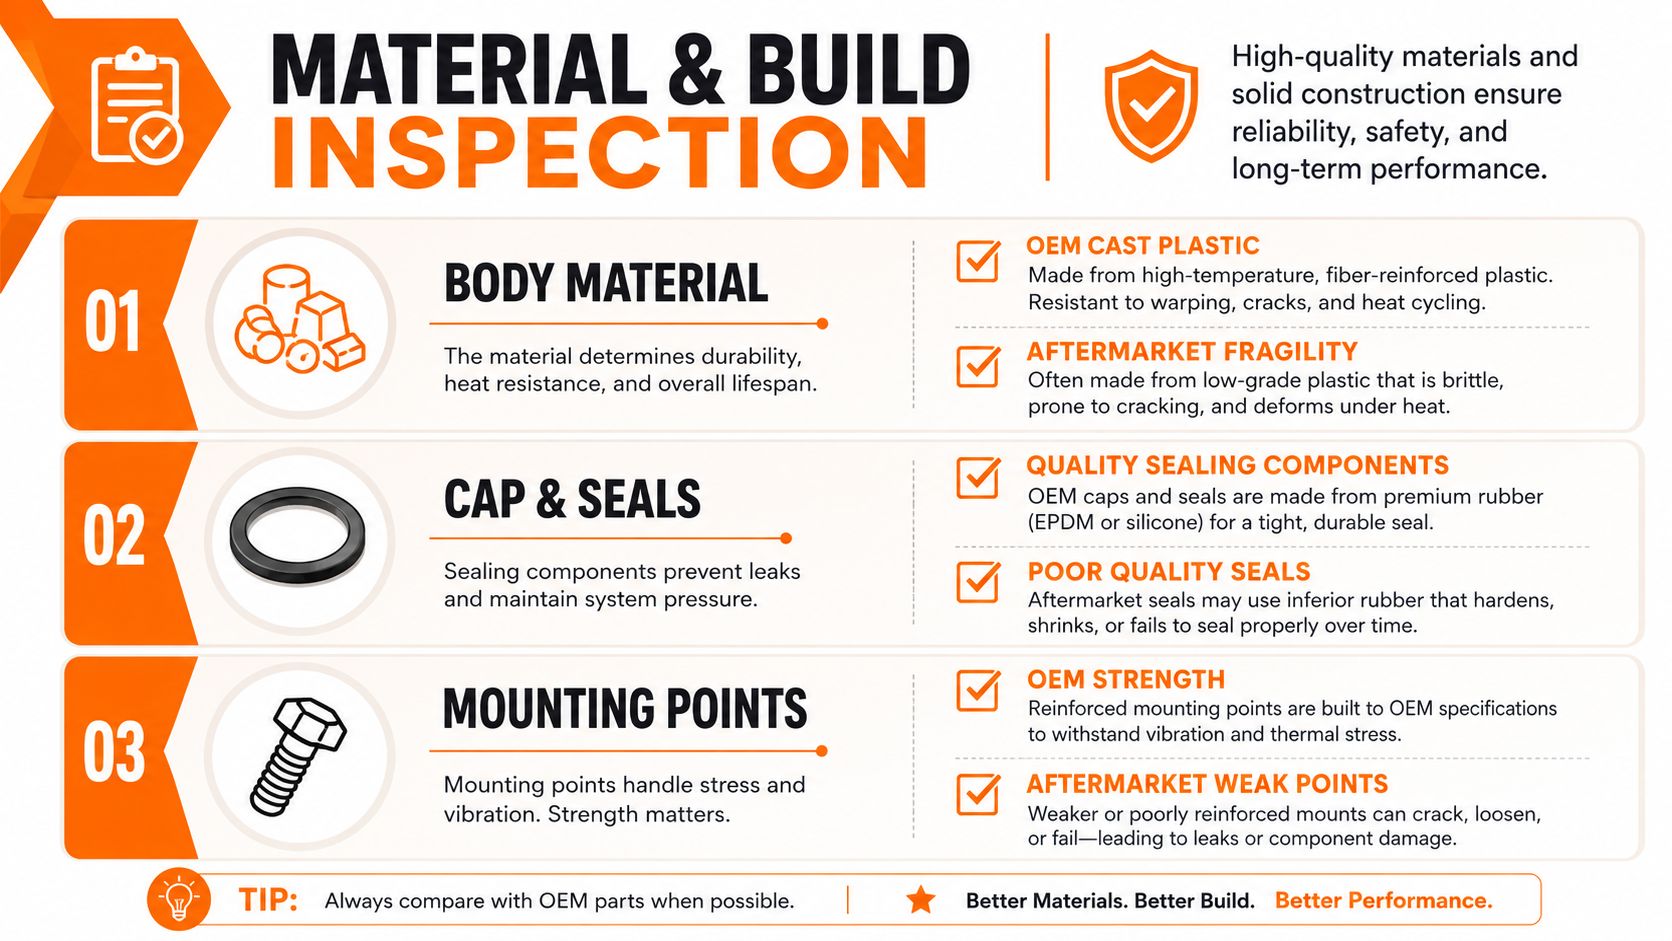
Inspect the cap before admiring the finish
The cap controls the seal, so examine it before judging the anodising. A flat rubber diaphragm or rolling-style seal should sit evenly in its recess. Twisting, pinching, swelling or rubber standing proud of the groove can prevent correct sealing. Tighten the cap evenly and confirm that the diaphragm remains seated rather than being pushed out.
Check the unit on the bench, before adding fluid:
- Anodising: Colour should be even, with no thin patches, bubbling or edge damage.
- Machining: Threads and cap seats should be clean. Sharp burrs can cut an O-ring or diaphragm.
- Level markings: Moulded or laser-etched MIN and MAX marks should remain readable after cleaning.
- Sight window: The window should be clear and firmly seated, with no perimeter gap.
- Mounting hardware: Bolt heads, threads, brackets and clamps should be straight and free from cross-threading.
Poor replicas often fail at these contact points. A loose cap, wandering O-ring or bolt that bottoms out before the bracket clamps can cause leaks. It can also let air or contamination reach the fluid, turning a cosmetic upgrade into a hydraulic problem.
A five-minute inspection
Hold the empty reservoir and shake it gently. Rattling can indicate a loose insert, sight window or internal part. Fit the dry cap, tighten it evenly and check the diaphragm again. Finally, view the level marks from the rider's position and confirm that the bracket holds the tank without twisting. A clean finish is useful, but correct sealing and stable mounting decide whether the component can be trusted.
Matching a Reservoir to Your Motorcycle
A reservoir can look like a simple container, yet its position, connection and fluid specification determine how reliably the hydraulic circuit works. Start at the master cylinder, not with the tank's outside diameter. Identify whether the original unit is integrated into the pump, bolted directly to it, or connected through a hose. Photograph the thread, mounting area and hose route, then compare those details with the motorcycle's service information.
Matching only the thread causes many fitment errors. Some applications use M10x1, while M12x1 is common on radial pumps. Other master cylinders, including some Ducati and BMW arrangements, have an integrated body that cannot accept a universal remote tank without the correct conversion parts. Thread size, pitch, sealing method and outlet depth all work together, like the matching faces of a pipe fitting. One correct dimension does not make the whole connection suitable.
Four checks prevent most fitment errors
First, measure the master-cylinder connection. Confirm the thread and pitch, then identify whether the seal uses an O-ring, a banjo fitting or a shaped seat. A visually similar outlet can still leak if its sealing surface is different.
Second, measure bolt spacing and clamp diameter against the handlebar or triple-clamp mount. Check the available height and clearance as well. A tank may accept the correct hose yet contact the switchgear, fairing or steering hardware once installed.
Third, test hose length and banjo orientation with the bars turned fully left and right. The line should not kink, pull tight or rub on the fairing. It should also avoid a low loop where air can remain trapped. Bottom-exit tanks need extra care because the outlet should stay above the master-cylinder connection, allowing air to rise back toward the reservoir. Mounting geometry therefore affects lever feel after a pad change or a track session, not just appearance.
Fourth, match the fluid specification printed on the cap or stated in the manual. DOT 3, DOT 4 and DOT 5.1 are glycol-based fluids often used in systems designed for them, but the motorcycle manufacturer's specification takes priority. Silicone DOT 5 is a different fluid and is not a casual substitute. The brake-fluid standard reference explains the need to use fluid from a sealed container and provides the relevant DOT classifications.
| Reservoir compatibility quick-check by master cylinder type | Thread / Mount | Reservoir Format | Brake Fluid | Common Models |
|---|---|---|---|---|
| Axial master cylinder | Often M10x1, verify manually | Integrated or side-exit | Follow cap or manual | Older and many naked motorcycles |
| Radial master cylinder | M12x1 is common, verify manually | Separate or bottom-exit remote tank | Commonly DOT 4, confirm specification | Sport motorcycles |
| Integrated proprietary body | Model-specific body and seal | Integrated tank | Manufacturer specification | Some Ducati and BMW arrangements |
| Converted remote setup | Adapter-specific mount and hose | Remote tank | Match the original system specification | Modified road or track motorcycles |
Printable checklist
- Thread: Confirm size, pitch, seal and outlet depth.
- Mount: Measure bolt spacing, clamp diameter and available height.
- Routing: Check hose length, banjo direction and full steering movement.
- Level: Ensure the pickup remains covered at every normal riding angle.
- Fluid: Match the DOT specification printed on the cap or stated in the service manual.
- Instructions: Compare the part number with the bike-parts compatibility guide.
A conversion kit belongs on a master cylinder designed to accept that conversion method. Do not improvise an adapter for an integral tank. If the fluid level falls below the pickup, the circuit can draw in air, making the lever feel soft or compressible when pressure is needed. Before ordering, verify the complete chain: master-cylinder interface, mounting geometry, hose path, fluid type and model-specific part fit.
Maintenance Habits That Protect the Whole System
Check the reservoir while inspecting the brake pads, even if the sight window still appears full. A falling level may follow normal pad wear, yet it can also point to a leak. Inspect the caliper, hose connections, and master-cylinder area before adding fluid. Keep the motorcycle in the position specified by its manufacturer, then confirm that the level remains between the marked limits.
Cleanliness protects the hydraulic circuit. Wipe the cap and surrounding area with a clean, lint-free cloth before loosening any screw. Use fluid from a sealed container and follow the cleaning instruction associated with the filler cap. Dirt that enters the reservoir can travel into small passages, while moisture introduced through an opened container works against the fluid's boiling-point margin.
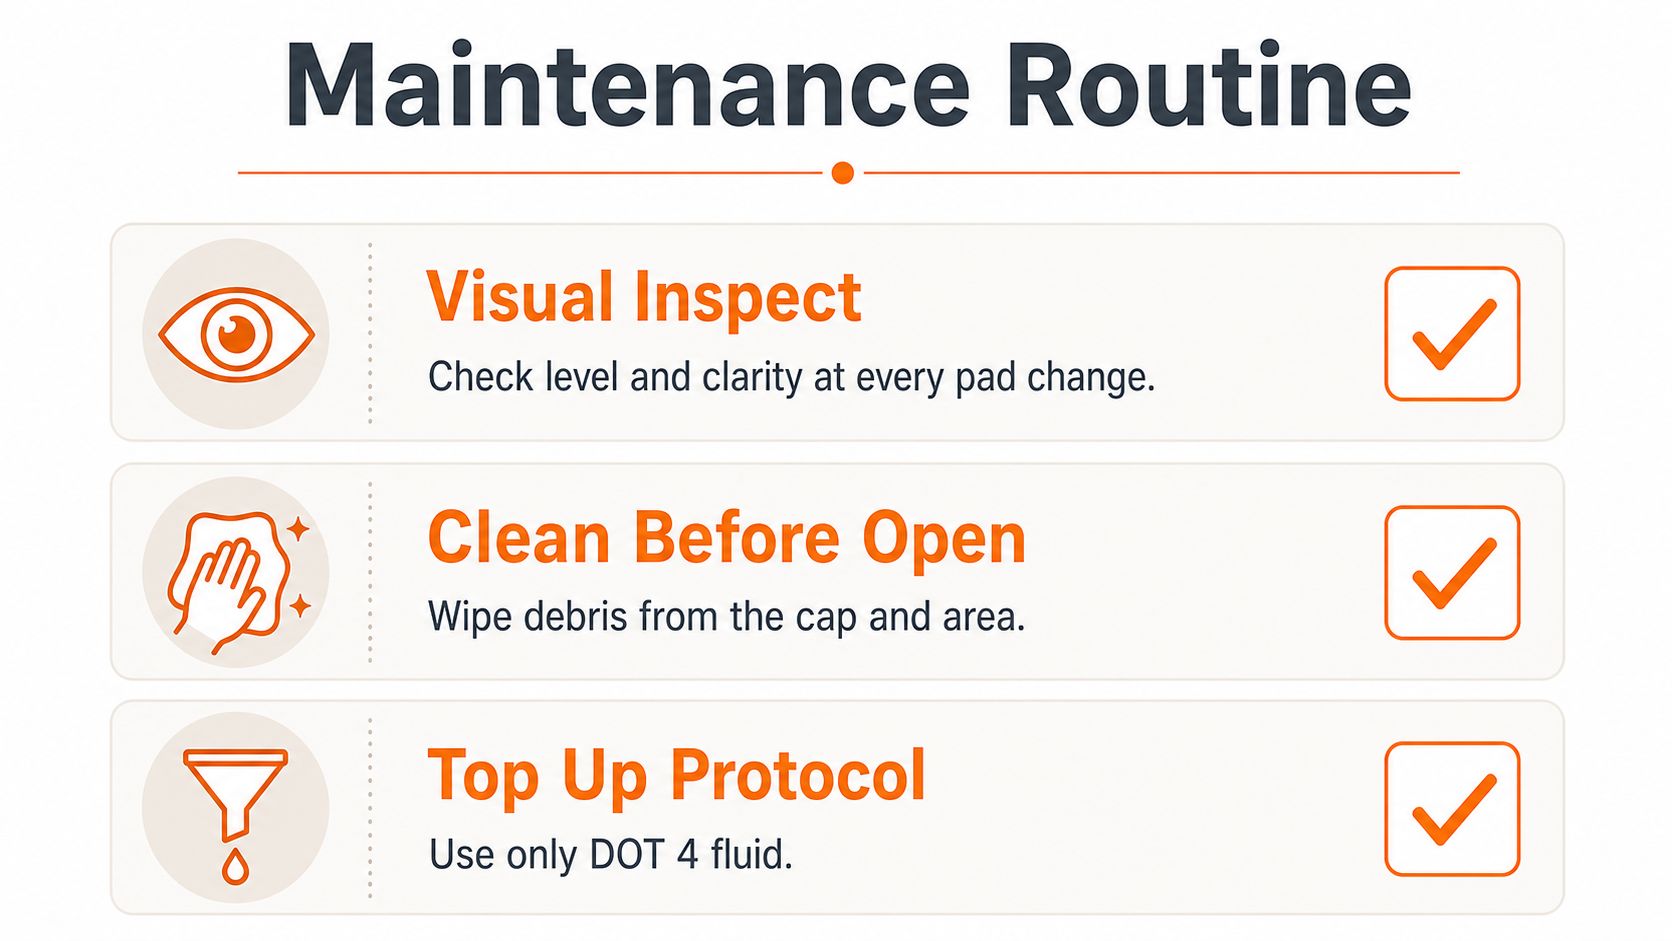
Use a sequence, not a reflex
Read the level through the sight window, or compare it with the MIN and MAX marks. Worn pads leave the caliper pistons farther out. During pad replacement, pushing those pistons back sends fluid toward the reservoir, so topping up beforehand can leave the tank overfilled and cause a spill once the pistons are fully seated.
Use the same specified DOT rating already in the system unless the service manual describes a controlled replacement procedure. DOT 3 and DOT 4 absorb moisture during service, and the reservoir's atmospheric venting makes moisture management important even though the hydraulic circuit is otherwise closed. Moisture lowers the fluid's resistance to heat and can contribute to vapor lock under severe braking. Follow the inspection and condition guidance in brake-fluid condition maintenance guidance.
Some manufacturer service procedures call for moisture testing during servicing and fluid replacement every two years, or sooner where moisture reaches 3% or more. The Harley-Davidson service procedure illustrates why a reservoir should be treated as part of the sealed hydraulic system, not merely as a refill point.
Do not open it yet: Keep the reservoir closed during high-pressure washing, before completing a crash inspection, and whenever the fluid is discoloured or a seal looks swollen. Those signs call for diagnosis rather than a quick top-up.
A lever that remains spongy after bleeding usually indicates air in the circuit, possibly above the outlet or inside another component, rather than a defective tank alone. If the model-specific bleeding procedure does not produce a stable lever, stop riding and have the hydraulic system checked.
For readers comparing workshop care with broader vehicle maintenance routines, this detailed interior service cost overview provides wider context on how service scope and vehicle condition affect maintenance work. Use the motorcycle service manual for the braking procedure itself.
Working Around the Reservoir During Mods and Track Prep
A handlebar change can turn the reservoir into a routing problem. Wider bars or higher clip-ons may move the master cylinder far enough to pull the original hose tight, create a kink, or press it against the tank or fairing. Set the controls loosely first, then turn the bars from lock to lock while watching the hose, cap and reservoir body. The sealed hydraulic component must remain stable throughout steering movement.
For example, higher clip-ons followed by an adjustable short-stroke lever may not require a different reservoir. The altered piston movement can still change the bleeding process. Keep the reservoir level visible, and do not fill it to the brim while the caliper pistons are not fully seated.
A sensible modification sequence
- Set the controls first: Position the bars, master cylinder and lever. Confirm that the reservoir has the manufacturer's intended orientation, the cap can be serviced, and the fluid pickup remains covered.
- Route the hose: Match the hose length and banjo orientation to the new position. Avoid sharp bends, hot or moving parts, and any route that tightens at full steering lock.
- Install braided lines: Plan to refresh the fluid, bleed the circuit carefully, and recheck the level with the pistons fully seated. Cover painted surfaces because brake fluid can damage finishes.
- Test before riding: Operate the lever repeatedly and inspect each connection for wetness. Make the first brake test at low speed in a safe area.
Track preparation adds heat and repeated lever applications. A practical sequence is to remove the old fluid, refill with fresh DOT 4 or DOT 5.1 from a sealed container when the motorcycle specification permits it, bleed the circuit, and verify that the cap and diaphragm sit correctly before hard braking. Moisture-affected fluid has less boiling margin, so demanding use can bring vapor lock and longer lever travel, as noted earlier.
Small installation errors can create a soft or inconsistent lever. Overtightened reservoir screws may strip, forced clamps can crack the tank, and a loose cap can admit contamination or allow unwanted fluid movement. After the work, inspect the cap, hose joints, bleed points and routing before blaming the replacement reservoir. If the lever remains soft after the model-specific bleeding procedure, stop riding and have the hydraulic system checked.
Buying Checklist and Where Sixrace Fits In
A confident purchase comes from measuring the motorcycle before browsing finishes and colours. Product photographs can show the general shape, but they rarely prove thread pitch, outlet height, diaphragm design or clearance around the switchgear. Treat the listing as a starting point, then verify the dimensions against the service manual and the original part.

Your workshop buying list
- Thread and pitch: Identify the master-cylinder connection, including its sealing method.
- Physical fit: Check reservoir height, bolt spacing, clamp diameter and clearance from the fairing.
- Outlet geometry: Confirm whether the hose exits from the side, bottom or another model-specific position.
- Hose routing: Match length and banjo orientation to the chosen bar bend, with full steering movement available.
- Fluid specification: Use the DOT type stated by the motorcycle manufacturer. DOT 4 is widely specified on modern motorcycle reservoir caps, but the cap and manual remain authoritative.
- Cap and diaphragm: Inspect the actual replacement for a clean seat, undamaged rubber and even screw engagement.
- Capacity: Choose a volume appropriate for pad wear and the motorcycle's hydraulic layout, rather than selecting the smallest tank for appearance alone.
- Maintenance access: Make sure you can read the level and clean the cap without removing unrelated parts.
The aftermarket versus OEM motorcycle parts guide can help frame the decision between keeping an original reservoir and selecting an aftermarket replacement. Sixrace also organises motorcycle parts and accessories by application, with model-specific compatibility information and technical product details that can support the comparison. That makes it useful as one resource alongside the service manual, manufacturer instructions and a careful measurement of the motorcycle in front of you.
The final decision should connect purchase and upkeep. A reservoir that fits the thread but sits too low, routes the hose badly or uses a poor diaphragm isn't a safe upgrade. A correctly matched unit still needs clean handling, moisture checks, correct fluid and a level inspection whenever pads or brake lines change.
Visit Sixrace to compare motorcycle parts and model-specific fitment information when you're selecting a brake-fluid reservoir or related control component. Before ordering, record your master-cylinder thread, mount measurements, hose route and DOT specification, then use the maintenance routine above to keep the finished installation reliable.
 Italiano
 Deutsch
 Français
 Español
 English
 Polski