
You've just fitted a new brake lever, adjusted the reach until your fingers feel comfortable, and taken the bike around the block. The lever looks better, but the important question is different: does it give you predictable braking when you need it most? A lever that sits too far from the grip, engages abruptly, or fails to return fully can change the way you slow the motorcycle, especially during repeated braking or an emergency stop.
The right leve freno moto is a control component, not just a styling accessory. Its pivot geometry, reach range, clearance, and relationship with the master cylinder all affect how efficiently your hand operates the front brake. This guide approaches the choice as a workshop technician would, with emphasis on model-specific fit, dependable adjustment, and diagnosing the braking system before replacing parts.
Table of Contents
- Why Lever Feel Changes How You Stop
- How Motorcycle Brake Levers Work
- Brake Lever Types for Street, Track, and Off-Road
- How to Measure Your Lever Fit and Match Your Bike
- Installing and Adjusting Brake Levers Correctly
- When a Soft Brake Lever Is Not a Lever Problem
- Maintenance, Brand Choices, and Model-Specific Advice
Why Lever Feel Changes How You Stop
You're riding through traffic when a car turns across your path. Your hand reaches for the front brake, but the replacement lever sits farther away than the original. You stretch your fingers, squeeze harder, and feel the lever move through more travel than expected before the pads bite. The motorcycle may still stop, but your response is slower and less repeatable than it was during the calm test ride.
That difference matters because the brake lever is where rider input enters the braking system. The front brake generally provides the largest share of a motorcycle's stopping force, and an earlier investigation by Hurt, Ouellet, and Thom found that as many as 83% of riders involved in crashes had not used the front brake before impact, as reported in NHTSA's motorcycle braking-control study. That finding doesn't mean every collision could have been avoided with front-brake use, but it shows why hand position, reach, and emergency response deserve serious attention.
The feel you should be aiming for
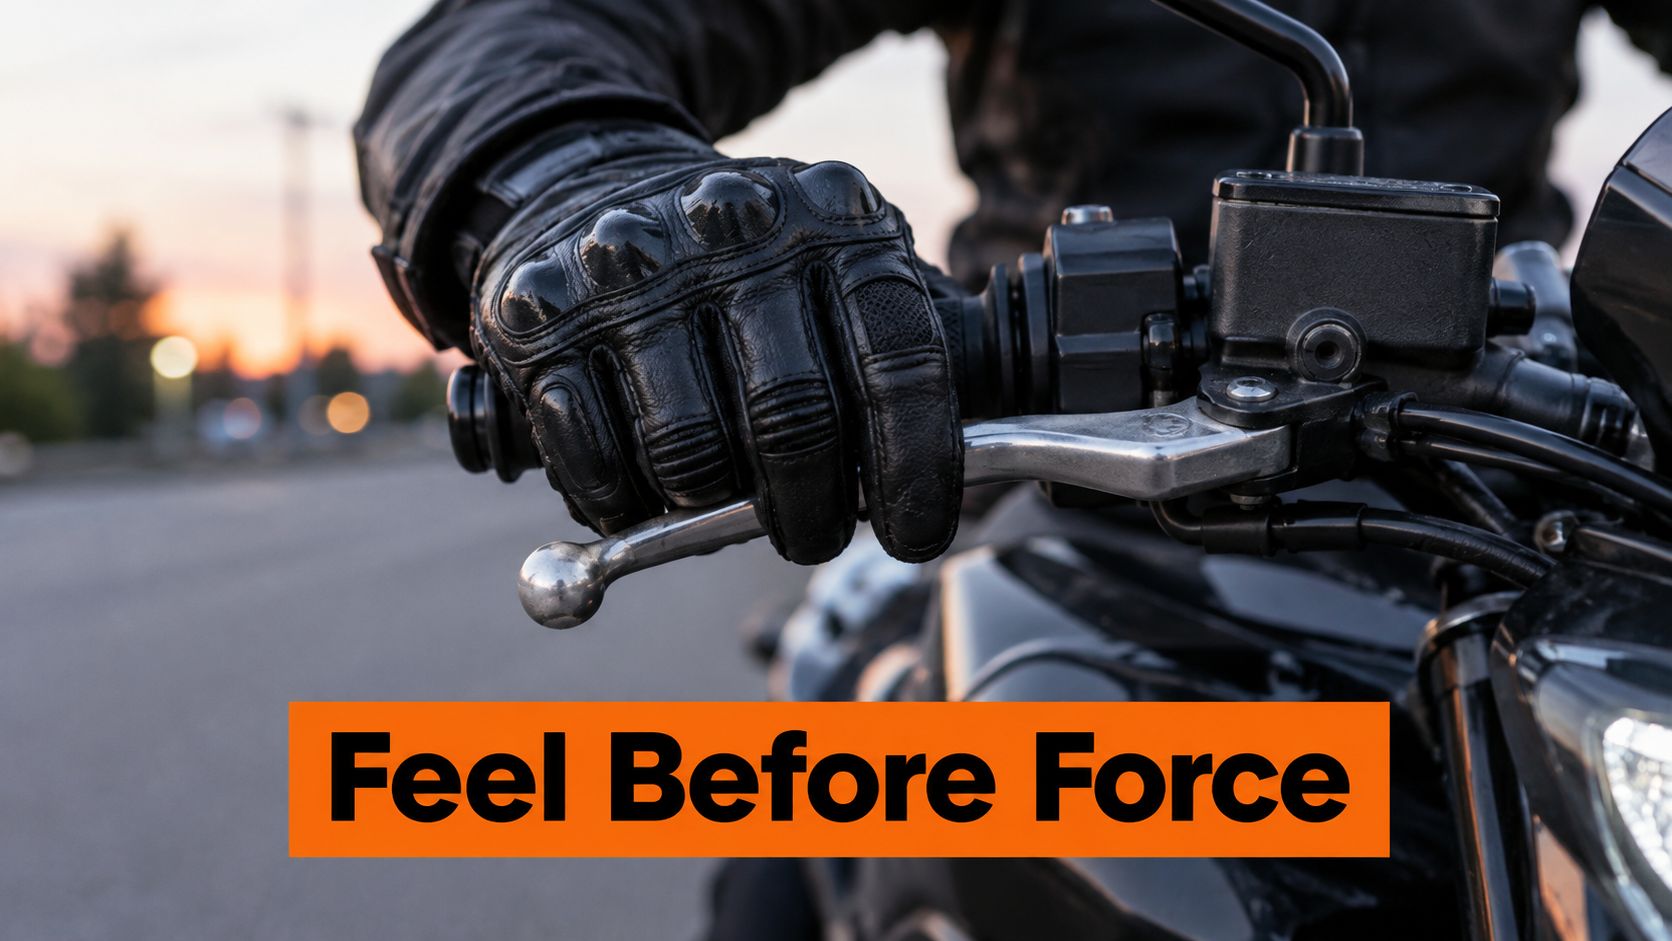
A useful lever setup lets you reach the braking zone without twisting your wrist or losing contact with the throttle. Riders using two-finger braking need enough clearance for the remaining fingers to keep a secure grip, while riders with smaller hands often benefit from a shorter reach setting. The lever shouldn't contact the handlebar under maximum reasonable load, and it must return completely when released.
Poor geometry creates several problems:
- Excessive reach forces finger extension and can make emergency application less consistent.
- Excessive force increases forearm loading during repeated braking.
- Abrupt engagement makes it harder to build pressure smoothly.
- Insufficient clearance can prevent the master-cylinder piston from returning or cause the lever to touch the grip before full braking force is available.
Practical rule: Choose a lever by how accurately your hand can control the brake, not by how striking it looks in a product photograph.
The useful upgrade is the one that matches your motorcycle and your hands. A daily street rider may need a broad adjustment range and a forgiving feel, while a track rider may prefer a compact lever with precise two-finger control. Both choices can work, but neither should be made without checking the complete brake-control arrangement.
How Motorcycle Brake Levers Work
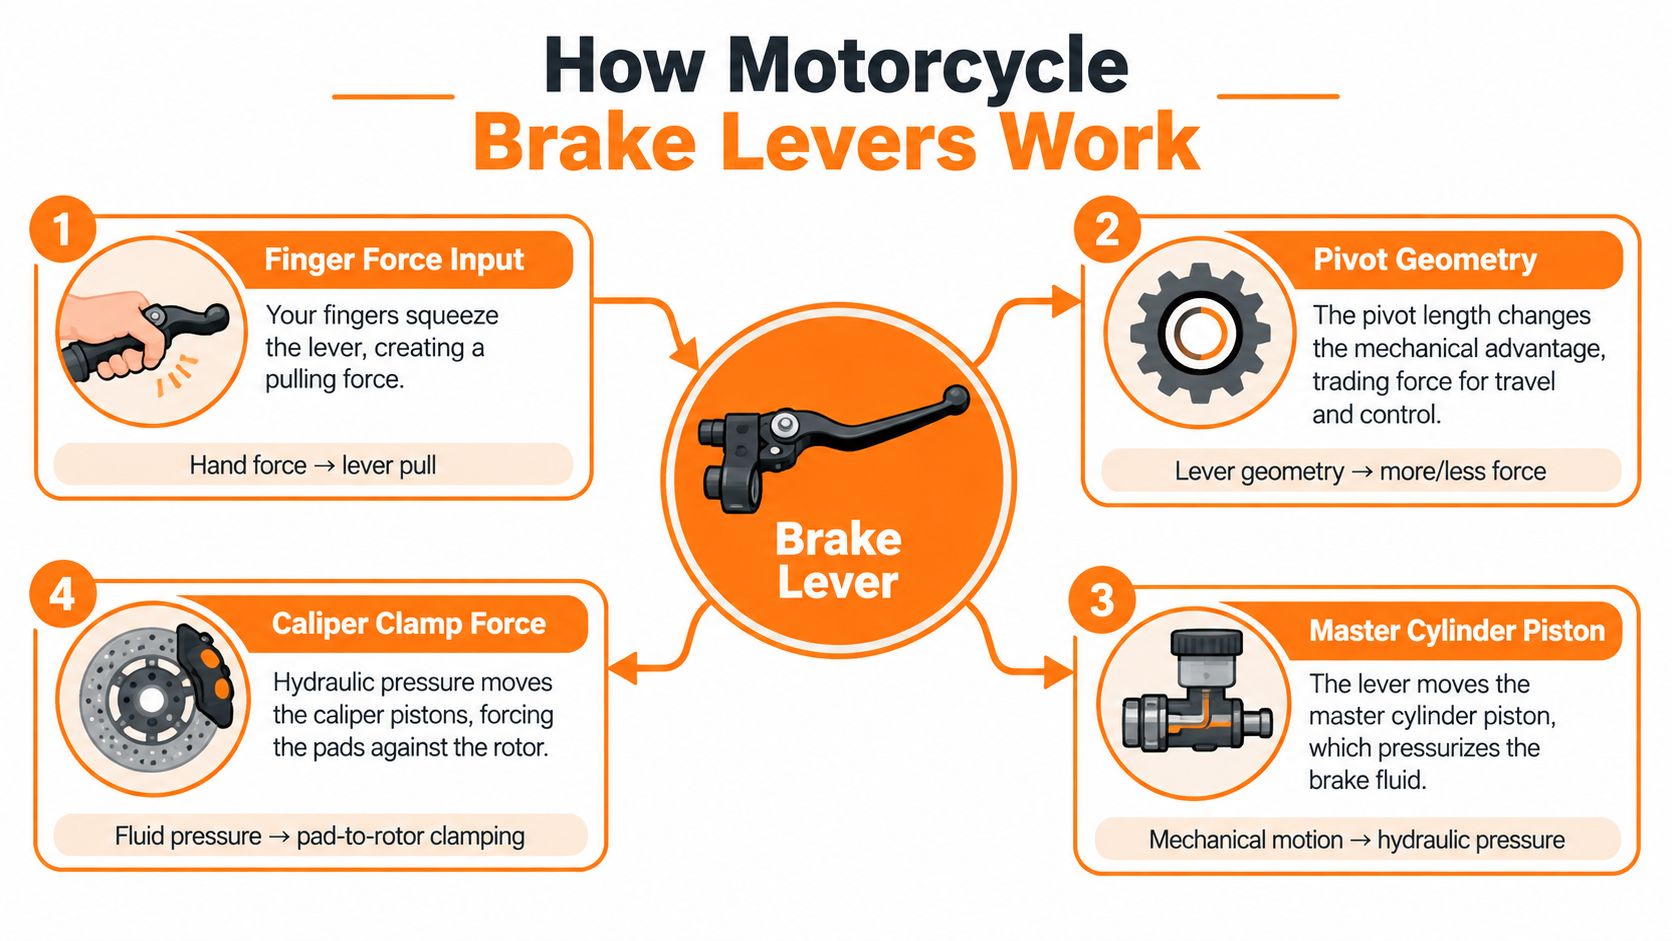
A motorcycle brake lever is a small mechanical input device with a demanding job. Your fingers apply force at the outer end, the lever rotates around its pivot, and the inner contact point pushes the master-cylinder piston. In a hydraulic system, that piston creates pressure in the brake fluid, which transfers force to the caliper and pads.
The pivot position determines the relationship between finger movement and piston movement. A longer effective lever can reduce the hand force required for a given input, but it may also increase travel. A shorter relationship can produce a firmer, more immediate sensation, though the hand may need to apply more force. The correct balance depends on the original master cylinder, the lever's contact geometry, and the motorcycle's intended use.
Travel, force, and free play
Government braking-control research evaluated front-brake displacement gradients from 1.0 to 5.7 mm per m/s² and force gradients from 17.5 to 76.7 N per m/s², with separate ranges for rear-brake controls, in its motorcycle braking report. These measurements illustrate why two levers that look similar can feel very different. The lever's ratio, pivot placement, stroke, and master-cylinder interaction all shape the pressure your hand experiences.
Hydraulic systems can also show an initial force overshoot after a rapid lever input, followed by a reduction in the force needed to maintain a constant lever position. In practical terms, the lever should allow progressive pressure rather than a sudden bite, and the adjustment must preserve enough free play for the piston to return fully.
The lever is part of a larger system
Brake development has moved from purely mechanical refinements toward electronic assistance. Regulatory records describe a gradual reduction in the hand force required by motorcycle brake systems after Federal Motor Vehicle Safety Standard No. 122 was adopted in 1972. The proportion of new motorcycle models with ABS as standard equipment rose from about 1% in 2003 to 20% in 2013 and approximately 59% in 2023, according to NHTSA and NTSB regulatory material.
The same document reports that motorcycles with optional ABS had fatal-crash rates 22% lower than otherwise similar models without ABS, based on research summarized by the Insurance Institute for Highway Safety. ABS can help prevent wheel lock, but it doesn't make an incompatible lever safe. Before buying, verify pivot geometry, master-cylinder stroke, switch operation, handguard clearance, and compatibility with the motorcycle's hydraulic and electronic systems.
A front-brake pad listing such as PASTIGLIA FRENO ANT. DX-SX 1185XBK5 Ktm Super Duke RR 2021+ CL BRAKES also reinforces the point: the lever should be evaluated alongside the pads, caliper, fluid, hose, and ABS arrangement, not as an isolated component.
Brake Lever Types for Street, Track, and Off-Road
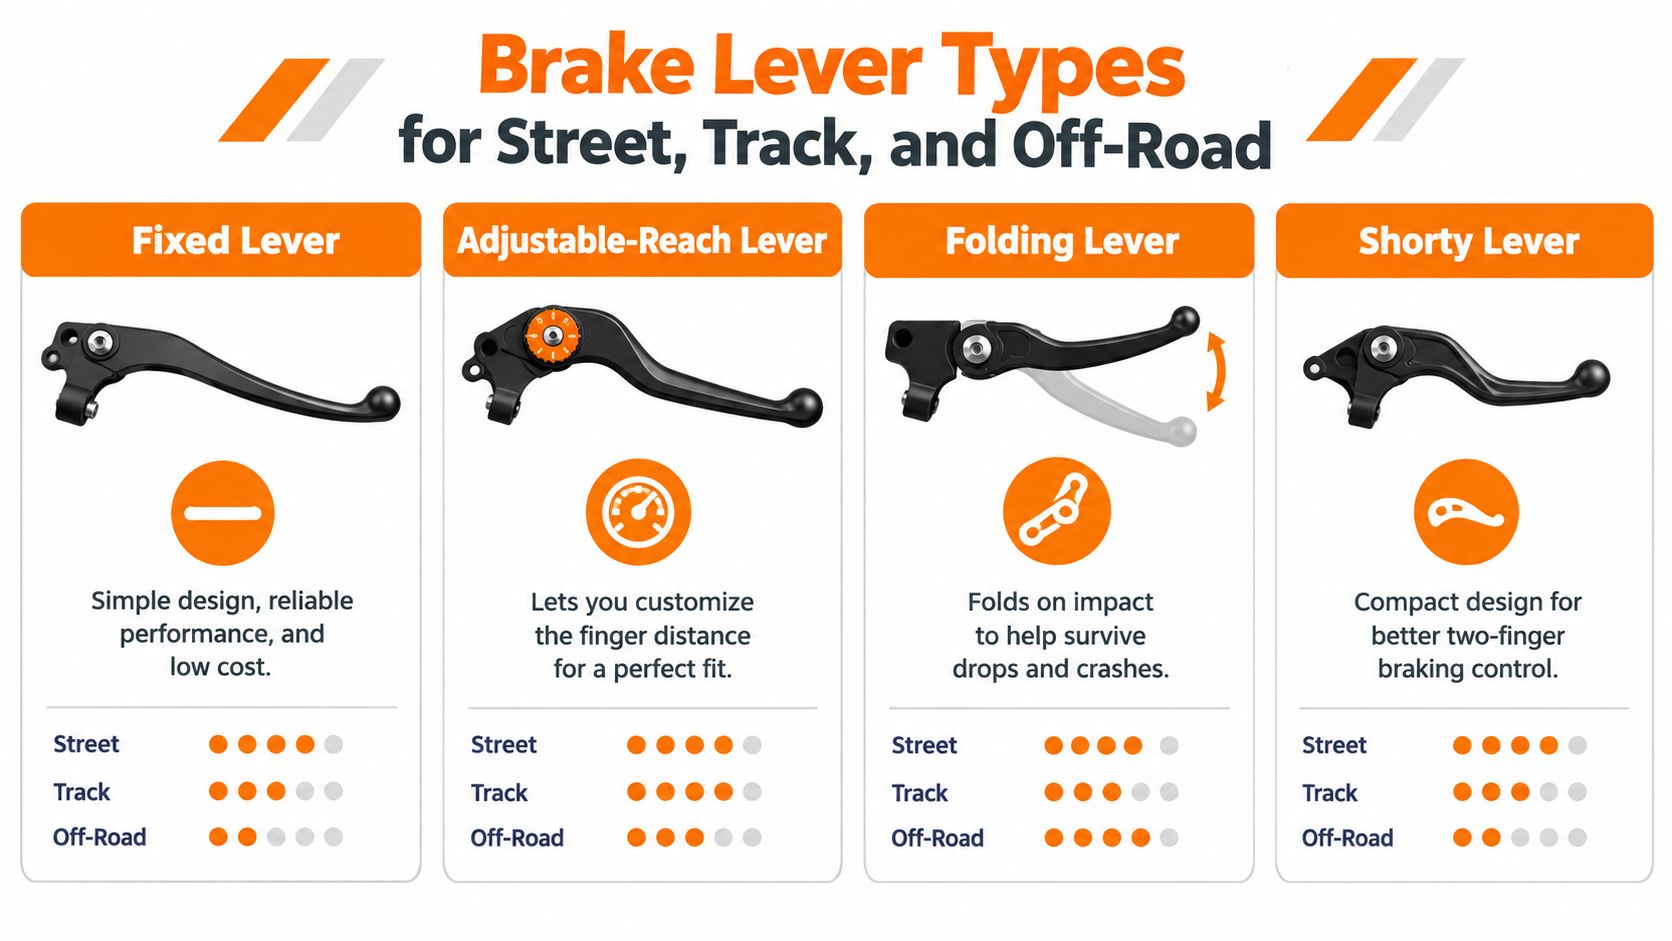
The best lever type depends on what happens when you ride, not what looks aggressive on a catalogue page. A fixed lever, an adjustable-reach lever, a folding design, and a short lever can all be sensible choices, but they solve different problems.
Fixed levers
A fixed lever is the straightforward option. It normally has fewer adjustment parts, which can mean less complexity and fewer mechanisms to inspect. It suits a rider who already likes the original reach and wants a direct replacement with the correct pivot and contact profile.
Its weakness is limited adaptability. If your gloves, hand size, or riding position change, the lever may remain too distant or too close. A fixed design also offers little protection against a tip-over because the lever remains rigid.
Adjustable-reach levers
An adjustable lever uses a dial, cam, or similar mechanism to change the distance between the grip and the lever blade. This is often the most useful choice for mixed street and touring use, particularly when riders share a bike or alternate between thin summer gloves and bulky winter gloves.
Adjustment isn't a cure for incorrect fit. The mechanism must still match the original master cylinder, and the nearest setting must leave adequate clearance and correct piston release. A poorly designed adjuster can create false confidence if it changes hand position without preserving the correct actuation geometry.
Folding levers
Folding levers pivot away during a fall, reducing the chance of snapping at the blade. That makes them attractive for adventure, enduro, supermoto, and riders who regularly operate on loose surfaces where low-speed drops are part of the environment.
The hinge adds another service point. Dirt, corrosion, or excessive play can affect movement, so the hinge must remain free and secure. Folding protection also doesn't excuse a poor fit. The lever still needs correct reach, pivot alignment, and return action.
Short levers
Short levers are designed around compact hand placement, often for two-finger braking. They can provide useful clearance for the other fingers and reduce the chance of trapping fingers between the lever and grip. Track riders may appreciate the focused input, while some street riders find the reduced blade area less comfortable during long rides.
For an adventure motorcycle, the decision may also involve the rest of the cockpit. A part such as SP-2 SHORT BLACK TITANIUM Honda XL750 TRANSALP 2023+ HP CORSE belongs to a different component category, but its model-year description illustrates the same buying discipline: confirm the exact motorcycle application rather than relying on a broad family name.
| Riding use | Sensible starting point | Main trade-off |
|---|---|---|
| Daily street | Fixed or adjustable reach | Comfort versus adjustment complexity |
| Track days | Short or precise adjustable design | Compact control versus greater hand effort |
| Adventure and off-road | Folding, often adjustable | Drop resistance versus hinge maintenance |
How to Measure Your Lever Fit and Match Your Bike
Start with the motorcycle, not the lever. Record the exact make, model, model year, trim, and whether the bike uses the original master cylinder, an ABS system, handguards, or an aftermarket bar. Two motorcycles with similar names can use different pivots, switches, or pushrod interfaces.
Use your current setup as a reference
Sit in your normal riding position with the motorcycle secure. Note where the original lever meets your index and middle fingers, how much wrist rotation you need, and whether the lever feels natural when you cover the brake without gripping hard.
Then check your hand span and palm width. A lever that works for a large hand may force a smaller hand to reach too far, while a very short blade may leave a large hand without a comfortable pressure point. If you use two-finger braking, measure with those fingers positioned naturally and make sure the other fingers can keep the throttle or grip secure.
Verify the motorcycle interface
A catalogue description should identify the motorcycle application, but compare that information against the actual bike. Check:
- Pivot hardware, including bolt diameter, bushing arrangement, and lever thickness.
- Master-cylinder contact, including the pushrod or piston interface.
- Brake-light switch, whether mechanical, hydraulic, or integrated into the original assembly.
- Handlebar and handguard clearance, especially if the bar or guards have been changed.
- Full compression, with enough space before the lever reaches the grip.
- Return movement, with no binding at the pivot or contact point.
The handlebar diameter can matter for adjacent controls and handguard fit, but it doesn't confirm lever compatibility by itself. A lever advertised for a broad range of motorcycles may still have the wrong master-cylinder geometry.
Before ordering: Match the lever to the exact brake master cylinder and model-year fitment. A universal description is not a substitute for a correct pivot and piston interface.
Use a bike parts compatibility guide to organize the check, then compare the result with the manufacturer's fitment information. If the listing doesn't show the relevant year or brake assembly, ask for confirmation before ordering rather than assuming the part will adapt.
Installing and Adjusting Brake Levers Correctly
Installation should be treated as a control-system check, not a cosmetic swap. Put the motorcycle on stable ground, protect painted surfaces, and compare the replacement lever with the original before removing anything. The pivot, bush, contact nose, adjuster, and switch tab should all correspond to the original assembly.
A careful fitting routine
Remove the pivot fastener and support the original lever so the master-cylinder pushrod or piston contact doesn't drop out of position. Clean the pivot area, inspect the bush for wear, and check that the replacement lever's contact surface is smooth and correctly shaped.
Install the new lever without forcing the bolt. If the holes don't align naturally, stop and recheck the part. Tighten the fastener to the motorcycle manufacturer's specification, then operate the lever slowly through its range before making any reach adjustment.
Set the reach so your fingers contact the lever comfortably while your wrist remains neutral. The lever should begin to apply the brake after the designed free movement, not immediately at rest. An adjuster that is set too close can keep the master-cylinder piston slightly loaded, which may prevent full fluid release and cause brake drag.
Checks that must happen before riding
Use a short inspection sequence:
- Smooth movement: The lever should pivot without roughness, sticking, or side-to-side looseness.
- Complete return: Release the lever and confirm that it returns against its stop.
- Clearance: Apply firm pressure and verify that the blade doesn't touch the handlebar before the brake reaches full useful travel.
- Switch function: Confirm that the brake-light switch responds correctly without being held continuously.
- Handguard clearance: Turn the bars fully in both directions and check that the guard doesn't press the lever.
- Static pressure: Hold the lever under pressure and look for movement, leaks, or a changing pressure point.
The relevant U.S. motorcycle brake rules specify a maximum hand-control actuation force of 200 N and require the service brake to be operable from the normal seated position with both hands on the steering control, as described in the controlled fatigue and braking study. The same research found fatigue-related declines mainly above 30% of maximal voluntary contraction and during intervals longer than 100 milliseconds, with early pressure development over roughly 0 to 500 milliseconds offering a more useful fatigue indicator than a single maximum-force test.
Take a slow, controlled test ride only after the static checks pass. Recheck the lever after the ride, especially if the pivot or adjuster has settled.
When a Soft Brake Lever Is Not a Lever Problem
A soft or suddenly changing lever doesn't automatically mean the replacement lever is wrong. Air in the hydraulic system, low fluid, a leaking hose, caliper trouble, pad knock-back, master-cylinder wear, or an incorrectly adjusted contact point can all change lever feel. A new lever can't repair any of those faults.
Recent recall evidence makes this distinction important. A NHTSA recall notice for 2025 and 2026 Harley-Davidson Softail motorcycles describes a rear brake line that could contact the body control module, wear through, leak fluid, and compromise rear braking. The warning signs include fluid beneath the motorcycle and a softer or reduced brake response, symptoms a rider might wrongly blame on a lever or recent adjustment.
Stop and diagnose these signs
Don't continue riding while investigating if:
- the lever suddenly comes closer to the grip,
- the pressure point changes between applications,
- fluid appears around the master cylinder, hose, caliper, or beneath the motorcycle,
- the brake feels soft after a lever installation,
- the lever doesn't return completely,
- braking response is reduced without an obvious adjustment change.
Inspect the fluid level and visible lines, but don't assume a normal-looking reservoir proves the system is safe. Check the master-cylinder interface to ensure the replacement lever isn't continuously pressing the piston, and consult the relevant manufacturer or regulator recall database when the change is sudden or model-specific.
A front brake master-cylinder reference can help identify the component involved, but it shouldn't replace a proper inspection or bleeding procedure. If you can't establish the cause, have a qualified motorcycle technician test the system before riding again.
Maintenance, Brand Choices, and Model-Specific Advice
A good brake lever stays reliable when its moving parts receive simple, regular attention. Clean the pivot and adjuster with a suitable product, inspect for corrosion or play, and confirm that the blade still returns freely. Don't pack the mechanism with abrasive dirt-attracting grease, and replace a lever that's bent, cracked, heavily worn at the pivot, or damaged around the master-cylinder contact.
Choose the design around the motorcycle and use. Street riders usually benefit from dependable reach adjustment and a comfortable blade, track riders should prioritize predictable two-finger control and clearance, and off-road riders often need folding protection plus an adjuster that can tolerate regular cleaning. Model-specific fitment is more important than material claims or finish.
Brake-system maintenance also includes surrounding components. A brake-fluid reservoir option belongs in the same compatibility check as the lever, hose, master cylinder, and caliper. Before ordering from any brand or catalogue, confirm the exact model year, original equipment arrangement, switch type, and installation requirements.
If the lever feels different after fitting, diagnose the change before buying another part. That habit protects the motorcycle, the braking system, and the rider.
Sixrace lists model-specific motorcycle components and accessories, including control-related parts and brake-system items, with fitment information intended to help riders and workshops compare applications. Visit Sixrace to check the correct motorcycle and model-year match before choosing your next brake-control component.
 Italiano
 Deutsch
 Français
 Español
 English
 Polski