
A smagliacatena per moto is a dedicated hand tool that pushes a pin out of a roller chain so you can shorten it, fit a master link, or remove it for replacement. The correct choice depends on the chain's pitch and seal type, not on whether the tool is marketed as “universal.”
You're halfway through a chain replacement when the pin refuses to move. A punch slips, the outer plate starts to distort, and the expensive O-ring chain you planned to reuse is already damaged. That situation usually comes from treating a smagliacatena per moto as a generic cutter instead of matching the tool to the chain and the job.
A proper breaker pushes the riveted pin out in a straight line. It doesn't crush the side plates, shear the seals, or leave you guessing whether the master link can be trusted afterward. The tool you need for a one-off chain swap isn't necessarily the same tool that makes sense for a workshop or a rider who services several bikes.
Table of Contents
- What a Smagliacatena Actually Does
- Types of Smagliacatena Compared
- Matching the Tool to Chain Size and Seal Type
- How to Use a Smagliacatena Safely Step by Step
- Road Use Versus Offroad Use Scenarios
- Alternatives to a Smagliacatena and When They Win
- Chain Care Routine That Protects Your Tool and Drivetrain
- Quick Checklist and Rider FAQs
What a Smagliacatena Actually Does
The Italian term smagliacatena means chain breaker, but the name can be misleading. This isn't a blade that cuts through chain metal. It's a hardened driver, supported by a body and an anvil, that pushes a chain pin through the side plate until the link separates.
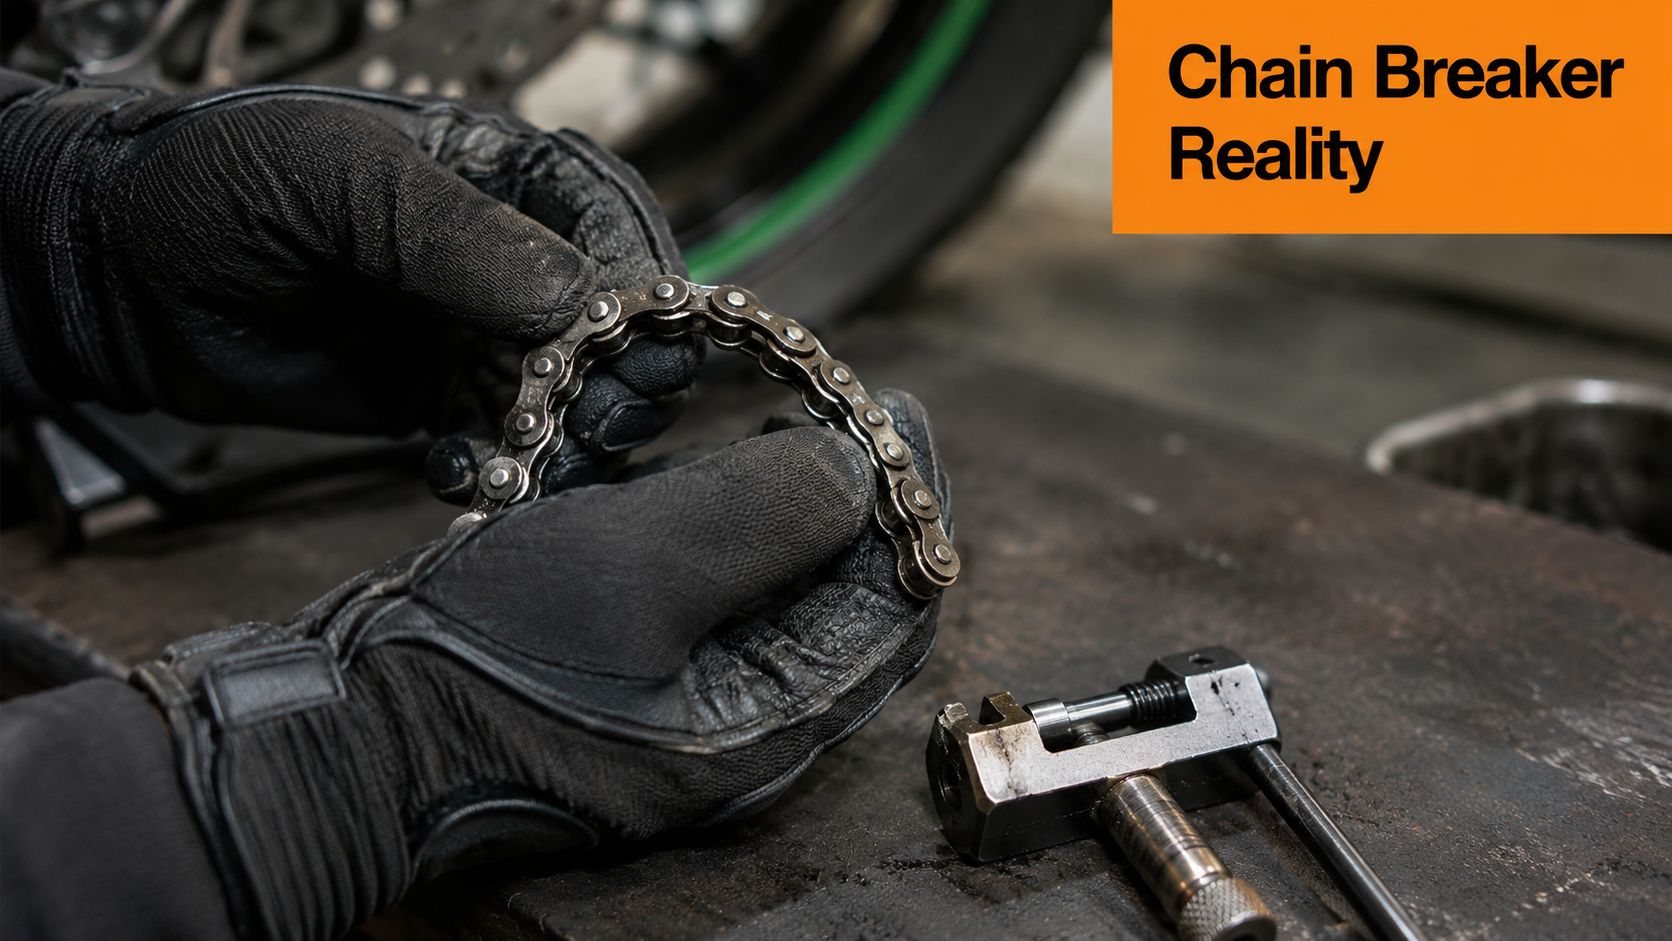
The basic job
A rider normally uses the tool for one of three tasks:
- Shortening a new chain: Remove the unwanted links after confirming the correct final length.
- Removing a chain: Separate the old chain before fitting a replacement.
- Preparing a master-link connection: Push out the selected pin or remove the outer plate so the joining link can be installed.
The tool must apply force through the centre of the pin. If the driver contacts the side plate, the pressure goes into the wrong part of the chain. That can bend the plate, mark the link, or damage the tool's own pin.
A smagliacatena isn't a grinder, either. An angle grinder can remove a rivet head quickly, but it destroys the original geometry of that section. That's acceptable only when the chain is going straight into the waste bin. A breaker preserves the link area when you need a clean, controlled separation.
It also isn't a substitute for a chain riveter. Breaking a chain and joining one are separate operations. A replacement rivet link needs its outer plate pressed to the correct position and its pins staked according to the chain manufacturer's instructions. Pressing too far can crush O/X-ring seals, while staking too little can leave the master link insecure.
The parts you should recognise
Most hand tools share four functional parts:
- Handle or screw head, where you apply turning force.
- Tool body, which keeps the driver aligned with the chain.
- Driver tip, matched to the chain pin diameter.
- Anvil or pin stop, which supports the chain while the pin moves out.
Workshop rule: If the driver isn't centred on the pin before pressure is applied, stop and reposition it. More force won't correct poor alignment.
The rest of this guide focuses on the two choices that prevent most failures, chain size and seal type, then adds the practical question of whether you're working on the bike, at a bench, once a year, or every weekend.
Types of Smagliacatena Compared
A compact manual breaker can be perfectly adequate, but “adequate” depends on the chain and how often you use it. A small T-handle model is portable and inexpensive in practical terms, making it useful for a one-off replacement or emergency kit. Its weakness is control. The handle can become tiring, and many versions don't provide a precise depth stop.
A clamp-on model holds the chain in a defined position and drives the pin with a screw. That controlled, straight stroke is kinder to sealed chains, especially when you're shortening a new O-ring or X-ring chain rather than destroying an old one. It's usually the sensible home-garage choice for a rider who wants repeatable results without buying a full professional kit.
Professional press and riveter kits combine the breaking function with an outer-plate press, pin gauge, and staking die. They're designed for the complete job, not just removal. The price is higher, but the extra control matters when you regularly fit rivet-type master links or work on larger chains.
| Type | Best for | Price band | Chain-seal risk | Skill needed |
|---|---|---|---|---|
| Manual T-handle | One-off jobs, compact tool kits, roadside support | Budget | Higher if alignment is poor | Basic |
| Clamp-on screw model | Home garages and repeated chain service | Mid-range | Lower because the push stays straight | Intermediate |
| Press and riveter kit | Workshops, frequent replacements, sealed chains | Professional | Lowest when used with the correct gauges | Advanced |
The price-band descriptions are qualitative because tool construction varies widely. A cheap universal tool may cover a broad range on paper but still have a weak driver, loose threads, or an anvil that doesn't support the link properly.
For chain selection before choosing the breaker, Sixrace's guide to choosing a DID motorcycle chain is useful because chain construction and application should be confirmed before the tool goes on the pin.
The Pedane MUE2 Suzuki GSX R 1300 Hayabusa 1340 2021+ GILLES TOOLING listing is an example of how Sixrace presents a model-specific motorcycle component, identified for the SUZUKI GSX R 1300 Hayabusa GILLES TOOLING GTMUE2-S03-B 2021-2026. It isn't a chain tool, but the same model-specific approach is the right habit when checking drivetrain parts.
Matching the Tool to Chain Size and Seal Type
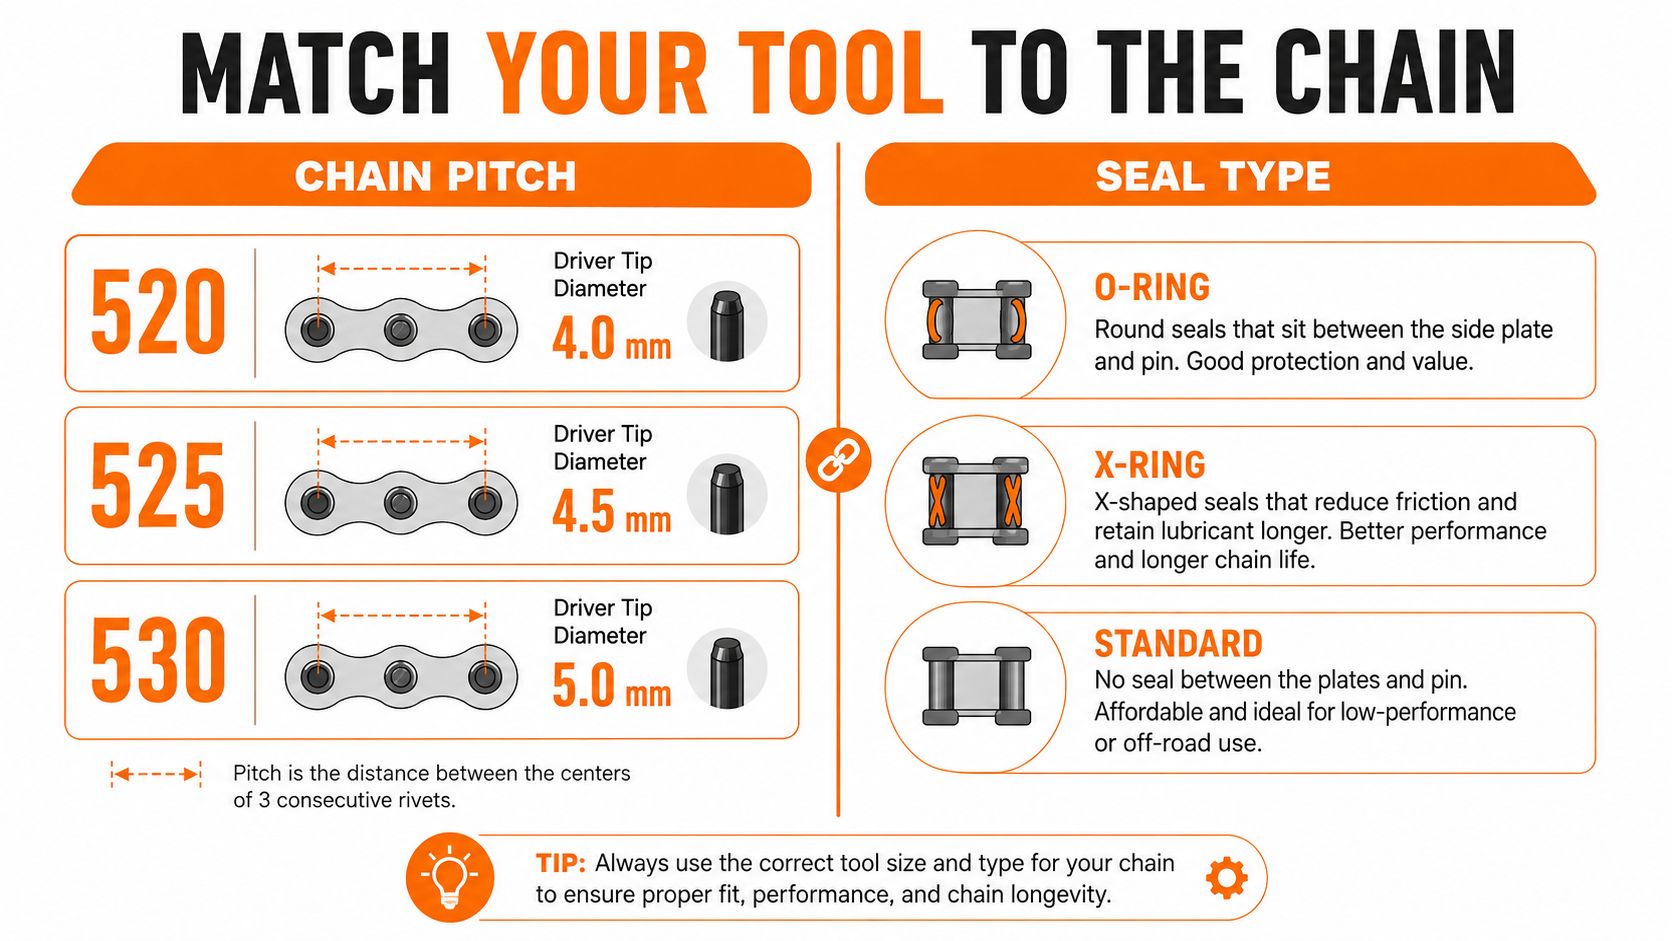
The tool's compatibility is decided first by chain size, then by the way the chain seals its lubricant. Chain numbers such as 520, 525, and 530 describe a defined chain series, not interchangeable marketing categories. A breaker pin that fits one size can be too large, too small, or mechanically unsuitable for another.
Technical breaker kits demonstrate why the word “universal” needs scrutiny. One documented kit covers #25 to #520 chains, with different pin and anvil diameters, while another spans #35 to #630 and advises grinding the rivet head on #520 and larger chains before pushing the pin out or staking a new link. The manufacturer instructions for a chain breaker and riveter kit%20_DFC1380508.pdf) show the practical consequence: chain size determines the interface between the tool and the pin.
Read the chain before buying the tool
| Chain and seal | Tool choice | What matters |
|---|---|---|
| 420 or 428 standard | Compact breaker | Light chain construction, correct small driver |
| 520 standard | Size-specific manual or clamp tool | Confirm the driver and anvil match #520 |
| 520 O-ring | Clamp-on or press-style tool | Keep the driver centred and avoid seal contact |
| 525 O-ring or X-ring | Size-specific clamp or professional kit | Don't assume a #520 driver is suitable |
| 530 X-ring or R-ring | Heavy-duty press and riveter | Use the correct pin, support, and staking die |
Small commuters and pit bikes may use 420 or 428 chains, where a compact tool can make sense. Larger motorcycle chains need more substantial support. A #520, #525, or #530 tool should be selected by the actual chain marking and the kit's compatibility chart, not by a visual comparison.
Standard roller chains don't have elastomer seals between the plates. O-ring, X-ring, and R-ring designs do. Those seals retain lubricant around the bearing surfaces, so a driver that enters at an angle can nick or squeeze them. Once the seal is compromised, the link may develop stiffness and the chain can accelerate sprocket wear.
Check the chain and replacement options in Sixrace's motorcycle drive-chain category before ordering a breaker. If you're shortening a chain for reuse, the tool must also allow a controlled partial pin push and a correct re-riveting operation. Otherwise, replacing the chain and sprockets together is usually the more responsible decision than forcing a damaged link back into service.
How to Use a Smagliacatena Safely Step by Step
Start with the motorcycle stable. On the bike, support the rear wheel with a suitable stand and keep the machine secure. On a bench, place the chain on a solid surface where the tool can sit squarely. The chain must not hang under tension while you're trying to drive a pin.
Breaking the chain
- Identify the link. Choose the link you'll remove, and inspect it for damage before placing the tool.
- Support the chain. Set the link against the tool's anvil so the side plate is fully supported.
- Centre the driver. The driver tip must sit directly on the selected pin. Check this from the side before turning the handle.
- Apply steady pressure. Turn the screw gradually. If the handle suddenly binds, back off and inspect alignment instead of forcing it.
- Stop at the correct depth. If the chain will be reused, push the pin only far enough to separate the link. Don't eject it completely. Over-travel can bend the driver or damage the link plates.
A reused sealed chain deserves extra caution because the outer plate and seals must remain undisturbed. A chain destined for replacement is less sensitive, but the tool still needs proper support to avoid broken drivers and damaged anvils.
Joining a replacement chain
After confirming the required length, connect the new chain temporarily with a suitable wire or old master link. Fit the new master link from the correct side, then apply the supplied O-rings or X-rings with the specified lubricant. The side plate should slide on by hand or with the tool's press function. If it needs excessive force, something is misaligned.
The breaker's press function seats the plate. It doesn't finish the rivet. Use the correct staking die, hammer and punch, or the riveting head supplied with the kit, and follow the chain manufacturer's specified pin expansion. Work carefully so the seal isn't cracked or squeezed flat.
Practical rule: Press the outer plate until it reaches the intended position, then stake the pins. Don't keep tightening simply because the tool still turns.
Never grind sideways across a sealed chain you intend to fit again. Don't hammer directly on the O/X-ring area, and don't forget the master-link lubricant. A spring clip may be appropriate for a chain designed around that joining method, but it shouldn't replace a specified rivet link on a high-load sealed chain.
Road Use Versus Offroad Use Scenarios
A street naked bike in a clean garage gives you time to choose and check the tool. Its sealed 525 or 530 chain may only need occasional replacement, so a compact clamp-style breaker is usually a practical compromise. Match the tool to the chain's rivet link, support the plate squarely, and you get better alignment than with a loose punch without needing a full workshop press. That control helps protect O/X-ring seals and prevents plate distortion that can accelerate sprocket wear.
On a sportbike, the same controlled support matters when shortening a new chain. Separating an existing chain with a partial pin push is possible only if the plates, seals, and pin remain undamaged. If the breaker bends the plate or crushes a seal, the link is no longer a sound option for reuse. A tool selected for the chain size and intended joining method avoids turning a simple length adjustment into a drivetrain problem.
Enduro and supermoto work is harder on both chain and tool. Mud, grit, water, impacts, and high chain loads increase the chance of contamination or damage. Riders who replace chains frequently can justify a heavier bench-mounted breaker and riveter, since repeated use rewards better support and replaceable dies. A clip-style master link can suit a chain that will be discarded before clip fatigue becomes a concern, but it must match the chain and face the correct direction. A poor fit can damage the seal and leave the link vulnerable under load.
Chain slack must follow the motorcycle manufacturer's specification, not a universal workshop setting. Published ranges include 20 to 30 mm, 20 to 25 mm, and 25 to 30 mm, depending on the model. Measure at the midpoint between the sprockets, then recheck alignment after axle adjustment. NHTSA's final-drive chain maintenance guidance treats measurement and re-tensioning as safety-related maintenance.
A road chain set too tight can overload the chain, seals, and sprockets. An off-road chain needs enough slack for suspension movement. Excess slack can allow derailment and increase wear. Use the service specification for the motorcycle, then select the smagliacatena based on chain size, seal type, workspace, and how often the job will be repeated.
Alternatives to a Smagliacatena and When They Win
A smagliacatena is the most controlled general solution, but it isn't always the fastest choice. A quick master link can let you remove a chain without pressing out a pin, which is useful for track preparation or repeated wheel changes. It won't shorten a chain by one pitch, and it only works when the chain is designed for a matching link.
An angle grinder or Dremel wins when the old chain is definitely being discarded. Removing the rivet head is fast, and there's no reason to preserve the side plate geometry. The trade-off is obvious, you lose a clean reusable separation and create sparks, debris, and heat near the motorcycle.
Mole grips, centre punches, and improvised drifts belong in emergency territory. They may free a damaged chain when the only alternative is recovery, but they distort the outer plate and can damage seals. Don't use them on a sealed chain you plan to refit.
| Method | Best for | Risk to O/X-ring seals | Skill required |
|---|---|---|---|
| Smagliacatena | Controlled removal and shortening | Low with correct fit | Basic to advanced |
| Quick master link | Fast removal on compatible chains | Low if correctly matched | Basic |
| Grinder or Dremel | Chain going into disposal | High, but irrelevant for disposal | Intermediate |
| Mole grips or punch | Emergency roadside separation | Very high | High |
| Hydraulic workshop riveter | Frequent professional replacement | Lowest with correct gauges | Advanced |
A main-dealer or independent workshop with a hydraulic riveter wins when the chain is large, the master link is rivet type, or the rider doesn't have a reliable way to measure pin flare. Paying for one properly completed job can be cheaper than replacing a chain damaged by a bargain tool. The workshop's advantage isn't brute force. It's stable alignment, correct tooling, and the ability to verify the finished link.
Chain Care Routine That Protects Your Tool and Drivetrain
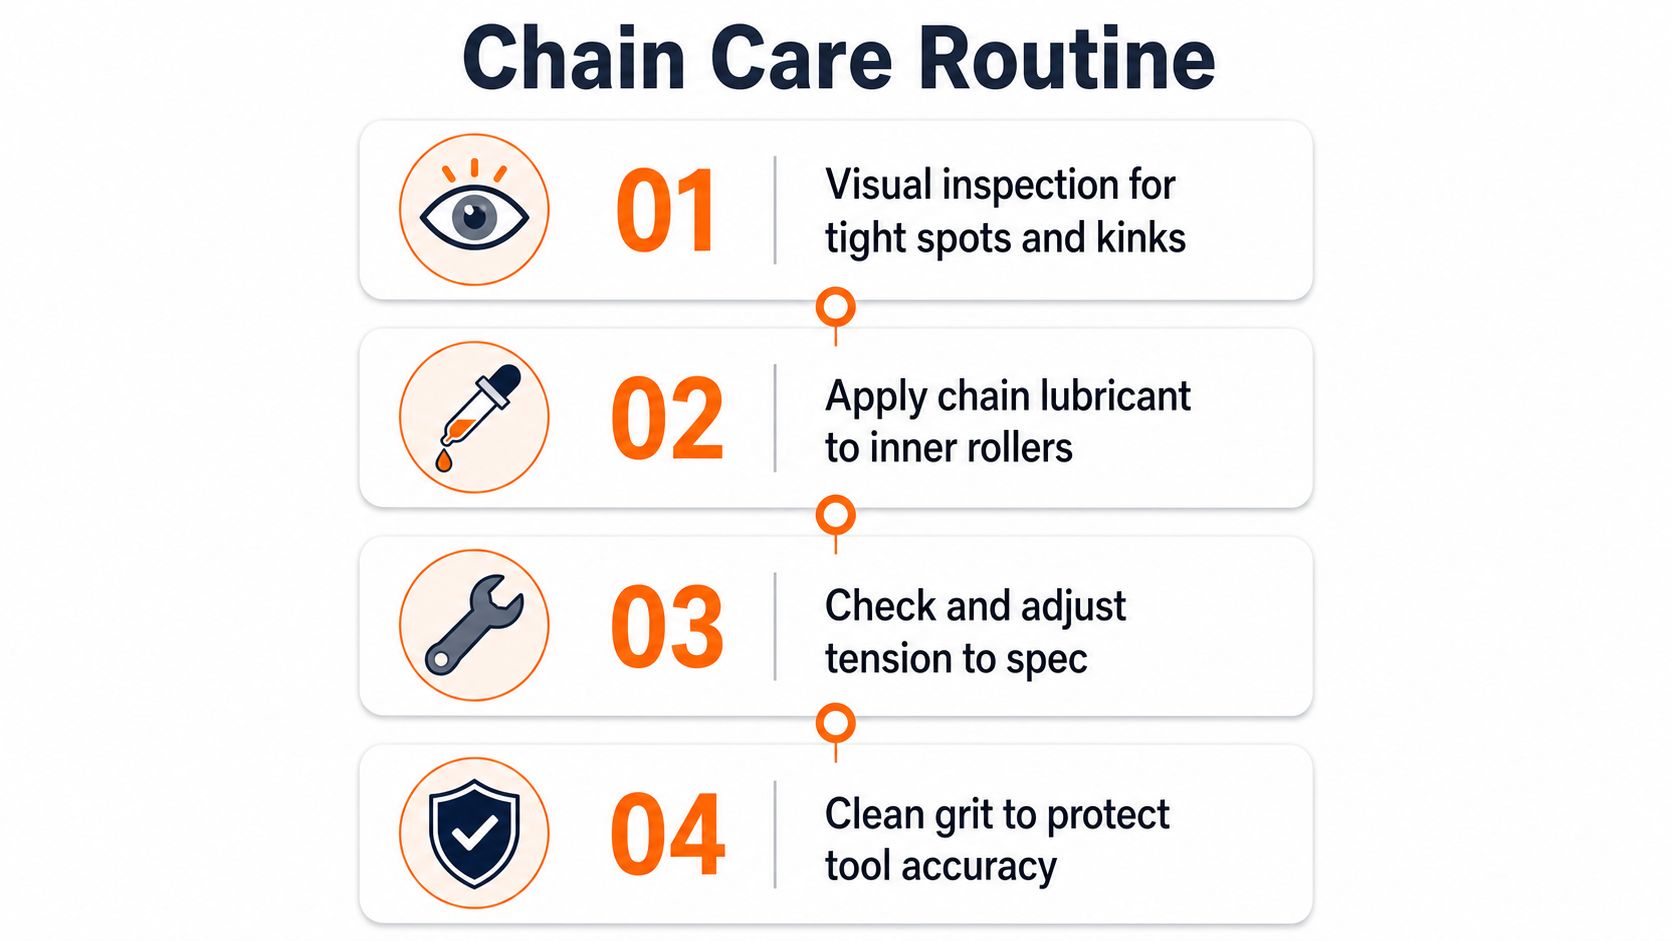
A clean chain is easier to inspect and easier to handle with a breaker. Before touching the tool, rotate the rear wheel and look for tight spots, kinked links, stiff sealed joints, missing seals, and rollers that don't move freely. A damaged link can behave unpredictably under pressure, so don't treat a visible defect as a reason to apply more force.
The maintenance cadence in independent guidance is at least every 600 miles, or about 1,000 km, with a pre-ride check before every ride. The maintenance guidance covering inspection, cleaning, lubrication, and adjustment also warns against steam cleaners, high-pressure washers, and aggressive solvents that can damage O-ring seals.
A repeatable workshop routine
- Inspect first: Find tight sections and compare slack as the wheel rotates.
- Clean gently: Use a purpose-made chain cleaner and a soft brush. Work in small sections on a warm chain, then rotate the wheel to expose the full run.
- Lubricate the inner rollers: Apply an O-ring-compatible lubricant to the inside run, let it settle, and wipe excess from the outer plates.
- Set and verify slack: Measure at the chain midpoint and adjust at the tightest point. Recheck axle alignment and torque after tightening.
For general motorcycle cleaning around the drivetrain, this guide to motorcycle washing for showroom shine provides useful context. Keep high-pressure water away from the chain seals even when you're cleaning the rest of the motorcycle.
Use Sixrace's motorcycle chain grease selection as part of a complete maintenance decision, not as a replacement for inspection. Sprocket teeth should be checked at the same time. Hooked or asymmetric teeth can rapidly wear a new chain, making a careful breaker job poor value if the worn sprockets remain in service.
Quick Checklist and Rider FAQs
Before applying force, identify the chain and decide whether the job is for roadside use, a workbench, or repeated workshop work. That choice affects the driver, support, and the pressure placed on O/X-ring seals. Use the motorcycle manufacturer's service manual for the specified slack rather than applying a generic setting.
- Measure slack: Check at the chain's midpoint and at its tightest section, following the motorcycle-specific procedure.
- Inspect sprockets: Replace parts with hooked, sharp, or asymmetrical teeth. A new chain cannot run correctly on badly worn sprockets.
- Check the master link: Confirm clip direction, or verify that a riveted link has been correctly staked.
- Wipe the chain: Remove excess lubricant from the outer plates and keep grit away from the smagliacatena.
| Chain | Recommended tool | Technique note |
|---|---|---|
| 420 or 428 standard | Compact manual breaker | Use a small, correctly sized driver |
| 520 standard | Manual or clamp-on breaker | Support the plate and avoid sideways force |
| 525 O/X-ring | Clamp-on or press/riveter kit | Centre the driver and protect the seals |
| 530 X/R-ring | Heavy-duty press and riveter | Match the driver, anvil, and staking die |
Common questions
Can a generic tool damage an X-ring chain?
Yes. A mismatched driver, weak support, or angled pressure can crush a seal or bend a plate. Confirm the chain series before turning the screw.
Is a clamp-on breaker strong enough for a 530 conversion?
It can be, if its manufacturer rates it for that chain size and supplies the correct pin and anvil. Body size alone does not prove compatibility.
Can a chain be reused after breaking it?
Only after a clean separation with no bent plate, damaged seal, stretched hole, or stiff link. A partial pin push gives a better chance of reuse than fully ejecting the pin, but visible wear calls for replacement.
Does a master link need staking?
A rivet-type master link does. Pressing the plate alone does not provide final retention. Follow the specified staking method and inspect the finished flare.
How do I identify the correct pin diameter?
Start with the chain series, then check the breaker's compatibility chart. Pin and anvil dimensions differ across 520, 525, and 530 chains.
What gives away a poor tool?
Watch for a flexing driver, loose threads, an anvil that fails to support the link, or vague chain-size coverage. If the pin moves off-centre, stop. Continuing can damage the chain, tool, seal, or sprocket alignment.
The right smagliacatena per moto matches the chain size, seal construction, and working situation. Choose it before force is applied, because deformation can ruin a link and accelerate sprocket wear.
Sixrace lists motorcycle-specific components and drivetrain-related products for racing, naked, supermotard, cross, enduro, trial, and custom applications, with compatibility information tied to particular models. Visit Sixrace to compare suitable chain and motorcycle parts before maintenance, then verify the chain size and joining method before ordering a breaker or rivet link.
 Italiano
 Deutsch
 Français
 Español
 English
 Polski