
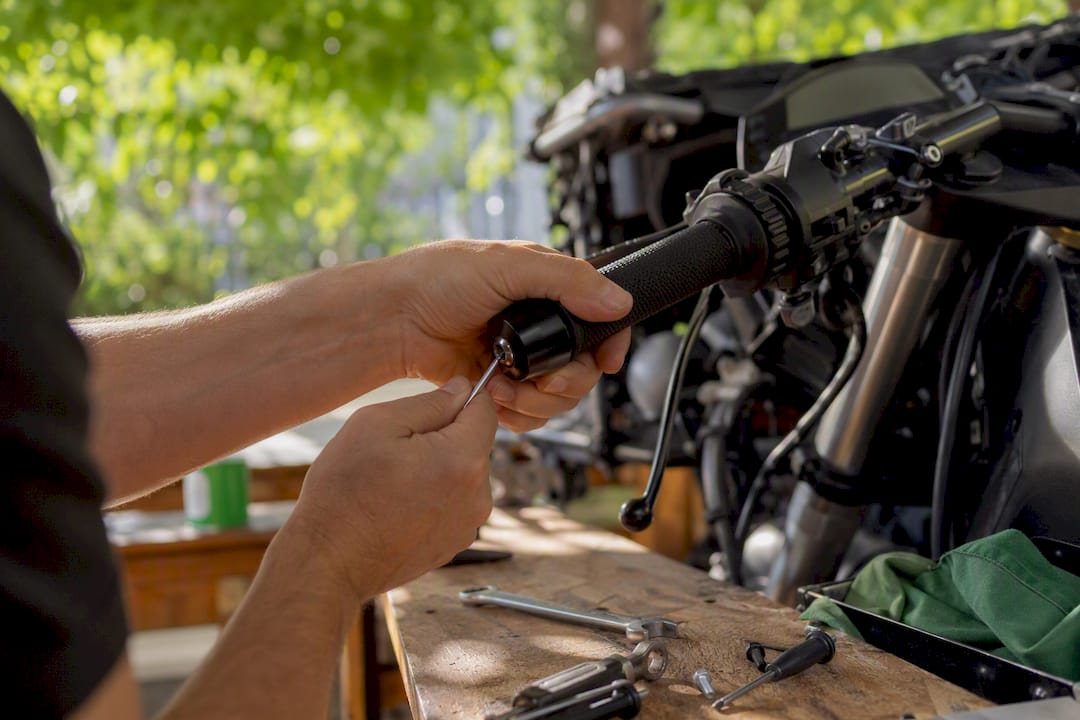
Check tyre pressure and wheel balance first: most handlebar buzz traces back to a wheel that is out of round, poorly centred, or simply underinflated. If your bars start to oscillate or “wobble” at speed, ease your grip rather than fighting it, then reduce speed smoothly and get the bike inspected before riding further.
Do these today:
- Set tyre pressures to the manufacturer’s cold figures, front and rear.
- Inspect tyres visually for flat-spotting, cupping, or uneven wear.
- Torque-check the handlebar clamps, stem bolts, and lever mounts.
- Ride a stretch of familiar road and note the speed or RPM band where the buzz appears.
- If vibration only shows up under braking or load, note that too. It narrows the diagnosis considerably.
Pro Tip: Do your ride test with one hand resting lightly on the tank and the other barely touching the grip. If the buzz disappears when you lighten your grip, the source is likely resonance in the bar assembly, not the wheel itself.
Key Takeaways
Reducing motorcycle vibration reliably means fixing the mechanical cause first, tyre balance, pressure, bearings, fasteners, before reaching for any aftermarket accessory.
| Point | Details |
|---|---|
| Diagnose before buying | Ride test across a speed range and note where vibration peaks before choosing any fix. |
| Mechanical fixes come first | Correct tyre pressure, wheel balance, and fastener torque resolve most vibration complaints outright. |
| Wobble response matters | Ease your grip and slow smoothly; never brake hard or tighten your grip during a wobble. |
| Aftermarket accessories finish the job | Bar-end weights, anti-vibration grips, and internal dampers reduce residual buzz once mechanics are sound. |
| Source model-matched parts | Sixrace supplies compatibility-checked accessories and suspension parts to match your exact bike. |
Table of Contents
- Why motorcycles vibrate: the main causes behind handlebar buzz
- How do you diagnose where motorcycle vibration comes from?
- What DIY checks can fix motorcycle vibration at home?
- When do you need a professional fix for motorcycle vibration?
- What aftermarket products reduce handlebar vibration?
- What should you do if your motorcycle starts to wobble?
- Five-step vibration checklist for under 30 minutes
- A rider’s view on chasing vibration fixes
- Where to find the right parts once you’ve diagnosed the problem
- Sources
Why motorcycles vibrate: the main causes behind handlebar buzz
Most handlebar vibration comes down to a short list of usual suspects, and narrowing them down starts with knowing what each one feels like.
Wheel and tyre imbalance is the most common culprit, particularly when the buzz is worst in a narrow speed window. Handlebar vibration is most often linked to wheel imbalance or incorrect tyre centring, and it’s typically felt hardest between 90 and 130 km/h. Worn steering head bearings produce a looser, more clunky vibration that often worsens under braking. Suspension faults, tired fork seals, or a rear shock losing damping, tend to show up as vibration that changes with road surface rather than speed alone.
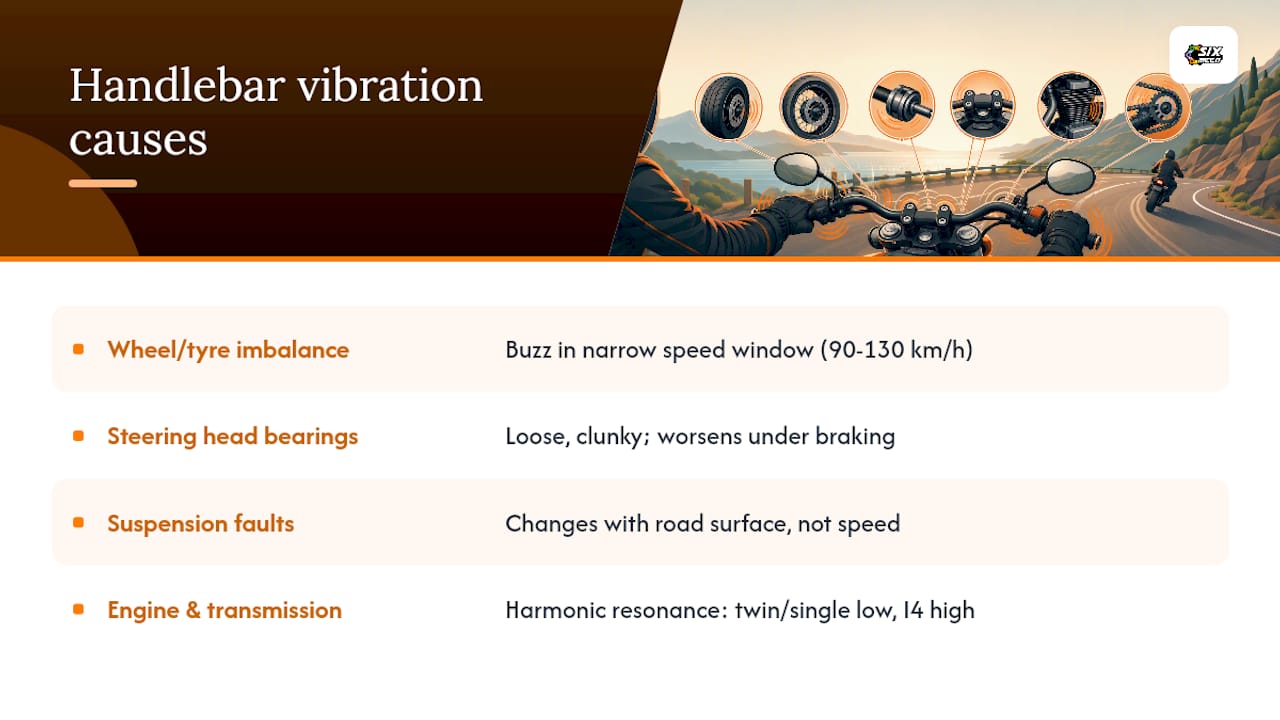
Engine and transmission vibration is a different animal entirely. Harmonic resonance carries engine and rotating assembly vibration through the frame to the handlebars, and cylinder count matters here: a parallel twin or single tends to shake at a lower, more insistent frequency than an inline four, which usually feels smoother but transmits a higher-pitched buzz at high RPM. Loose fasteners anywhere in the cockpit, levers, mirrors, clamps, amplify whatever vibration is already present. Finally, the handlebar itself, its material, wall thickness, and mounting geometry, determines how much of that vibration you actually feel in your hands rather than it being absorbed elsewhere.
How do you diagnose where motorcycle vibration comes from?
Work through this in order rather than jumping straight to parts.
- Ride test first. Accelerate through a wide speed range on a safe road, noting exactly where the vibration starts, peaks, and fades. Repeat under light throttle, then engine braking, then a gentle stop.
- Check if load changes it. Vibration that appears only with a passenger or luggage points towards suspension or subframe issues, not the wheel.
- Inspect statically. Look over tyres for wear patterns, check pressures cold, spin each wheel by hand to feel for imbalance, and check steering head play by rocking the forks front to back with the front brake applied.
- Torque-check critical fasteners. Handlebar clamps, top yoke pinch bolts, axle nuts, and lever mounts should all match the factory torque figures. Loose hardware often mimics a much bigger mechanical fault.
- Isolate the bar itself. Try loosening your grip pressure, resting a hand lightly on the tank instead of the bar, or comparing left versus right hand feel. If the vibration is only in one grip, suspect that side’s bar end or cable routing.
- Know when to stop. If steering head play, bearing noise, or wheel wobble is confirmed, stop diagnosing and book a workshop visit rather than continuing to ride it out.
Pro Tip: Buy a decent torque wrench before you touch anything structural, and write your bike’s factory torque values on a sticky note inside the seat unit. Guessing torque on stem or handlebar bolts is how a minor vibration turns into a genuine safety issue. Correct fastener torque, alongside tyre pressure and wear checks, is the foundation of vibration management on any motorcycle.
What DIY checks can fix motorcycle vibration at home?
A basic workshop and an hour of your time will solve a surprising number of vibration complaints before you ever need a specialist.
- Set tyre pressures cold, front and rear, matching the figures on your swingarm or owner’s manual sticker.
- Spin each wheel off the ground and watch the tyre and rim for visible run-out or flat spots.
- Torque the handlebar clamps, top yoke, and lever mounts to factory specification.
- Rock the forks front to back with the front brake held on to check for play in the steering head bearings.
- Check the cush drive rubbers in the rear wheel hub and inspect the sprocket for hooked or worn teeth.
Tools worth having on the bench:
- A tyre pressure gauge you trust
- A torque wrench covering the low to mid Nm range
- A paddock stand or axle stands rated for your bike’s weight
- A basic metric socket set
- A feeler gauge for bearing play checks
Always support the bike securely on a stand before lifting a wheel, and let the engine and exhaust cool fully before working near them. Isolate the ignition while you’re testing controls, so nothing fires up while your hands are near moving parts.
Treat these as first-line fixes. Correct pressure and fastener torque often resolve vibration outright, but if you suspect wheel imbalance, bearing wear, or bent rims, a DIY fix is only ever temporary. Those jobs need proper equipment and belong with a specialist.
When do you need a professional fix for motorcycle vibration?
Some causes simply need equipment you won’t have at home. Dynamic wheel balancing, tyre re-centring on the rim, steering head bearing replacement, suspension re-valving, and cush drive or engine mount replacement all fall into this category.
Typical turnaround and cost vary by workshop and region, so treat these as cautious estimates rather than quotes:
- Wheel balancing and tyre centring: often a same-day job, usually one of the cheaper interventions on this list.
- Steering head bearing replacement: half a day to a full day, more if the bearings have damaged the races and need machining.
- Suspension service or re-valving: a day or more, cost driven heavily by whether internals need replacing versus just re-oiling.
- Cush drive or engine mount replacement: generally quick once the part is confirmed, but parts lead time can extend it.
Labour rates, whether the shop uses OEM parts, and whether wheels need removing all shift these figures up or down.
Practical workshop experience shows that correctly balancing a wheel and checking tyre centring resolves narrow-band handlebar buzz in the large majority of cases brought in for that complaint. When you book the bike in, describe the speed or RPM band where you feel it, whether load changes it, and ask specifically for a dynamic balance report rather than a static one.
Pro Tip: Ask the workshop to torque everything back to factory spec and note the figures on your invoice. It gives you a paper trail if the same vibration returns.
What aftermarket products reduce handlebar vibration?
Once the mechanical basics are sound, aftermarket accessories can take the edge off residual buzz, particularly on bikes with naturally harsh engine characteristics.
- Bar-end weights add mass to the handlebar assembly, which lowers its resonant frequency. Heavier bar ends can substantially reduce high-frequency buzzing, though very heavy ends can slightly change low-speed steering feel.
- Anti-vibration grips use softer compounds or internal gel layers to absorb buzz at the point of contact, a cheap, fully reversible first step.
- Elastomer-mounted risers isolate the bar from frame-transmitted vibration without adding significant weight.
- Internal bar dampers sit inside the bar itself; engineers and testers find that viscoelastic dampers and tuned elastomers outperform simple dead weight for cutting high-frequency transmission without dulling steering.
- Stiffer or composite bars, aluminium 7075 or carbon fibre, change how vibration travels through the bar rather than simply damping it, and material choice affects transmissibility noticeably.
- Steering dampers address wobble and weave at speed rather than buzz, and are a separate fix from vibration damping.
Before fitting anything, check bar internal diameter, left and right bar-end compatibility, and clearance for cable routing or ABS sensor wiring. Start with grips and bar ends before moving to structural changes like new bars or risers; they’re cheaper, reversible, and solve most complaints outright.
Pro Tip: Mass dampers, which create an opposing resonance to cancel a specific frequency, are a genuine engineering solution but a specialist, tuned approach used in racing. Don’t reach for one before trying grips, bar ends, and a proper balance check.
What should you do if your motorcycle starts to wobble?
A high-speed wobble or weave triggers an instinct to grip harder and brake. Resist it.
Do:
- Ease your grip slightly rather than tensing up.
- Reduce speed smoothly using engine braking, not the front brake.
- Keep the bars as steady and neutral as you can manage.
- Get to a safe stop and inspect the bike before continuing.
Don’t:
- Tighten your grip instinctively; it feeds more input into the oscillation.
- Brake hard, especially with the front brake.
- Make sudden or sharp steering corrections.
If the wobble escalates:
- Gradually close the throttle rather than snapping it shut.
- Let speed roll off smoothly.
- Steer gently towards a safe stopping point.
During a wobble or weave, gripping harder or braking abruptly typically makes the oscillation worse; easing off and slowing smoothly is the response supported by that guidance.
Five-step vibration checklist for under 30 minutes
- Check tyre pressures cold, front and rear (5 minutes).
- Spin each wheel by hand and look for run-out or flat spots (5 minutes).
- Torque-check handlebar clamps and stem bolts (10 minutes).
- Rock the forks to test steering head play (5 minutes).
- Ride test through your usual speed range and note where the buzz sits (5 minutes).
If everything checks out clean but the buzz persists, it’s fixable at home with grips or bar ends. If you find play, imbalance, or wear, book the workshop.
A rider’s view on chasing vibration fixes
I’ve spent enough time around riders chasing rattles and buzzes to know the pattern: most people jump straight to bar-end weights or a new set of grips before they’ve even checked tyre pressure. That’s backwards. The cheapest, fastest fix is almost always mechanical, a proper balance, correct pressure, torqued fasteners, and aftermarket accessories work best as the finishing touch, not the first move.
What I’d push back on is the assumption that a bigger, heavier bar end is always better. It isn’t; on some bikes it just shifts the resonance to a different, equally annoying frequency. That’s where model-specific, properly engineered parts earn their keep over generic ones. Sixrace stocks accessories matched by make, model and year precisely because a part that works on one bike can behave differently on another.
Where to find the right parts once you’ve diagnosed the problem
Once you know whether your vibration needs a mechanical fix or an accessory upgrade, sourcing the right part matters as much as the diagnosis itself. Sixrace stocks bar-end weights, anti-vibration grips, torque tools, and suspension components matched to your bike’s exact make, model and year, so you’re not guessing at compatibility.

If your ride test pointed to buzz rather than a mechanical fault, browse the accessories range for grips and bar-end counterweights built for specific models rather than one-size-fits-all options. If the diagnosis pointed towards the suspension, the Öhlins parts range covers service items for a proper re-valve. Riders searching the shop for vibration fixes typically look for bar ends, gel or foam grips, torque wrenches, riser kits, and suspension service parts. Check your reserved discount on the Sixrace discount page before you order, and always confirm compatibility by make and model first.
Sources
- Motorcycle handlebar vibration, wobble, and other handling difficulties | Michelin USA
- Vibrazioni, oscillazioni del manubrio della moto e altri disturbi di guida | Michelin Italy
- Perché le moto vibrano sull’anteriore: cause, soluzioni e consigli | MotoClubETrusco
- How to Reduce Motorcycle Handlebar Vibrations – Chance Moto
- Motorcycle vibration mitigation: the physics of stopping hand fatigue | Himalayan Rides
- Moto
 Italiano
 Deutsch
 Français
 Español
 English
 Polski