
Most motorcycle suspension advice starts with “set the sag and leave the clickers alone.” That's a useful starting point, but it isn't a diagnosis. A bike can show tidy sag measurements and still feel harsh over sharp bumps, pack down through repeated braking zones, or move around mid-corner.
Proper regolazione sospensioni moto is a process of separating symptoms. Preload establishes the motorcycle's position in its travel. Spring rate supports the load. Compression damping controls resistance as the suspension compresses, while rebound damping controls how quickly it extends. Tyres, seals, linkage friction, load and electronics then determine how those settings feel on the road or track.
The practical target isn't a number that looks correct in the garage. It's stable geometry with enough compliance for the tyre to maintain contact with the surface.
Table of Contents
- Why Perfect Sag Numbers Still Leave a Harsh Ride
- Measuring and Setting Sag with Real-World Precision
- Decoding Compression and Rebound Damping Clickers
- Symptom-Based Troubleshooting for Common Chassis Issues
- Adapting Your Setup for Different Loads and Riding Styles
- Essential Maintenance and Pre-Ride Verification Checklist
Why Perfect Sag Numbers Still Leave a Harsh Ride
Sag is important, but it's not a verdict on the whole chassis. Many riders measure rider sag, add preload until the figure matches a handbook recommendation, and assume the suspension is now correctly tuned. That assumption confuses ride height with dynamic control.
Preload changes the spring's initial compression. It changes how much the motorcycle settles under its own weight and the rider's weight, which affects ride height and the travel available in each direction. It doesn't make the spring intrinsically stiffer, and it doesn't alter compression or rebound damping. The distinction is also highlighted in this technical explanation of how motorcycle suspension works.
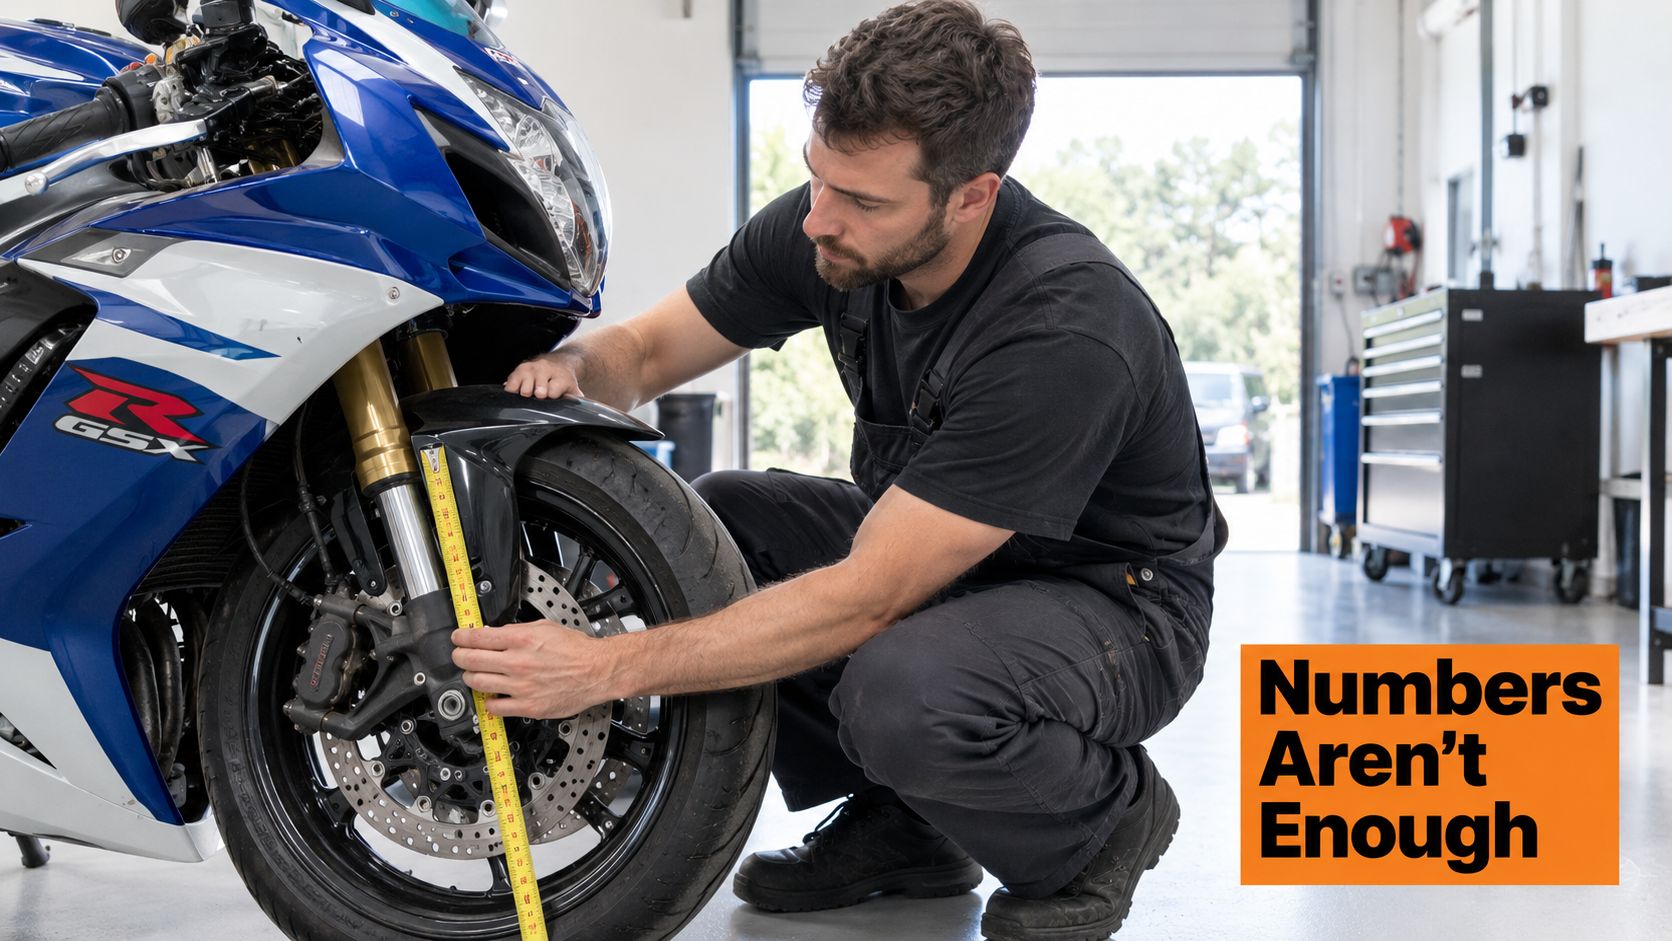
Geometry is only the starting position
A motorcycle with correct sag can still use the wrong spring for the rider or the intended load. If the spring is too soft, adding preload can recover some ride height, but the spring still carries the same load at the same rate. The bike may sit higher in the garage while remaining prone to excessive compression under braking, acceleration or large bumps.
The same mistake appears at the rear. Riders often wind on preload to cure wallow, then discover that the bike turns more slowly and transmits more force through the chassis. The preload adjustment solved a position problem, not necessarily the spring or damping problem.
A useful way to think about the four fundamental controls is:
- Spring preload sets initial position and sag.
- Spring rate determines how much force is required for further compression.
- Compression damping resists the compression stroke.
- Rebound damping controls the return stroke.
The tyre needs the wheel to follow the ground. Too much damping can hold the suspension away from the surface, while too little control can let the chassis oscillate. That's why “firmer” isn't automatically faster or safer.
Workshop rule: If the bike feels wrong while travelling through bumps, don't assume the sag measurement is the cause. First identify which part of the stroke produces the problem.
The research behind practical suspension tuning makes the same distinction between setting rider sag and diagnosing poor behaviour. A correct sag figure gives you a repeatable base, but it doesn't tell you whether seal friction, a mismatched spring, an incorrect damping circuit or a tyre problem is limiting grip. Once the static geometry is verified, the next step is to observe what the motorcycle does under a specific input.
Measuring and Setting Sag with Real-World Precision
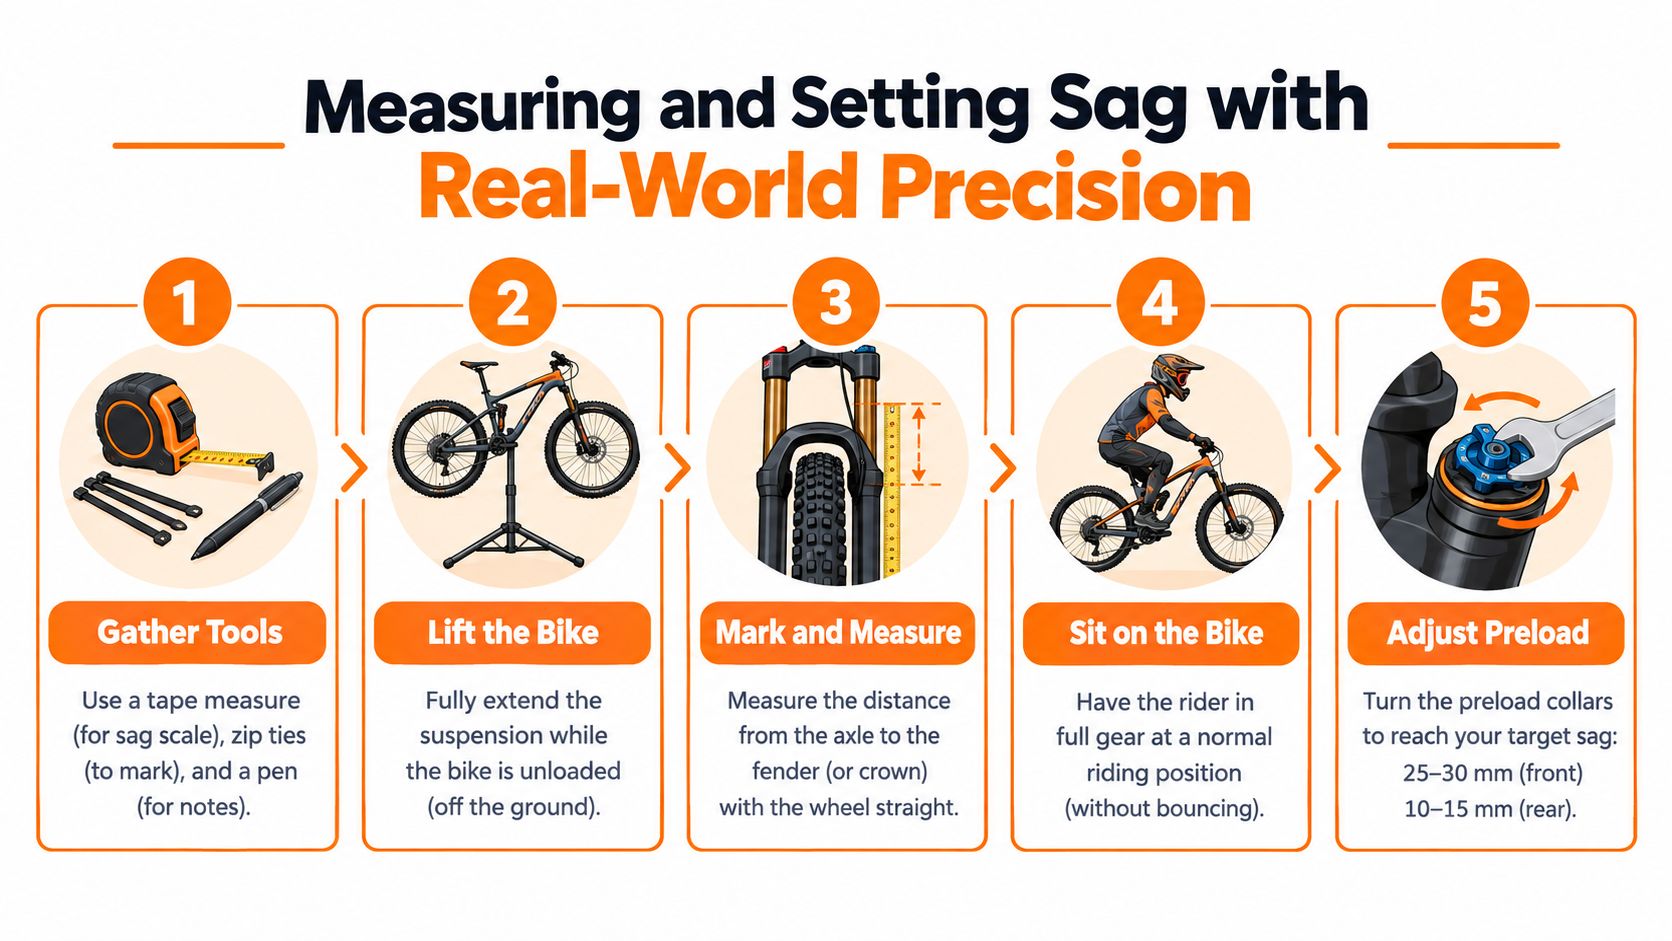
Accurate sag measurement starts with consistent reference points. Use a tape measure or sag scale, a zip tie for a fork leg where appropriate, a pen, a notebook and a helper who can keep the motorcycle upright without supporting its weight. Wear the equipment you typically ride in, because clothing, luggage and a passenger materially alter the load.
The measurement sequence has three states:
- Fully extended: Lift the wheel or place the motorcycle on a suitable stand so the suspension is unloaded. Measure between fixed points, such as the rear axle and a marked point on the tail, or a repeatable fork reference and the front axle.
- Static: Put the motorcycle on its wheels without the rider. Let it settle naturally, then record the same measurement.
- Rider loaded: Sit in the normal riding position with your usual equipment. Keep your hands light, place your feet where you normally ride, and have the helper hold the machine upright.
Sag is the difference between the fully extended measurement and the loaded measurement. Rider sag includes the motorcycle and rider load, while static sag describes how much the motorcycle settles under its own weight.
Friction can make a good measurement look bad
Fork seals, bushings, shock seals and linkage bearings create friction. If you pull the suspension down and measure immediately, it may remain slightly compressed. If you lift it and measure immediately, it may remain slightly extended. Either direction can produce a misleading result.
To reduce that error, take readings after settling the suspension from both directions. Gently compress and release the fork or rear suspension, allow it to settle, and record the value. Then extend it gently and allow it to settle again. Average the readings rather than trusting one measurement. This approach helps reduce the effect of seal and linkage friction, as discussed in the research on suspension measurement and variable preload.
Set preload only after the measurements are repeatable. A widely used baseline for rear rider sag is approximately 25 to 30% of total suspension travel, while street-oriented setups often use front sag around 30 to 35 mm and rear sag around 25 to 30 mm, depending on the motorcycle and manufacturer specification. These reference values come from motorcycle suspension system guidance. For example, a rear shock with 120 mm of usable travel would commonly be configured for roughly 30 to 36 mm of rider sag, based on the same guidance.
Turn the preload adjuster in small increments, then repeat the measurement. On a threaded shock, use the correct C-spanner and keep the spring collars square. Don't force a seized collar across dirty threads, and don't use a punch that can damage the adjuster. If the available preload range can't bring the loaded sag into a sensible window, stop adding preload and assess the spring rate.
For the fork, record each leg separately if the design allows it, and keep both adjusters matched unless the manufacturer specifies otherwise. Once the target is repeatable, write down the measurement, preload position and load condition. The step-by-step preload adjustment guide is useful when the motorcycle uses a less familiar adjuster arrangement.
Decoding Compression and Rebound Damping Clickers
Perfect sag figures do not guarantee a compliant motorcycle. Springs carry the motorcycle and rider, while damping controls how quickly the suspension compresses and returns. A bike can therefore have correct sag yet feel harsh if seal friction, internal valving or the tyre prevents the suspension from moving freely.
Compression damping resists the compression stroke during braking, bumps, acceleration and landings. Rebound damping resists extension after the spring has compressed, controlling how quickly the wheel returns to the ground. Too little rebound can make the bike feel springy or cause the tyre to skip. Too much can leave the suspension packed down through repeated bumps.
External clickers commonly adjust a bleed circuit that has its greatest effect at lower shaft speeds. A square-edged impact can produce much higher shaft speeds, bringing the internal shim stack or a separate high-speed circuit into play. A compression adjustment may therefore improve braking support without curing a sharp hit. If a clicker has very little effect, inspect friction, oil condition and internal service rather than continuing to turn it. This guide to suspension oils and improving suspension performance covers oil selection and service considerations.
Count clicks before you change direction
Turn the adjuster gently to its stop while counting, then return it to the recorded baseline. Never force it against the seat. Write down whether the manufacturer counts from fully closed or fully open, since brands use both conventions.
Change one circuit at a time. Early testing usually benefits from small adjustments. Some procedures recommend no more than two clicks during initial testing, while racing-oriented methods may use groups of four clicks to establish the direction before fine adjustment, as described in this history of motorcycle suspension adjustment. The test must remain controlled, whatever increment you choose.
Use the same road or track section, similar tyre condition and a comparable pace. Record the rider's input and the motorcycle's response:
| Rider sensation | First circuit to investigate | What to watch |
|---|---|---|
| Fork dives too quickly under braking | Front compression | Brake support and corner-entry grip |
| Rear returns sharply after a bump | Rear rebound | Whether the seat kicks or the tyre skips |
| Motorcycle remains low through linked bumps | Rebound, then spring rate | Whether usable travel is progressively lost |
| Harshness over a sharp edge | High-speed compression, friction or tyre | Whether the event involves fast shaft movement |
Suspension adjustment was once far more dependent on spring choice and mechanical changes because early telescopic forks and basic rear shocks offered little external control. During the 1980s, electronically or automatically influenced damping concepts entered production motorcycles, including Kawasaki's AVDS, or Automatic Variable Damping System, introduced in a telescopic fork during that decade.
Modern clickers provide useful control, but they cannot correct every fault. If the adjuster sits near one extreme and the symptom remains, the restriction may be inside the fork or shock, or the problem may be mechanical friction rather than damping.
Symptom-Based Troubleshooting for Common Chassis Issues
A suspension problem becomes easier to solve when you describe the event precisely. “The bike feels bad” isn't a usable test result. “The fork sends a sharp kick through the bars when the front wheel crosses a drain cover while leaned over” gives you a speed, a phase of movement and a load condition.
Harshness over sharp bumps
Sharp-edged impacts often expose excessive high-speed compression, excessive friction or a tyre that isn't allowing the suspension to work. A low-speed compression clicker may have limited authority over that event. Before turning it further, check whether the fork moves freely through the first part of its stroke and whether the seals or bushings are binding.
A simple garage check is to apply the front brake and compress the fork smoothly. It should move without a sticky initial breakaway or a notchy sensation. Clean the stanchions, inspect for damage and repeat the test. If the fork still resists the first movement, a damping adjustment won't remove mechanical friction.
A harsh rear response can come from too much compression damping, a spring that leaves the shock operating in the wrong part of its travel, or internal valving that needs service. Reduce compression in a small, recorded step and test the same bump. If compliance improves without excessive dive, the circuit was contributing. If the sharpness remains unchanged, stop chasing the clicker.
Repeated bouncing and a pogo response
If the motorcycle rebounds repeatedly after a compression, rebound damping may be insufficient. The spring is releasing energy faster than the damper can control it, so the chassis continues to oscillate rather than returning once and settling.
Add a small amount of rebound damping and test again. If the bike now returns slowly, feels dead over successive bumps or remains compressed after a series of inputs, you've gone too far. Excess rebound can prevent the wheel from extending before the next bump, a condition riders often describe as packing down.
Packing down under repeated braking
Packing down is a cumulative problem. The first bump may feel acceptable, but the suspension doesn't recover enough before the next input, so available travel decreases. The bike then rides lower, steering geometry changes and the tyre can lose its ability to follow the surface.
Open rebound slightly, test the same sequence and watch whether the motorcycle regains travel between impacts. If the adjustment only works at an extreme position, investigate the oil condition, spring rate and internal damping. The MA Hydraulics troubleshooting methodology provides useful context for isolating symptoms instead of adjusting several variables at once.
Wallowing and vague mid-corner behaviour
Wallowing usually means the chassis is moving too freely in a low-speed control range, but the cause may also be spring support, incorrect sag, tyre loading or an imbalance between the front and rear. Add damping only if the test shows that controlling the movement improves the line without reducing grip.
That last point matters. Excessive low-speed damping can reduce grip during direction changes and prevent the rear tyre from putting power down. A motorcycle that feels “calmer” on the stand may feel less connected when accelerating over imperfect tarmac.
Use a simple decision sequence:
- Check the tyre first: Confirm the intended cold pressure and inspect the tyre condition.
- Repeat the event: Use the same corner, braking point or bump.
- Change one circuit: Make one small adjustment, then return to the test.
- Check the range: If the correct feel exists only at an extreme setting, consider spring selection, oil service or revalving.
- Check friction: A sticky fork or dry linkage can imitate excessive damping.
Diagnostic principle: Damping should control unwanted movement while allowing the wheel to follow the surface. If adding damping removes grip, the adjustment is solving the symptom by restricting the wheel.
Adapting Your Setup for Different Loads and Riding Styles
The motorcycle needs a different suspension balance when its load, speed and surface change. A solo road ride, a fully loaded touring trip and a track session don't ask the springs and dampers to do the same work.
For solo riding, measure the bike with the equipment you normally wear and use a moderate setting that leaves compliance over imperfect roads. A track setup may need more support for heavy braking and acceleration, but reducing sag or closing damping blindly can make the tyres skip over bumps. The correct choice depends on the motorcycle, rider mass, pace, tyres and surface.
A passenger and luggage add load, particularly at the rear. Increasing rear preload can restore ride height and available travel, but it doesn't replace a spring with the correct capacity. Recheck sag with the passenger and luggage installed, then evaluate rebound and compression under that same condition. The front may also change indirectly because altered rear ride height changes chassis attitude.
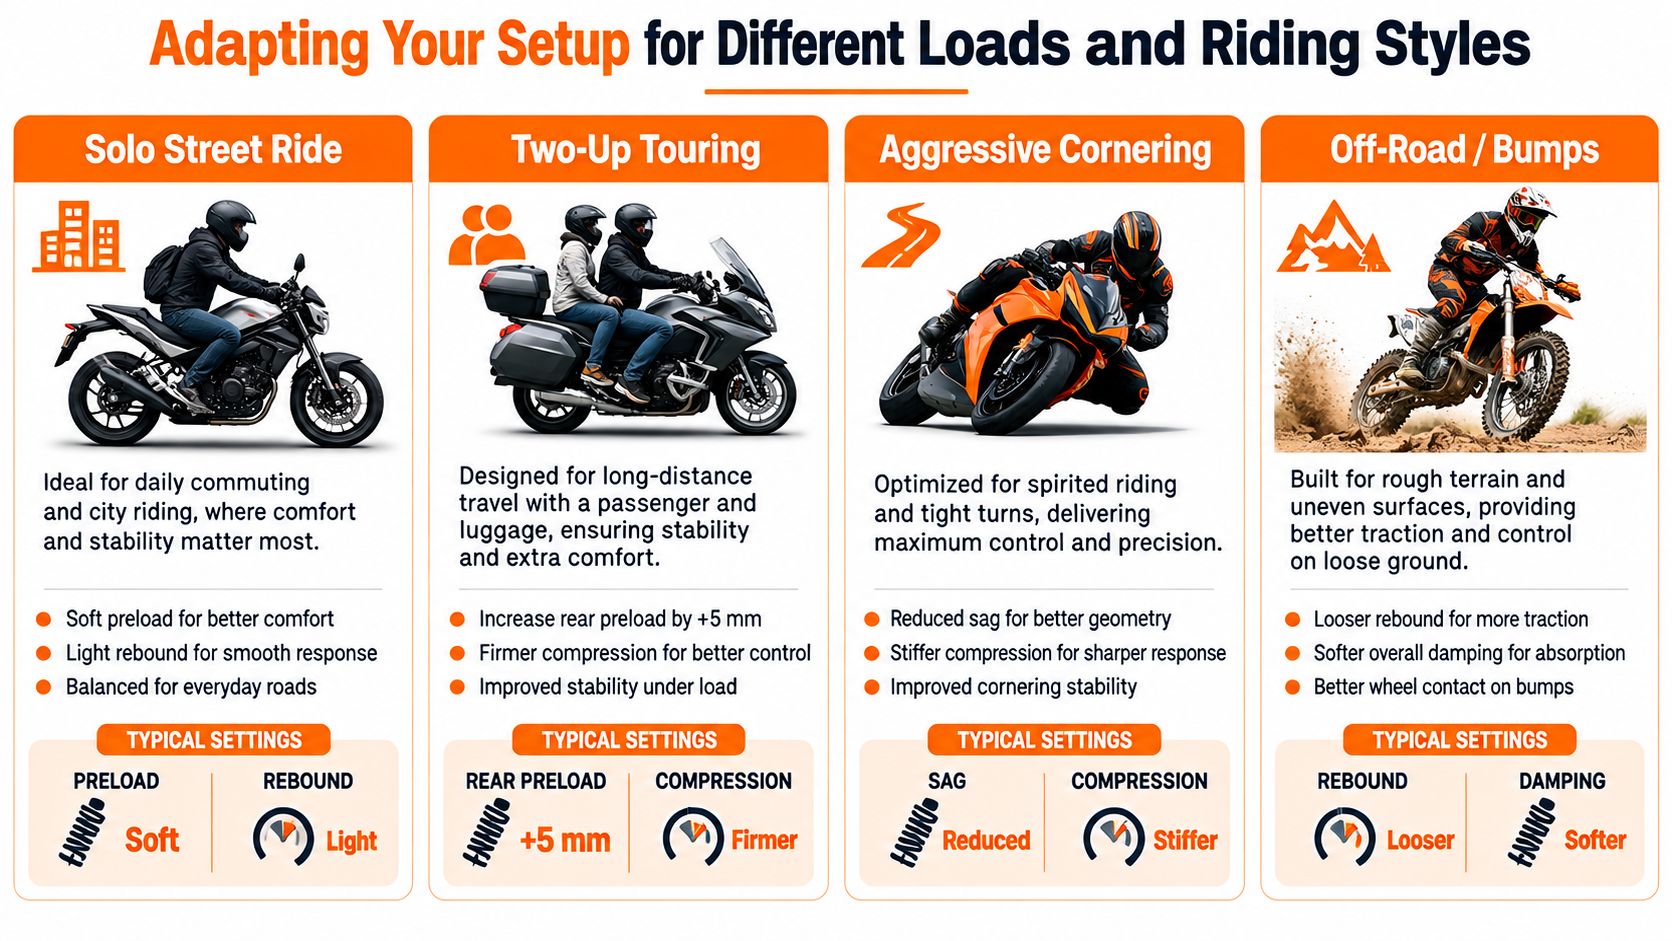
A practical load comparison
| Use case | What changes | What to verify |
|---|---|---|
| Solo street riding | Lightest normal load and varied surfaces | Comfort, braking support and tyre contact |
| Touring with luggage | Higher mass and altered weight distribution | Loaded sag, geometry and rebound recovery |
| Passenger riding | Greater rear load and different balance | Rear travel, spring capacity and stability |
| Track riding | Higher pace, stronger load transfers and repeated inputs | Travel usage, damping response and repeatability |
| Rough or unpaved surfaces | Frequent impacts and changing grip | Wheel tracking, compliance and recovery |
Modern electronically adjustable and semi-active motorcycles add another layer. Electronic preload control can adapt to changing loads and may improve comfort and stability, while suspension sensors can work alongside traction control, cornering ABS and adaptive chassis systems. The underlying safety function remains the same, maintaining tyre contact with the ground, as discussed in the technical study of electronic preload and integrated motorcycle chassis systems.
Select the correct load mode, then verify actual sag rather than trusting the display alone. Record the mode, tyre pressure and luggage condition. Don't override factory damping algorithms unless you understand what the change controls and how the system blends electronic input with its base settings.
Essential Maintenance and Pre-Ride Verification Checklist
Clicker settings can't compensate for contaminated fork oil, a leaking seal, a dry linkage or an incorrectly installed axle. Suspension tuning starts with hardware that moves freely and stays correctly fastened.
Before a road or track session, run through a short check:
- Confirm cold tyre pressure: Set it for the intended use before riding, then record it if you're comparing handling.
- Inspect fork stanchions: Look for pitting, oil traces and damaged surfaces that can harm seals.
- Check for fluid weeping: Examine fork seals and the shock body after the motorcycle has been used.
- Verify axle and pinch-bolt security: Use the motorcycle manufacturer's torque specifications, and don't assume a tight feel is sufficient.
- Test movement: Apply the front brake and compress the fork smoothly, then load and release the rear suspension. Look for binding, clicking or uncontrolled oscillation.
- Inspect the linkage: Check for play, corrosion and signs that grease has been displaced.
- Record settings: Note preload, compression and rebound positions before changing anything.
Service matters more than another click
Fork oil changes, bushing inspection and shock servicing should follow the motorcycle and component manufacturer's schedule. A shock that has lost damping performance or requires a nitrogen service won't become healthy because the rebound adjuster is turned further. If the clicker has little effect, the oil is contaminated or the suspension feels inconsistent as it warms, send the component to a qualified suspension technician.
When servicing a linkage, use the grease specified for the bearings and seals, and choose application equipment that can reach the fitting without damaging it. Guidance on selecting the right grease gun tube can help when access is awkward and precise grease delivery matters.
A repeatable setup log is one of the most useful tools in the paddock. Write down the load, tyre condition, ambient feel, sag readings, clicker positions and the exact symptom you're trying to change. That record prevents random adjustments and makes it clear when the problem has moved beyond external settings. Sixrace offers motorcycle-specific suspension components, fork and shock oils, and model-matched equipment for riders preparing road, racing, enduro and other applications.
Sixrace can help you match suspension-related parts, oils and model-specific motorcycle equipment to the way you ride. Visit Sixrace, check compatibility for your motorcycle, and use your recorded sag and clicker settings to choose the next change with confidence.
 Italiano
 Deutsch
 Français
 Español
 English
 Polski