
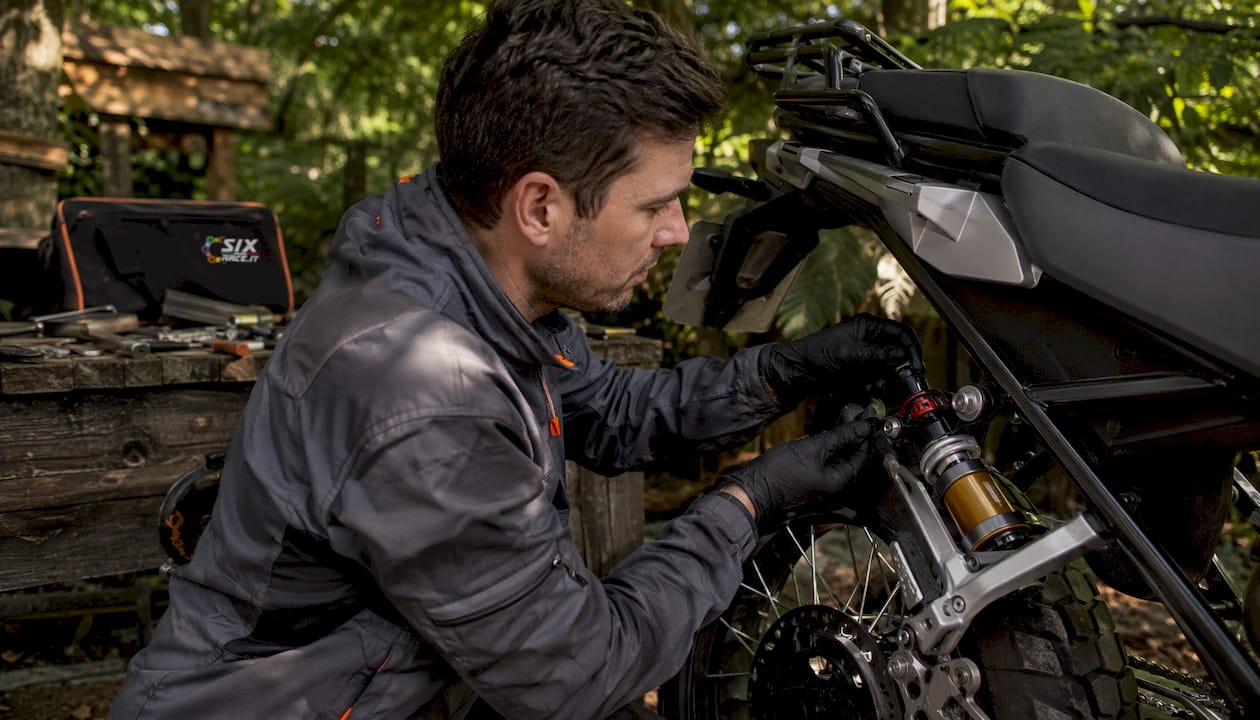
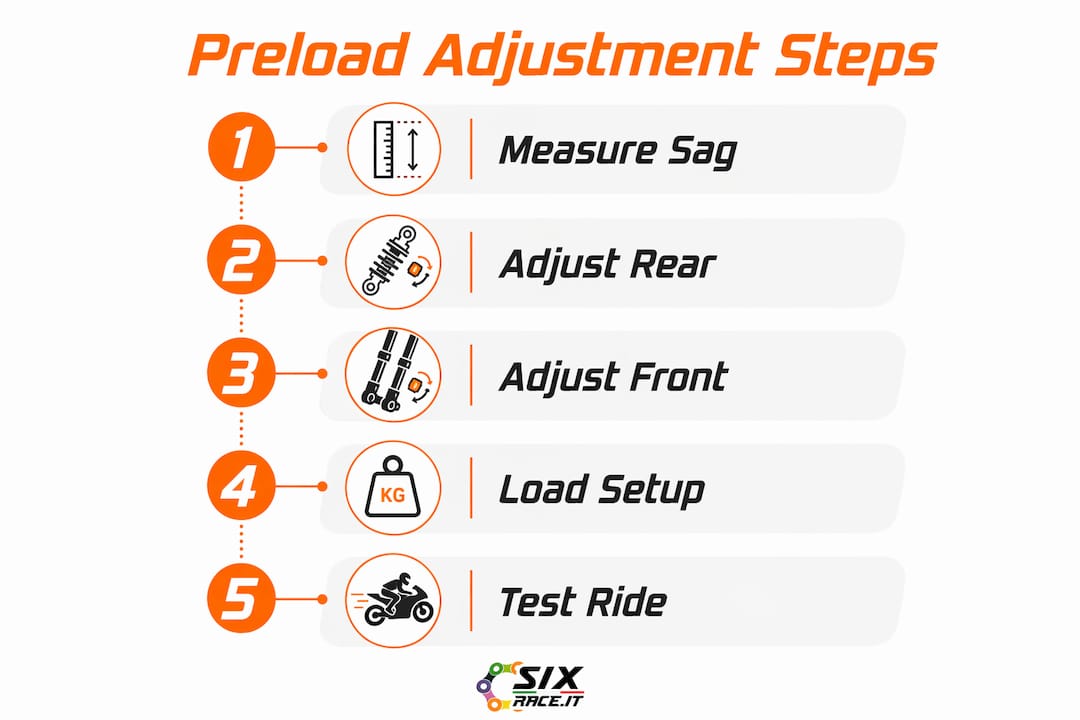
Setting motorcycle preload correctly comes down to one repeatable process: measure your suspension’s free length (L1), measure it again with you fully geared up on the bike (L2), calculate rider sag as L1 minus L2, then adjust the preload collar or adjuster until that sag figure sits within the recommended range. For road bikes, target 30–40 mm rear rider sag and 25–40 mm front sag. Off-road and adventure bikes generally need higher rear rider sag, with a recommended range of 35–50 mm to keep the tyre in contact over rough terrain. Track setups typically call for rear sag toward the tighter end of the range, around 25 mm, where a stiffer, more controlled platform matters more than compliance.
Quick-start checklist before you touch the bike:
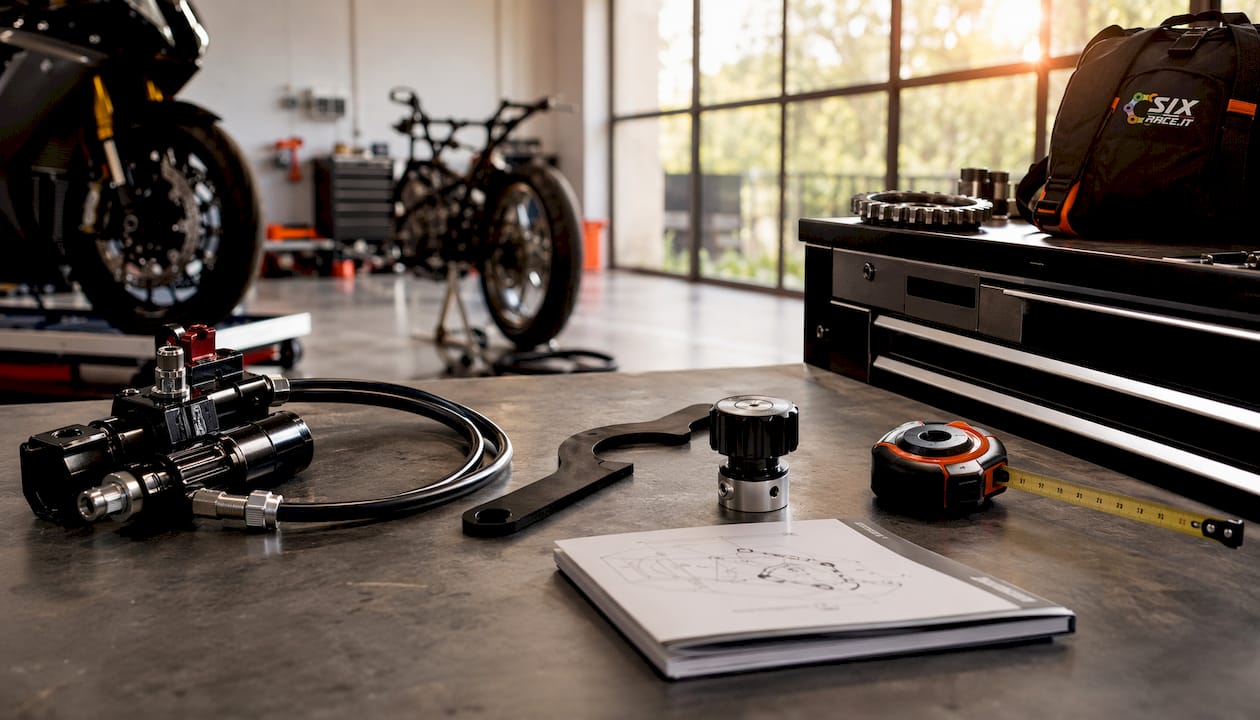
- Gather your tape measure, a marker or zip-tie, a preload spanner (C-spanner), and your service manual.
- Write down every current setting: collar position, clicks from fully in, or turns from fully out.
- Recruit an assistant — accurate sag measurement is not reliably achievable solo.
- Confirm the bike is on level ground and the tyres are at the correct pressures.
Pro Tip: Record your baseline settings before touching anything. Small increments of preload adjustment on a typical rear shock produce small changes in sag; small, documented increments are far easier to reverse than a large, unrecorded change.
Table of Contents
- What tools and preparation do you need before adjusting preload?
- How do you measure sag accurately, step by step?
- How to adjust rear preload step by step
- How to adjust front preload step by step
- How do you test-ride and fine-tune your settings?
- What do incorrect preload symptoms look like, and how do you fix them?
- When does preload reach its limits and you need new springs?
- Safety cautions and common mistakes to avoid
- Key takeaways
- The case for measuring twice and adjusting once
- Get the right parts for your suspension setup from Sixrace
- Useful sources for further reading
What tools and preparation do you need before adjusting preload?
Arriving at the bike without the right kit wastes time and produces unreliable numbers. The following items cover the vast majority of setups you will encounter.
Essential tools:
- Metric tape measure or a digital sag tool such as the Slacker, which simplifies repeatable readings on both forks and shock.
- Paddock stand or centre stand to lift each end of the bike cleanly.
- Preload spanner (C-spanner) for threaded rear collars; a socket set or Allen keys for fork top-cap adjusters.
- Torque wrench if your manual specifies a torque value for locking rings.
- Tape or a permanent marker to create consistent measurement reference points.
- A second person to stabilise the bike and take readings while you sit in your normal riding position.
Safety and preparation steps:
- Check for oil leaks at fork seals and the rear shock body before starting. A weeping seal changes damping behaviour and makes any preload setting unreliable.
- Take measurements with cold suspension for consistency; heat from a recent ride can temporarily alter fork oil viscosity and affect readings.
- Wear gloves when rotating threaded collars, particularly on older bikes where corrosion can cause collars to slip suddenly.
- Note your factory settings from the service manual and write down the current adjuster position as clicks or turns from the fully soft end of travel.
Riders with Öhlins TTX or STX shocks will find a remote hydraulic adjuster or a clearly marked knob; Showa units on many Japanese sport bikes use a stepped collar with a spanner flat; Kayaba (KYB) components, common on mid-range road and adventure bikes, typically use a threaded collar requiring a C-spanner. The physical access point differs, but the measurement and adjustment logic is identical across all three.
Pro Tip: If you are setting up for a specific load — passenger, luggage, or both — fit that load before taking any measurements. Sag set for a solo rider will be meaningfully different once a pillion and panniers are added.
How do you measure sag accurately, step by step?
Rider sag is the difference between the suspension’s fully extended length (L1) and its compressed length under your weight (L2): Rider sag = L1 − L2. The axle-to-fixed-frame-point method is the most reliable approach for both ends of the bike.
Rear sag measurement procedure
- Lift the rear wheel clear of the ground using a paddock stand or centre stand. Measure vertically from the centre of the rear axle to a fixed point on the subframe directly above it. Mark that subframe point with tape. Record this as R1.
- Lower the bike onto both wheels. Have the rider sit in their normal position, fully geared up, feet on the pegs. Your assistant pushes down on the tail, releases slowly, then measures the same axle-to-mark distance. Record as R2.
- Your assistant then lifts the tail gently and lets it settle. Measure again. Record as R3.
- Calculate: Rear rider sag = R1 − ((R2 + R3) / 2). Averaging R2 and R3 removes the effect of stiction in the linkage bearings.
Front sag measurement procedure
- Lean the bike onto its side stand or use the centre stand to lift the front wheel clear. Measure the exposed portion of the fork slider (the part that moves in and out). On conventional forks this is the upper tube; on upside-down forks it is the lower leg. Record as F1.
- Place the bike on the ground. Rider sits in position, fully geared. Assistant pushes down on the bars, releases slowly, then measures the exposed fork length. Record as F2.
- Assistant lifts the front gently and lets it settle. Measure again. Record as F3.
- Calculate: Front rider sag = F1 − ((F2 + F3) / 2).
Measurement record template
| Measurement point | Front (mm) | Rear (mm) |
|---|---|---|
| Target sag range | 25–40 mm | 30–40 mm (road), 35–50 mm (off-road) |
Worked example — road bike: A naked sport bike with 120 mm of rear travel gives R1 = 478 mm, R2 = 440 mm, R3 = 442 mm. Average rider position = 441 mm. Rear rider sag = 478 − 441 = 37 mm, which sits comfortably within the 30–40 mm road target.
Worked example — adventure bike: A mid-weight adventure bike with 200 mm of rear travel gives R1 = 510 mm, R2 = 462 mm, R3 = 465 mm. Average = 463.5 mm. Rear rider sag = 510 − 463.5 = 46.5 mm, which falls within the 35–50 mm off-road guideline. Touratech’s guidance frames this as keeping roughly 70% of travel available for upward wheel movement and 30% for wheel drop, which this figure satisfies.
How to adjust rear preload step by step
With your baseline sag figure in hand, the rear adjustment is straightforward. Record your starting position as turns or clicks from fully soft before moving anything.
Threaded collar shock (most road and sport bikes):
- Loosen the locking ring above the preload collar using a C-spanner or pin spanner, turning it anti-clockwise.
- Rotate the preload collar clockwise to increase preload (reduces sag) or anti-clockwise to decrease it (increases sag). One full turn typically shifts sag by approximately 1–2 mm; confirm with your manual.
- Re-tighten the locking ring against the collar.
- Repeat the full R1/R2/R3 measurement cycle. Do not estimate — re-measure every time.
- Iterate until sag sits in the target range, then record the final collar position.
Remote hydraulic adjuster (common on adventure bikes): Many adventure-oriented shocks, including units from Öhlins and Kayaba, feature a remote adjuster marked with + (more preload) and − (less preload). Turn the knob in small increments, typically two or three clicks at a time, then re-measure. The +/− markings make in-field adjustments fast and reversible.
Adjusting for passenger or luggage: Fit the full intended load before measuring. Use the same R1/R2/R3 cycle with the rider and passenger seated, or with luggage fitted. Add preload until sag returns to the target range. Keep a separate note of the collar position for each load scenario so you can switch quickly.

Warning: If you reach the adjuster’s maximum preload limit and sag is still too great, the spring rate is too soft for your weight. Continuing to add preload risks coil bind, where the coils contact each other under compression, and can cause the shock to top out when unweighted, reducing rear tyre contact on acceleration.
Pro Tip: Never make more than one full turn of adjustment without re-measuring. The relationship between collar rotation and sag change is not perfectly linear across the full adjuster range, so small, verified steps are more reliable than large single moves.
How to adjust front preload step by step
Front preload adjustment follows the same measurement logic but the physical access point varies considerably between models.
Identifying your fork adjuster type:
- Top-cap adjuster: Many sport and supersport bikes (including those fitted with Showa BFF or Öhlins NIX forks) have a slotted or hex adjuster on the fork top cap. Turn clockwise to increase preload, anti-clockwise to reduce it.
- Non-adjustable forks: Budget and mid-range bikes often have no external adjuster. Changing preload requires removing the fork cap and altering the spacer length inside the fork tube. Consult your service manual for spacer dimensions and the correct procedure.
- Allen-key adjuster: Some forks use a recessed Allen bolt at the top cap. A long Allen key through the cap is all that is needed.
Step-by-step front adjustment:
- Note the current adjuster position (clicks from fully in, or spacer length in mm).
- With the front wheel on the ground and the bike stable, make a small adjustment — two or three clicks, or a half-turn.
- Repeat the F1/F2/F3 measurement cycle. One full rotation of a fork preload adjuster typically changes sag by approximately 1 mm, per the AMCN workshop guide.
- Iterate until front sag sits within 25–40 mm, or within the specific range your service manual recommends for your total fork travel.
- Record the final setting.
Altering fork preload also shifts ride height at the front, which changes chassis trail and therefore steering behaviour. Raising front preload (reducing sag) sharpens turn-in; reducing it adds high-speed stability. If you find yourself making large front preload changes to compensate for geometry, consider adjusting fork height in the triple clamps instead, which achieves a similar geometry effect without stressing the spring into an extreme working position.
How do you test-ride and fine-tune your settings?
A structured test ride turns subjective impressions into reliable data. MCN’s suspension setup guidance recommends writing down every setting before leaving the garage and changing only one variable per session.
Test-ride checklist:
- Choose a familiar road with a mix of straights, medium-speed corners, and a braking section you know well.
- Complete a short warm-up lap at a relaxed pace before forming any judgement.
- Note impressions immediately after the ride: does the bike feel planted under braking? Does it track cleanly through corners? Does it feel harsh over small bumps or vague over larger ones?
- Change only preload between runs. Adjust rebound or compression damping only once preload is confirmed correct.
What to feel for and what it indicates:
- Bottoming harshly over bumps: sag is too great, add preload.
- Topping out on acceleration or when unweighted: too much preload, reduce it.
- Vague, wandering feel in corners: check sag balance front to rear; a large imbalance between front and rear sag affects chassis attitude.
- Harsh, nervous ride over small ripples: preload may be excessive, or damping is too stiff — confirm sag is correct before touching damping.
Pro Tip: Use the same fuel level and the same road for every comparison run. A half-tank of fuel on a large-capacity bike can shift the centre of mass enough to alter handling impressions between sessions.
What do incorrect preload symptoms look like, and how do you fix them?
Most handling complaints that riders attribute to tyres or geometry are actually sag problems. Low preload produces a squishy ride and risks bottoming; excess preload causes harshness and reduces tyre contact when the wheel drops into a depression.
Symptom-to-action guide:
- Squishy ride, bottoming on bumps: Add rear preload in half-turn increments, re-measure after each change.
- Harsh ride, bike feels nervous: Reduce preload; confirm front and rear sag are within range before adjusting damping.
- Understeer, reluctance to turn in: Front sag may be too great (front sitting low). Increase front preload or raise fork height in the triple clamps slightly.
- Oversteer, instability under braking: Rear sag may be excessive, causing the rear to sit low. Add rear preload and re-measure.
- Loss of rear traction on acceleration: Check for excessive rear preload causing the shock to top out when unweighted. Reduce preload and re-measure.
Before changing any suspension setting, exclude tyre pressure, wheel bearing play, and steering head bearing condition as contributing factors. A worn steering head bearing mimics front-end vagueness convincingly. If forks are leaking oil or the shock body shows signs of damage, stop and seek professional service rather than attempting to compensate through preload changes.
When does preload reach its limits and you need new springs?
Preload does not alter spring rate; it shifts the spring’s working position within its travel. If you need extreme preload to reach the correct sag target, the spring is too soft for your weight and riding load. Conversely, very little preload with correct sag indicates a spring that is too stiff.
Clear indicators that spring replacement is needed:
- You have reached the maximum preload position and sag is still outside the target range.
- The shock tops out visibly when you dismount, indicating the spring cannot support the bike’s static weight at the current preload setting.
- Rider weight has changed significantly (more than approximately 10–15 kg) since the bike was purchased.
- You are regularly carrying a passenger and luggage and cannot achieve correct sag for both scenarios within the adjuster’s range.
Choosing replacement springs: Spring rate is expressed in kg/mm (or N/mm). Öhlins, Showa, and Kayaba all publish spring rate selection charts based on rider weight and intended use. A heavier rider or a loaded touring setup generally requires a higher spring rate; a lighter rider on a sport bike may need to go softer than the factory fitment. Consult the manufacturer’s chart for your specific shock or fork model, and cross-reference with your measured sag data. Suspension springs and overhaul kits matched to your make, model, and year are available through Sixrace, with compatibility filtering to simplify selection.
Pro Tip: When ordering replacement springs, note the current spacer length inside your forks and the free length of your rear spring. A spring with the correct rate but a different free length will shift your preload baseline and require re-measurement from scratch.
Safety cautions and common mistakes to avoid
A few recurring errors account for the majority of poor outcomes when riders adjust preload without professional guidance.
Safety cautions:
- Never adjust a threaded collar with the wheel removed and the suspension unloaded. The spring can release suddenly if the collar slips.
- Do not make large adjustments (more than two full turns) without re-measuring sag. The adjuster’s mechanical stop can be reached without warning on some shocks.
- Confirm the locking ring is fully tightened after every adjustment. A loose locking ring will allow the collar to rotate under load, changing your setting mid-ride.
Common mistakes:
- Measuring sag alone, without an assistant holding the bike upright. Solo measurements introduce lean-angle error that invalidates the reading.
- Not recording the starting position. Without a documented baseline, reverting to a known-good setting is guesswork.
- Confusing preload with damping. Preload sets ride height and sag; rebound and compression damping control how fast the suspension moves. Adjusting damping to fix a sag problem will not work.
- Over-interpreting a single test ride. Road surface, temperature, and tyre warm-up all affect impressions. Confirm any perceived improvement with a second run before committing to a new setting.
Key takeaways
Correct motorcycle preload adjustment requires measuring sag with a rider on board, targeting 30–40 mm rear sag for road use and 35–50 mm for off-road, iterating in small increments until the bike sits correctly within its travel.
| Point | Details |
|---|---|
| Measure before you adjust | Calculate rider sag using L1 − L2 before touching any adjuster; never estimate. |
| Target the correct sag range | Road bikes: 30–40 mm rear, 25–40 mm front; off-road: 35–50 mm rear. |
| Change springs when preload runs out | Extreme preload to hit sag targets means the spring rate is wrong, not the adjuster position. |
| Iterate with small increments | Half a turn or two to three clicks per session; re-measure after every change. |
| Sixrace for parts and tools | Sixrace stocks suspension springs, overhaul kits, and preload spanners matched by make, model, and year across Central Europe. |
The case for measuring twice and adjusting once
The most persistent mistake in suspension setup is treating preload as a feel-based tweak rather than a measured correction. Riders who skip the L1/L2 measurement and simply wind in more preload because the bike “feels soft” often end up with a shock that tops out under acceleration, reduced rear tyre contact, and a handling character that deteriorates rather than improves. The measurement step is not optional formality; it is the only way to know whether your adjustment has moved the suspension in the right direction.
One workshop discipline that rarely appears in standard guides: log ambient temperature and tyre pressures alongside every sag measurement. Fork oil viscosity changes with temperature, and a cold-morning measurement on a bike that was last set up in summer can show a meaningful difference in sag even with no physical change to the adjuster. Keeping a run sheet with date, temperature, tyre pressures, fuel level, and sag figures turns a one-off setup into a repeatable reference you can return to after any change.
Sixrace’s suspension upgrade checklist provides a structured framework for riders who want to go beyond preload and address springs, damping, and geometry in a single organised session.
Get the right parts for your suspension setup from Sixrace
Riders who have worked through this guide and found that their current springs or adjusters are limiting the setup have a straightforward next step. Sixrace is a specialist European motorcycle parts retailer stocking suspension springs, fork overhaul kits, shock absorber rebuild kits, preload spanners, and remote adjuster hardware from manufacturers including Öhlins, Showa, and Kayaba. Every product in the catalogue is searchable by make, model, and year, which removes compatibility guesswork when ordering a replacement spring or a C-spanner for a specific shock collar diameter.
For riders in Central Europe, Sixrace offers tracked shipping, multilingual support, and competitive pricing across the full suspension category. Whether you need a stiffer rear spring to stop reaching the adjuster’s limit, a fork overhaul kit after discovering a weeping seal, or simply the correct suspension accessories to make the adjustment procedure easier, the catalogue covers it. Claim your reserved discount and browse the full suspension range at Sixrace.
Useful sources for further reading
The following references were used in preparing this guide and provide additional depth on specific aspects of suspension setup.
- Pando Moto — Motorcycle suspension setup and adjustment guide: clear seven-step walkthrough covering both ends of the bike with worked examples.
- Penske Shocks — How to properly set motorcycle front suspension sag: authoritative explanation of the relationship between preload, spring rate, and sag from a specialist manufacturer.
- Cycle World — Suspension setup guide: practical sag targets and test-ride methodology for road and track use.
- Touratech — How to set suspension sag: adventure-bike-focused guidance on travel ratios and remote adjuster use.
- Motorcycle News — How to set up your motorcycle suspension: stepwise checklist emphasising documentation and incremental changes.
- Law Abiding Biker — Check and properly set suspension sag: practical guide to using the Slacker digital sag tool for repeatable measurements.
- Your motorcycle’s service manual: always the primary reference for model-specific preload adjuster locations, torque values, and factory sag targets. No generic guide supersedes manufacturer data for your specific model.
- Sixrace suspension upgrade checklist: a structured checklist for riders planning a full suspension review, covering springs, damping, and geometry in sequence.
This article provides general technical guidance for informational purposes. Always consult your motorcycle’s service manual and, where in doubt, a qualified suspension technician for model-specific settings and safety-critical adjustments.
 Italiano
 Deutsch
 Français
 Español
 English
 Polski