

A motorcycle suspension upgrade checklist is defined as a structured sequence of measurements, assessments, and component decisions that guides owners from baseline diagnosis through to targeted hardware changes. The correct starting point is always sag measurement. Industry-standard rider sag sits at 25–30% of total suspension travel for optimal balance between handling and comfort. Touring riders carrying heavy loads may target 30–35% sag instead. Getting this number right before spending money on shocks or cartridge kits is the single most important step in any suspension upgrade guide.
1. How to measure and interpret suspension sag correctly
Measuring sag is the foundation of any suspension tuning checklist. Sag measurement takes around 15 minutes and costs nothing, yet it provides the critical baseline that determines every subsequent decision.
Follow these steps to measure rear sag accurately:
- Place the bike on a paddock stand so the rear wheel is off the ground. Measure from a fixed point on the rear subframe to the axle centre. Record this as L1 (fully extended length).
- Remove the paddock stand and let the bike rest on its own weight with no rider. Measure the same two points. Record this as L2 (static sag).
- Sit on the bike in full riding gear, in your normal riding position. Have an assistant take the measurement again. Record this as L3 (rider sag).
- Calculate rider sag: L2 minus L3. Calculate static sag: L1 minus L2.
- Rider sag should fall within 25–30% of total rear suspension travel. Static sag should be roughly 5–10 mm for most road bikes.
Repeat the same process on the front forks, measuring from the lower fork leg to the bottom of the fork seal. Front rider sag targets are typically similar in percentage terms to the rear.
Common errors include measuring with the bike on the side stand, wearing different gear between measurements, or bouncing the bike before recording. All three introduce inconsistency and produce misleading numbers.
Pro Tip: Fit a zip tie around the fork leg as a travel indicator. After a test ride on your usual road loop, check where the zip tie has settled. This tells you how much travel you are actually using and whether your sag figures translate to real-world behaviour.
2. What spring rates and preload settings mean for your ride
Spring rate is the force required to compress a spring by one unit of distance, typically measured in Newtons per millimetre. Preload is the initial compression applied to that spring before any load is added. The two work together, but they are not interchangeable.
Key points every rider should understand:
- Linear springs deliver a consistent rate throughout their travel. They suit riders who want predictable, progressive feedback and are the standard fitment on most road bikes.
- Progressive springs become stiffer as they compress. They offer a softer initial feel for small bumps but resist bottoming out under hard braking or heavy loads.
- Incorrect spring rate is the most common cause of poor ride quality. A spring that is too soft causes the bike to wallow and bottom out. A spring that is too stiff transmits every road imperfection directly to the rider.
- Preload adjustment changes ride height and sag but does not change the spring rate itself. Winding in more preload raises the bike and reduces sag; winding it out lowers the bike and increases sag.
If preload adjustment cannot bring sag into the recommended range, the spring rate is wrong for your weight and riding style. No amount of damping adjustment will fix a mismatched spring. The spring must be replaced before any further tuning is effective.
Signs of a spring rate mismatch include excessive dive under braking, persistent bottoming out on moderate bumps, or a ride that feels harsh even at low preload settings. Riders who have gained or lost significant weight since purchasing the bike, or who now carry a pillion regularly, are particularly likely to need a spring change.
Pro Tip: Weigh yourself in full riding gear before selecting replacement springs. Most spring manufacturers publish rate charts based on rider weight plus luggage. Use your actual loaded weight, not your body weight alone.
3. Key suspension component upgrades to consider in order
Choosing performance suspension upgrades works best when approached in stages. Match upgrades to your actual riding habits rather than hypothetical scenarios. A track-spec shock on a daily commuter adds complexity without meaningful benefit.
Stage 1: Seals, oil, and springs
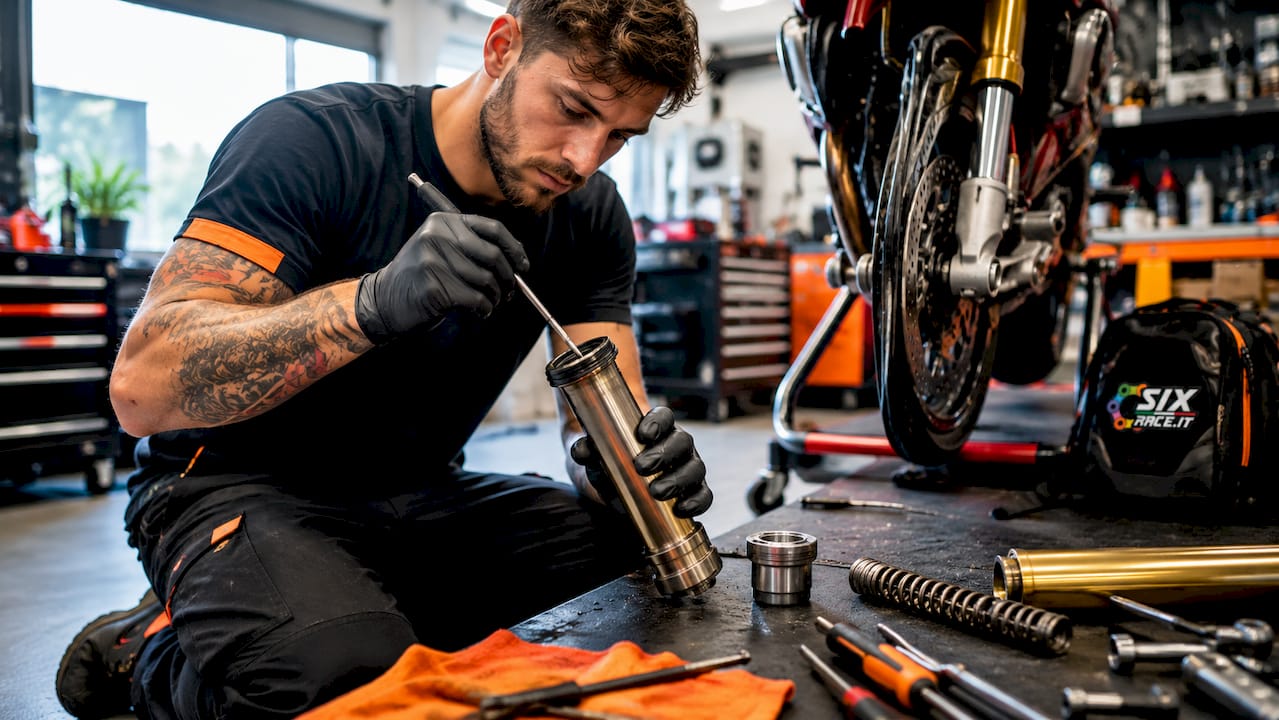
Worn fork seals leak oil and allow air contamination, which destroys damping consistency. Replacing seals and refreshing fork oil is the lowest-cost intervention and often transforms a bike that feels vague and wallowy. New springs matched to rider weight complete this stage. This work typically costs well under £200 in parts and is achievable at home with basic tools.
Stage 2: Cartridge emulators and drop-in kits
Cartridge emulators cost around £120–£200 and fit inside conventional damper-rod forks to add proper compression damping control. They represent the most cost-effective front suspension upgrade available. Full cartridge kits go further, replacing the entire damping mechanism for a once-and-done solution with adjustable compression and rebound. The Dynojet range, available through Sixrace’s Dynojet store, includes tuning components suited to this upgrade stage.
Stage 3: Rear monotube shock replacement
Monotube shocks separate the oil and gas chambers, which prevents aeration and maintains consistent damping even under sustained hard use. Premium rear monotube shocks can exceed £1,300 for top-tier units. Mid-range options from established manufacturers deliver a substantial improvement over OEM twin-shock or emulsion-type units at a more accessible price point.
Stage 4: Balancing front and rear
For heavy touring or two-up riding, upgrading the rear shock alone improves comfort but can upset steering geometry if the front is left unchanged. Increased rear ride height through preload or a taller shock changes the steering head angle, making the bike feel heavier in direction changes. Always assess front and rear together when planning a full suspension overhaul.
Always follow manufacturer torque specifications and oil volume recommendations during installation. Incorrect tightening risks component failure and compromises rider safety.
4. How to test and tune suspension after upgrades
Tuning suspension after fitting new components requires patience and a repeatable method. Guessing and making multiple changes at once produces results that cannot be interpreted or reproduced.
- Set a baseline. After installation, set all adjusters to the manufacturer’s recommended starting position. This is usually mid-range for both compression and rebound damping.
- Choose a test loop. Select a familiar road that includes a mix of smooth tarmac, surface changes, and at least one set of corners. Use the same loop for every test session.
- Adjust one setting at a time. Change only one setting per session, whether preload, compression damping, or rebound damping. Ride the loop and record your observations before making the next change.
- Read the bike’s behaviour. Suspension that is too stiff causes the bike to skip over bumps and feel nervous in corners. Overly stiff suspension reduces tyre contact with the road surface, lowering traction and rider confidence. Suspension that is too soft causes excessive pitch under braking and wallowing through corners.
- Read your body. Lower back pain signals rear shock issues; hand numbness and wrist fatigue point to front fork internals that need attention. Your body is a reliable diagnostic tool.
Record every setting change and its effect in a notebook or phone note. After three or four sessions, patterns emerge that make further refinement straightforward.
Pro Tip: Use a travel indicator on both forks and the rear shock linkage. After your test loop, check how close you came to full travel. If you are consistently using less than 70% of available travel, the setup is too stiff for your roads and riding style.
Key takeaways
A motorcycle suspension upgrade checklist works only when sag and spring rate are confirmed correct before any damping component is changed or replaced.
| Point | Details |
|---|---|
| Measure sag first | Rider sag of 25–30% of travel is the required baseline before any upgrade decision. |
| Fix spring rate before damping | If preload cannot achieve correct sag, replace the spring before touching damping adjusters. |
| Upgrade in stages | Start with seals and oil, then cartridge emulators, then rear shock replacement. |
| Balance front and rear | Changing rear ride height affects steering geometry; always assess both ends together. |
| Tune one setting at a time | Adjust preload, compression, or rebound separately and test on a consistent road loop. |
My view on where most riders go wrong
Sag before shocks: the order that actually matters
Most riders I speak to have already bought an expensive rear shock before they have ever measured their sag. The shock may be a quality unit, but it is set up on a spring that is wrong for their weight, which means the damping is working against itself from the first ride. The result is a bike that feels different but not necessarily better.
The uncomfortable truth about choosing performance suspension upgrades is that the most impactful changes are often the cheapest. Correct springs, fresh fork oil, and accurate sag settings transform a bike more reliably than a premium shock fitted over a worn and incorrectly loaded front end.
I am also wary of the instinct to go stiffer. Overly stiff suspension causes the tyre to skip rather than absorb bumps, which reduces grip precisely when you need it most. Stiffness is not a proxy for performance. The goal is compliance within a controlled range, not rigidity.
For touring riders and anyone carrying a pillion regularly, front and rear balance deserves more attention than any single component upgrade. A well-matched pair of mid-range units, correctly sprung and set up with accurate sag, will outperform mismatched premium hardware every time.
— Matteo
Suspension parts and upgrades at Sixrace
Sixrace stocks a broad range of motorcycle suspension components covering road, sport, touring, adventure, and off-road applications. The catalogue includes springs, rear shocks, fork internals, and cartridge kits from established manufacturers, with products matched by make, model, and year to simplify compatibility checks.

Whether you are replacing worn seals on a commuter or fitting a monotube shock to a loaded tourer, Sixrace provides the parts and the support to get the job done correctly. The Dynojet store on Sixrace is a strong starting point for fork upgrade components and tuning kits. For a reserved discount on motorcycle accessories and suspension parts, visit the Sixrace discount page and claim your offer before purchasing.
FAQ
What is the correct rider sag for a motorcycle?
Rider sag should be 25–30% of total suspension travel for most road bikes. Touring riders carrying heavy loads may target up to 35% for better load-carrying comfort.
How do I know if my spring rate is wrong?
If adjusting preload cannot bring sag into the recommended range, the spring rate is incorrect for your weight. The spring must be replaced before damping adjustments will have any meaningful effect.
What is the cheapest effective suspension upgrade?
Replacing fork seals, refreshing fork oil, and fitting correctly rated springs is the most cost-effective first step. Cartridge emulators are the next stage, typically costing £120–£200 and delivering noticeable improvement in fork damping.
Should I upgrade front and rear suspension at the same time?
Not necessarily, but changes to rear ride height affect steering geometry and should prompt a front suspension assessment. For touring or two-up riding, balancing both ends produces the best handling result.
How do I tune suspension after fitting new components?
Change only one setting at a time, whether preload, compression, or rebound damping. Test on the same road loop after each change and record the result before making the next adjustment.
 Italiano
 Deutsch
 Français
 Español
 English
 Polski