
You've finished the first lap, but your hands already feel like they're clamped around a jackhammer. The track is rough, your gloves are damp, and every landing makes your palms shift on the bars. By the time arm pump arrives, you're holding tighter to stay in control, which only makes the problem worse.
That's why manopole moto cross deserve more attention than a quick choice based on color or tread pattern. The grip is the contact point between your hands, gloves, throttle tube, and handlebar. Its compound, diameter, surface design, and installation all influence how lightly you can hold the bike while keeping accurate steering and throttle control.
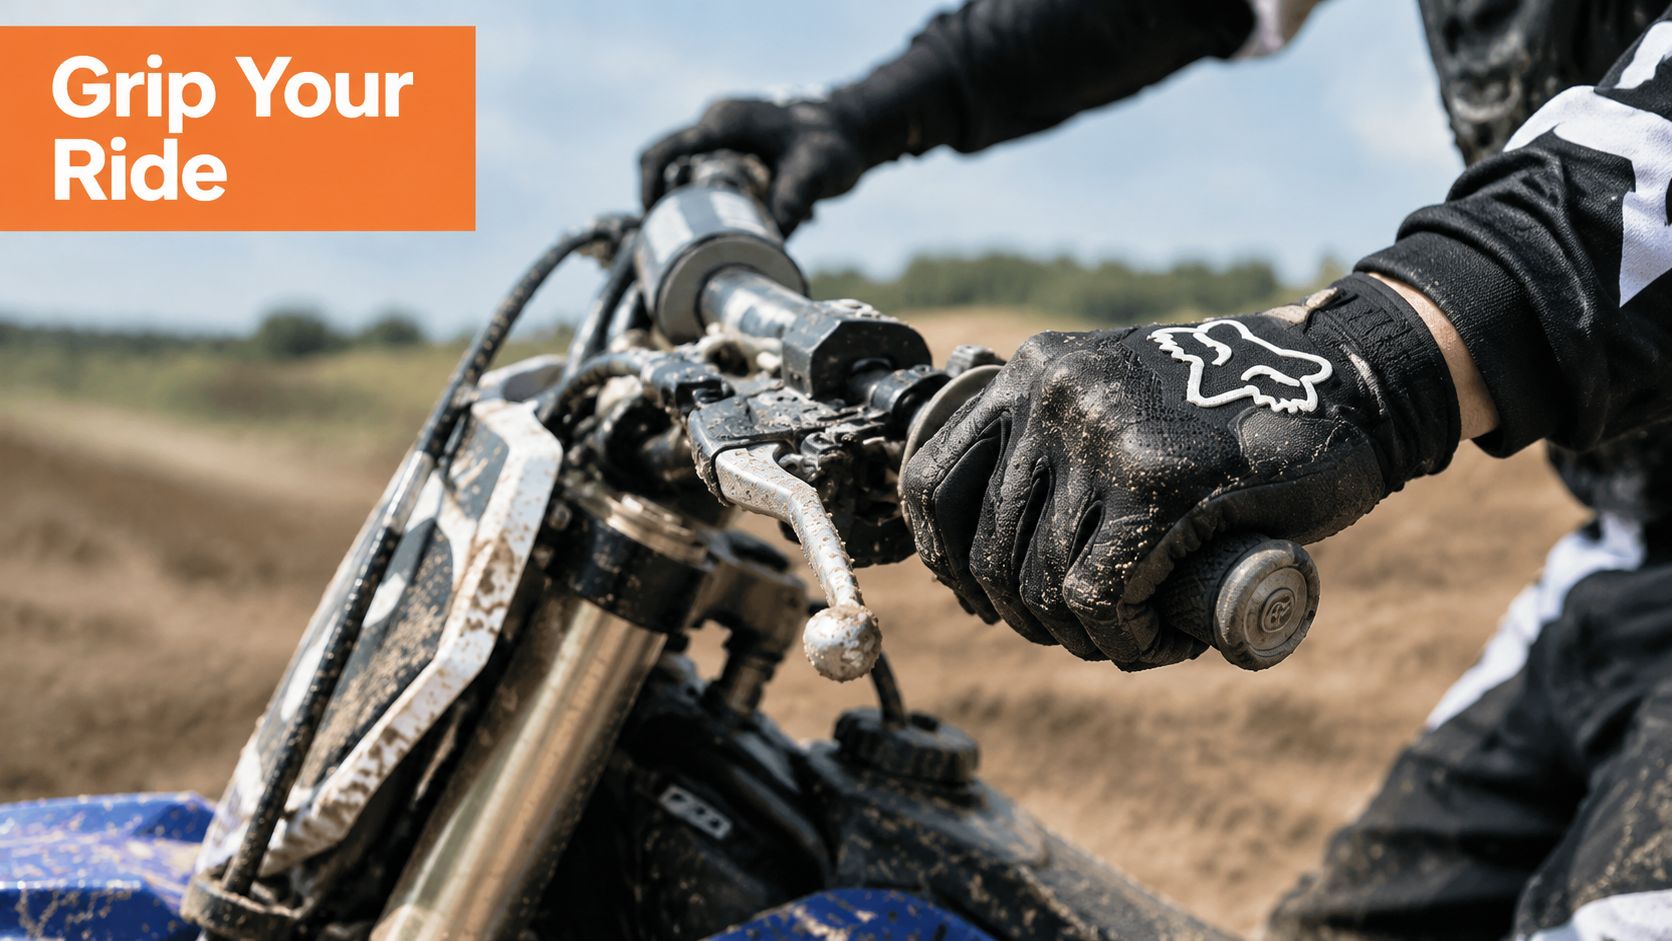
Control matters as much as comfort: the right grip doesn't replace good technique, but it can help you maintain a relaxed, consistent hold when the terrain becomes difficult.
This guide approaches grip selection like a workshop decision, not a catalog comparison. You'll see how grips evolved, how soft and firm compounds behave, how to match diameter to your hands, how to mount them without creating throttle problems, and why vibration should be treated as a complete setup involving grips, gloves, bars, and suspension. Riders looking for compatible cross parts can also browse the Sixrace motocross spare parts section while checking their bike's fitment.
Table of Contents
- What Motocross Grips Do and How They Evolved
- Soft Firm and Dual Density Compounds Explained
- Diameter Length and Handlebar Compatibility Made Simple
- How to Mount and Remove Grips Without Damage
- Vibration Fatigue and Durability What Grips Can Really Fix
- Your Final Checklist for Choosing Manopole Moto Cross
What Motocross Grips Do and How They Evolved
A motocross grip has a simple job, but it performs several tasks at once. It gives the glove a surface to push against, separates the palm from the metal handlebar, helps the rider control steering inputs, and provides a secure interface for throttle rotation on the right side.
The outer surface creates traction through raised ribs, diamonds, grooves, or waffle sections. The inner sleeve determines how the grip sits on the bar or throttle tube. A flange can help prevent the hand from moving inward, while the end may be closed or open depending on the control layout and whether handguards are installed.
From basic rubber to a control surface
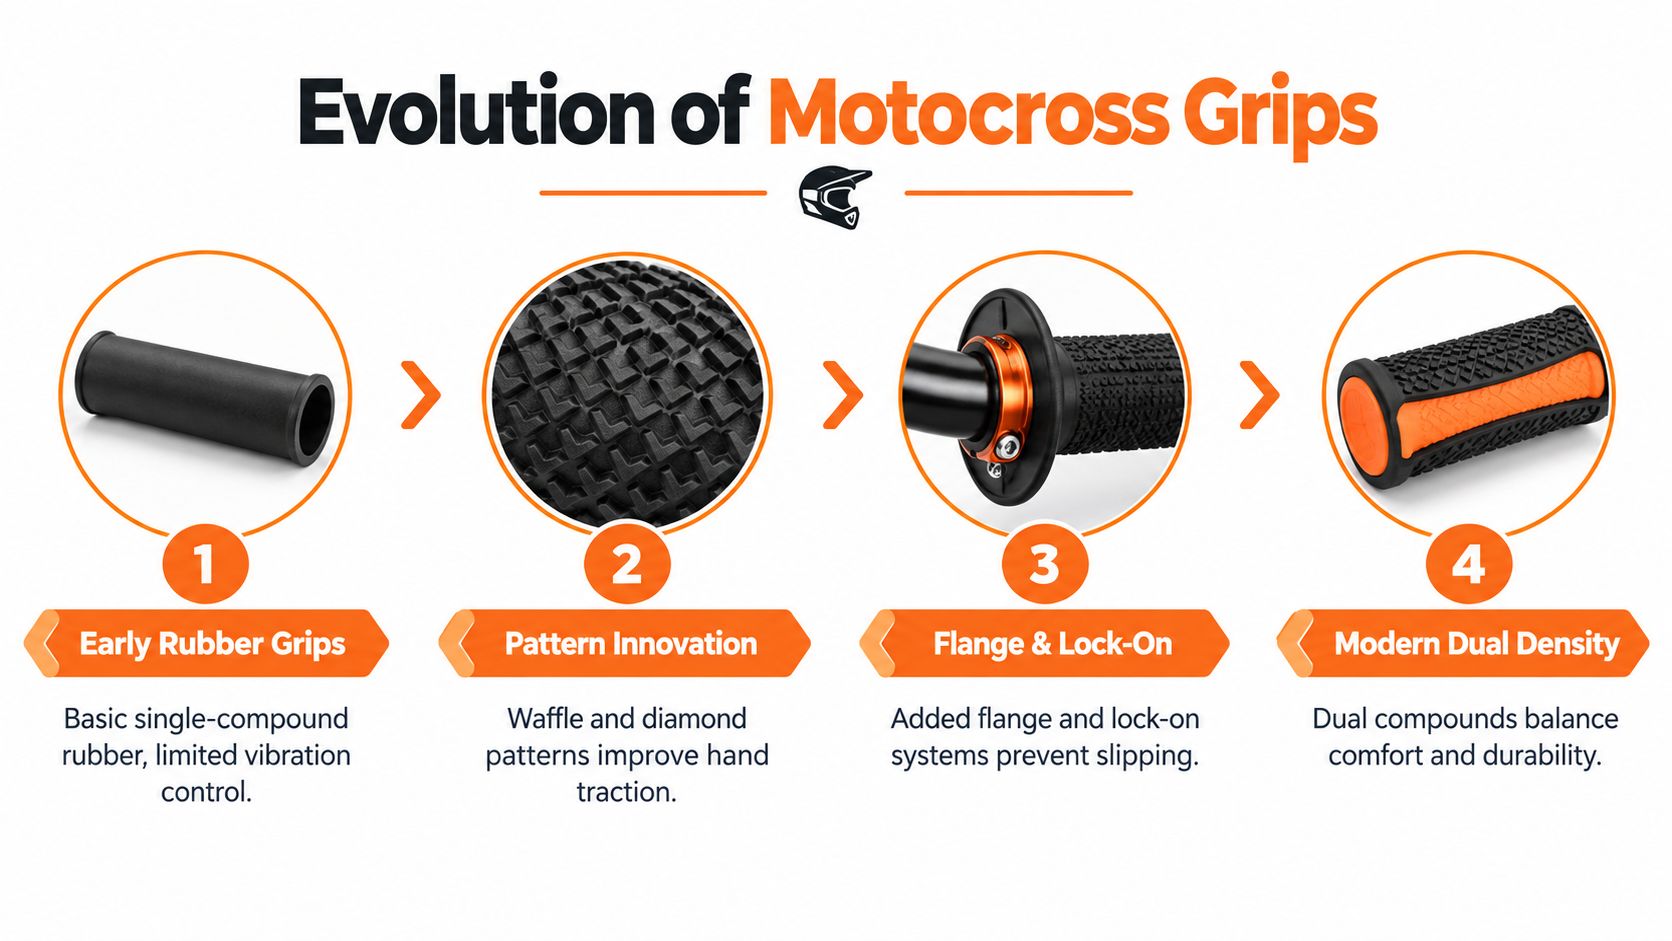
Early motorcycles already used basic rubber handlebar grips. By the 1950s, manufacturers had added an inboard rubber flange to help stop the rider's hand sliding toward the center of the motorcycle. That small change shows how grip design has always been connected to control and hand position, not only padding. These product-history details are documented by Motocross Action Magazine's history of favorite grips.
The modern motocross grip market reached a clear milestone in the mid-1970s, when Lance Moorewood cut a full-waffle grip into the first documented half-waffle design. After a photograph appeared in MXA, other manufacturers copied the idea, and the half-waffle style had become dominant in motocross by the 1980s, as described in the same motocross grip history.
Why pattern and compound now matter
Once every grip could perform the basic task of covering the bar, manufacturers gained room to differentiate through texture, rubber formulation, thickness, and control surfaces. A waffle section can flex under the fingers and offer a predictable feel, while a diamond pattern provides many small contact points. A flange can help define hand position, but it won't correct poor lever placement or a rider who grips too tightly.
The history also explains why modern grips shouldn't be judged by one feature alone. A soft compound with an aggressive pattern may feel excellent on a dry first ride but wear quickly in abrasive mud. A firmer grip can feel more precise and remain consistent longer, yet transmit more of the track's buzz into the hands. The useful question isn't “Which pattern is best?” It's “Which combination lets me keep control with the least unnecessary effort?”
Soft Firm and Dual Density Compounds Explained
Compound choice changes the character of the motorcycle at your hands. Think of a soft grip like the cushioned sole of a running shoe. It gives under pressure and smooths some sharp sensations. A firm grip is closer to a racing tire with a direct response, where the rider feels more of the surface and receives a quicker, harder signal through the bar.
Soft, firm, and dual-density grips can all work well. The right answer depends on terrain, riding position, hand pressure, glove choice, and how much wear you're willing to accept.
Soft compounds
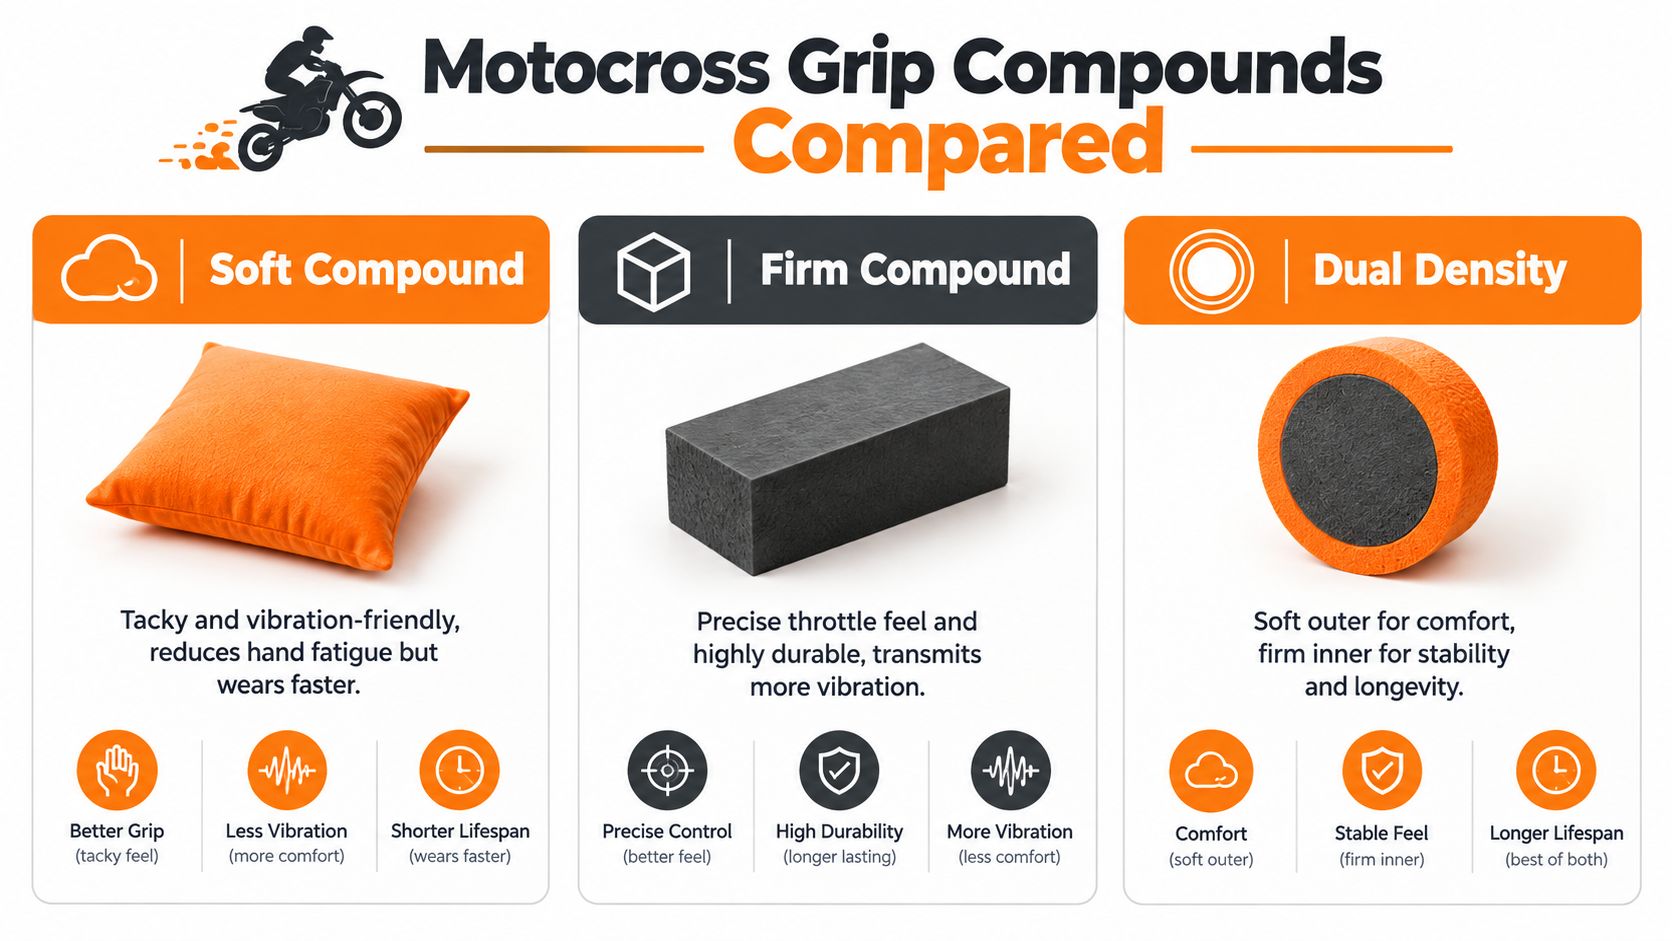
Soft rubber usually feels tackier and more forgiving. It can add compliance between the palm and handlebar, reducing the sharpness of high-frequency vibration that reaches the hands. That makes it a sensible choice for rocky trails, washboard sections, and long enduro-style rides where comfort and a relaxed hold matter.
The compromise is wear. A soft surface can abrade faster against mud, grit, gloves, and repeated movement. It can also feel less precise to riders who prefer a crisp throttle and steering response. If you ride short race sessions on hard-packed dirt, the added comfort may be more valuable than maximum service life. If you ride for long hours in abrasive conditions, inspect the surface regularly.
Firm compounds
Firm grips transmit a clearer bar feel. Riders who like to sense front-wheel loading, steering feedback, and throttle response directly may prefer them. They're also generally better suited to those who dislike a grip that compresses noticeably under the palm.
The cost is a harsher connection to the bike. A firm compound typically passes more vibration to the hands, especially when the rider's posture, bar angle, or suspension setup already creates excess shock. It may last well, but durability alone doesn't make it suitable for every rider.
Dual-density designs
A dual-density grip places different compounds in different areas. The outer layer can stay softer for palm comfort, while the inner structure remains firmer to support the grip on the bar and preserve a stable control feel.
This is useful for riders who want a compromise rather than an extreme. The design may work well for mixed terrain, regular weekend riding, and riders who alternate between seated corners and standing rough sections. It won't eliminate vibration or prevent all wear, but it can balance the competing demands more effectively than a single compound.
Pattern changes the result. A full waffle surface can feel flexible under the fingers, a half-waffle design offers a more open palm area, and a diamond pattern gives consistent contact across the hand. For wet or muddy conditions, choose a pattern that clears contamination and still feels secure through your gloves.
A simple decision rule works well: choose soft or dual-density when vibration and long riding time dominate, and consider firm or firmer dual-density when direct feedback and abrasion resistance matter most. Equipment elsewhere matters too. For example, the Stivali Motocross GMX MACH 80 WHITE is a separate protective item, so don't treat boot selection as a substitute for getting your grip setup right.
Diameter Length and Handlebar Compatibility Made Simple
Grip sizing causes confusion because riders often focus on length while ignoring outer diameter. The bar may have a standard control area, but the finished feel changes significantly when the grip wall is thicker, the compound is softer, or the rider wears heavily padded gloves.
Start with compatibility, then adjust feel.
Four checks before ordering
Confirm the bar and control layout. A motocross handlebar normally uses a grip area designed around the common control-bar format, but the throttle side isn't just bare metal. It fits over a throttle tube, so the inside diameter and sleeve design must match that assembly.
Measure the grip length you need. Cross bars and controls can vary in usable space. A grip that's too long may interfere with handguards or controls. One that's too short can leave an exposed section that catches mud and reduces support.
Judge outer diameter with gloves on. A larger diameter can spread pressure across more of the palm and suit bigger hands, while a smaller diameter can make it easier for smaller hands to wrap around the bar. Thick gloves increase the effective diameter, so test the combination rather than judging the grip alone.
Choose the mounting type. Slip-on grips rely on a clean bar, suitable adhesive, and secure installation. Lock-on grips use a clamping system and can simplify replacement, but the clamp and bar-end arrangement must fit the bike and handguard setup.
The Sixrace handlebar support kit for Yamaha FZ8 Fazer ABS 800 illustrates why model-specific compatibility matters in the wider cockpit. A component can be designed for a particular motorcycle without automatically confirming that every grip, bar, or control combination will fit. Check the exact bike, bar, throttle tube, and handguard configuration.
Grip Sizing Quick Match for Cross Riders
| Hand Size | Recommended Outer Diameter | Best Compound Priority | Ideal Use Case |
|---|---|---|---|
| Smaller hands | Slimmer feel that allows full finger wrap | Soft or compliant dual-density | Technical riding and lighter control pressure |
| Medium hands | Balanced diameter with moderate cushioning | Dual-density or medium compound | Mixed motocross and trail use |
| Larger hands | Fuller diameter that spreads palm pressure | Soft dual-density or firm, depending on feedback preference | Long standing sections and rough terrain |
These are starting points, not fixed measurements. If your fingers barely reach around the grip, it's too large for your technique. If your palm feels cramped and your fingers overlap excessively, it may be too small. Your ideal setup lets you keep the wrist neutral, elbows slightly bent, and hands relaxed while still reaching the controls naturally.
How to Mount and Remove Grips Without Damage
A grip can be the right model and still feel wrong if it twists, sits crooked, or interferes with the throttle. Clean installation is part of grip performance. Before starting, place the bike securely, remove the bar ends or handguard components as needed, and make sure you can test the throttle safely once the work is complete.
Prepare the contact surfaces
Remove the old grips carefully. If they're being discarded, cutting them lengthwise with a guarded blade is usually faster, but keep the tool away from wiring, the throttle tube, and your hands. If you want to save the grips, inject compressed air under the edge and work around the sleeve while gently lifting it.
Clean the bare handlebar and throttle tube with isopropyl alcohol and a clean rag. Remove old adhesive, rubber residue, and dirt. On the throttle side, inspect the tube for cracks, distortion, or burrs. A damaged tube can create drag or prevent the throttle from returning correctly.
Choose an installation method
There are three practical approaches:
- Compressed air: Feed the nozzle under the grip edge and use short bursts while pushing or pulling the grip. This can help with removal and avoids adding liquid inside the sleeve.
- Isopropyl alcohol: A small amount can lubricate the sleeve during installation and evaporate as the grip settles. Don't flood the bar.
- Grip glue: Use a thin, even layer where the grip needs permanent security. Excess adhesive can pool under the sleeve, create lumps, and make alignment harder.
Slide the grip on quickly while the chosen method is still working. Align the waffle, logo, or palm pattern before the grip reaches its final position. Don't twist aggressively after the adhesive starts to set.
Finish with a safety check
Wire, safety clamps, or another approved retention method can add security for demanding off-road use, depending on the grip and workshop practice. Let adhesive cure fully according to its product instructions, then confirm that both grips are solid.
On the throttle side, rotate the tube through its full movement and release it. It must snap back without sticking, rubbing, or contacting the handguard. If it doesn't, stop and correct the problem before riding.
Workshop rule: a grip that feels secure but causes throttle drag isn't finished. Test return movement every time.
Vibration Fatigue and Durability What Grips Can Really Fix
Grip softness helps, but it isn't a complete hand-arm vibration solution. A grip adds compliance between the palm and the bar, so soft rubber, foam over-grips, and dual-density materials can reduce the sharpness of high-frequency buzz. That can make the bike feel less tiring, especially across rough terrain.
The mechanism has limits. An independent motocross study found that professional riders can reach the EU exposure action value in about 20 minutes and the exposure limit value in about 1 hour, while recreational riders reach those thresholds in about 30 minutes and 2 hours. The same study reported that handlebar mount changes weren't effective at reducing vibration, a warning against promising that one component will solve the whole problem. See the motocross vibration exposure study for the documented exposure context.
Build the system around the grip
Your hands receive the result of several choices at once:
- Compound and diameter: a compliant, correctly sized grip can reduce the need to squeeze hard.
- Gloves: padding and material thickness change how the grip feels and how vibration reaches the palm.
- Bar setup: bar rotation and lever angle should support a neutral wrist with elbows slightly bent.
- Bar-end mass: added mass can influence transmitted vibration, although it should be evaluated alongside the rest of the cockpit.
- Suspension and technique: harsh impacts, poor setup, and locked elbows can send more shock into the hands than the grip can absorb.
Technical guidance on rider ergonomics links neutral wrist position, slightly bent elbows, and lighter grip pressure with reduced forearm load. It also identifies grip thickness, bar-end mass, and vibration isolation as useful levers when combined, rather than relying on a single part. The motorcycle ergonomics adjustment guide provides that broader setup perspective.
Comfort versus full-season durability
Rubber remains common, while silicone and foam options appeal to riders seeking comfort and damping. Market coverage also describes rubber and silicone-based grips as accounting for 71% of installations, linked to vibration absorption and affordability, in the motorcycle handle-grip market report. Treat that figure as market-report data, not a guarantee that one material suits every rider.
Softer, stickier compounds may wear faster when grit, water, mud, clamps, or aggressive knurling repeatedly abrade the surface. The best race-day feel may not deliver the most consistent feel over a season. Track riding hours, inspect the pattern for flattening or tearing, and replace the grip when it moves, loses its surface, or forces you to squeeze harder.
For wider market context, one independent forecast estimates the motorcycle handle-grip category at roughly USD 0.7 billion in 2024 and around USD 1.34 billion by 2033, a projection reported by Verified Market Reports. The useful takeaway isn't the forecast itself. It's that riders can choose from increasingly specialized products, but they still need to judge them as part of a complete vibration and fatigue system.
Your Final Checklist for Choosing Manopole Moto Cross
Stand beside the bike before you order. Hold the bars in your normal riding position, with your gloves on, and notice whether your wrists stay neutral or bend toward the controls. That quick check often reveals more than choosing a grip from a product photograph.
Buying checklist
- Confirm the fit: Check bar type, throttle tube, grip length, handguards, and whether you need open or closed ends.
- Choose for terrain: Soft or dual-density compounds suit rough, long, vibration-heavy riding. Firmer compounds suit riders who prioritize direct feedback and wear resistance.
- Match the diameter: Smaller hands usually need a slimmer feel, while larger hands may prefer more palm support. Gloves can change the final result.
- Read the pattern: Waffle, half-waffle, and diamond surfaces offer different finger and palm contact. Choose the one you can hold lightly in wet or muddy conditions.
- Plan the installation: Have isopropyl alcohol, a clean rag, suitable grip glue, compressed air if available, and the correct tools for bar ends or handguards.
- Inspect the throttle tube: Replace or repair damaged parts before fitting a new grip. Test snap-back with the engine off.
- Secure the grip: Check for twisting, movement, lifted edges, and adhesive that has failed or remained soft.
- Watch wear: Mud and grit can flatten patterns and abrade soft compounds. Replace grips when control consistency starts to decline, not only when the rubber looks completely destroyed.
- Review the whole cockpit: Bar rotation, lever angle, gloves, suspension condition, and riding pressure all affect fatigue.
A good grip should disappear from your attention once you're riding. You shouldn't be thinking about a slipping palm, a sticky throttle, or a harsh buzz through the gloves. If the setup makes you squeeze harder, change one factor at a time and evaluate it across the terrain you ride.
Sixrace provides motorcycle accessories and replacement parts across off-road categories, with product pages that identify specific compatibility where applicable. Visit Sixrace to compare motocross-related components, verify fitment for your bike, and build a cockpit that supports both control and long-term riding comfort.
 Italiano
 Deutsch
 Français
 Español
 English
 Polski