
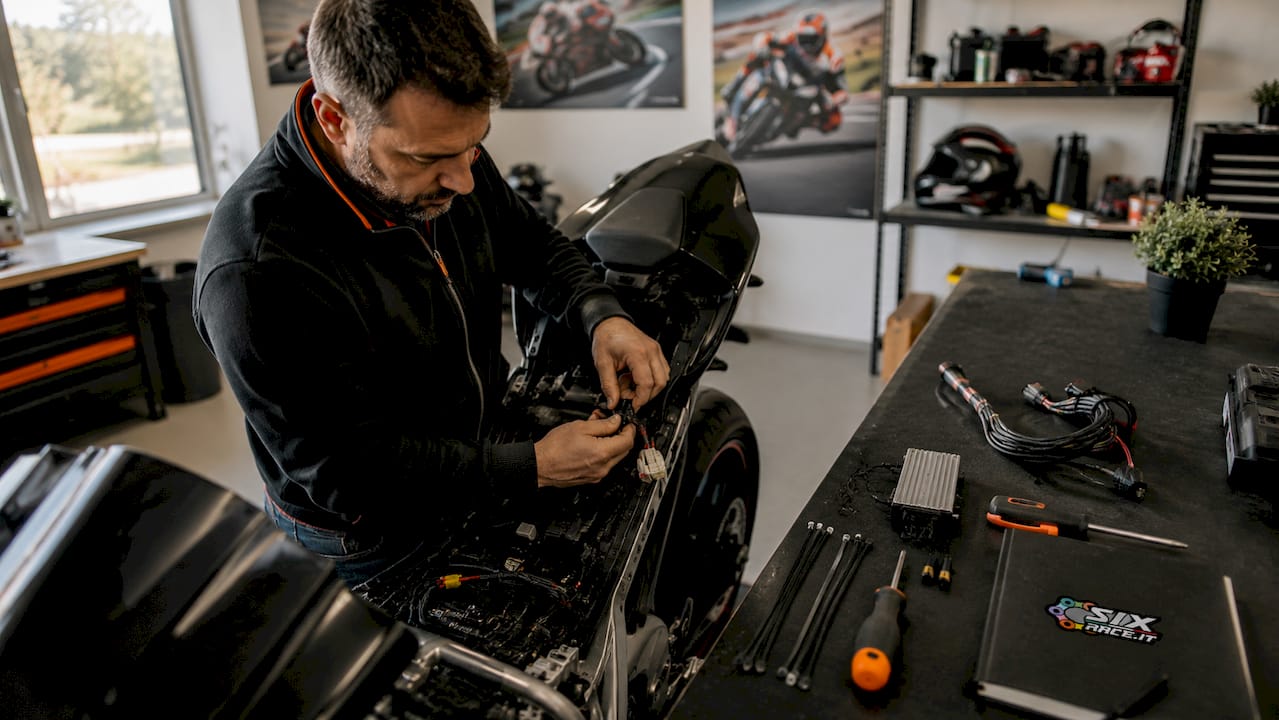
A motorcycle fuel controller is a piggyback module that intercepts injector signals between the stock ECU and the fuel injectors, adjusting fuel delivery without altering the factory ECU programming. This approach gives you measurable gains in throttle response, mid-range torque, and fuel efficiency, particularly after fitting an aftermarket exhaust or air filter. The installation is fully reversible, requires no wire cutting, and typically takes 1–2 hours with basic hand tools. Sixrace stocks Dynojet and HealTech products matched by make, model, and year, so compatibility is straightforward before you even pick up a spanner.
What do you need before starting the installation?
Preparation is the single factor that separates a clean installation from a frustrating one. Gather every item before touching the motorcycle.
Tools required:
- Socket set (8 mm, 10 mm, and 12 mm are most common)
- Screwdrivers (Phillips and flathead)
- Torque wrench
- USB cable (usually supplied with the controller kit)
- Laptop or desktop computer with the manufacturer’s PC software installed
- Electrical contact cleaner spray
- Zip ties and adhesive mounts for securing the module
Parts and documentation required:
- Model-specific fuel controller kit with wiring harness
- Your motorcycle’s service manual (for fuel tank removal torque specs)
- A printed or digital copy of the correct base map for your exact exhaust and intake configuration
Before starting, disconnect the battery negative terminal. This prevents accidental shorts when handling injector connectors. Verify the battery ground point is clean and free of corrosion, because poor ground connections are a primary cause of intermittent faults after installation.
Pro Tip: Clean every connector with electrical contact cleaner before plugging in the harness. Oxidised pins cause signal dropouts that mimic sensor failures and are notoriously difficult to diagnose after the fact.
Confirm your software is installed and the correct map file is downloaded before the motorcycle is even moved. Doing this in advance means you can load the map immediately after the physical installation, rather than waiting for a download with the tank off and the bike in pieces.
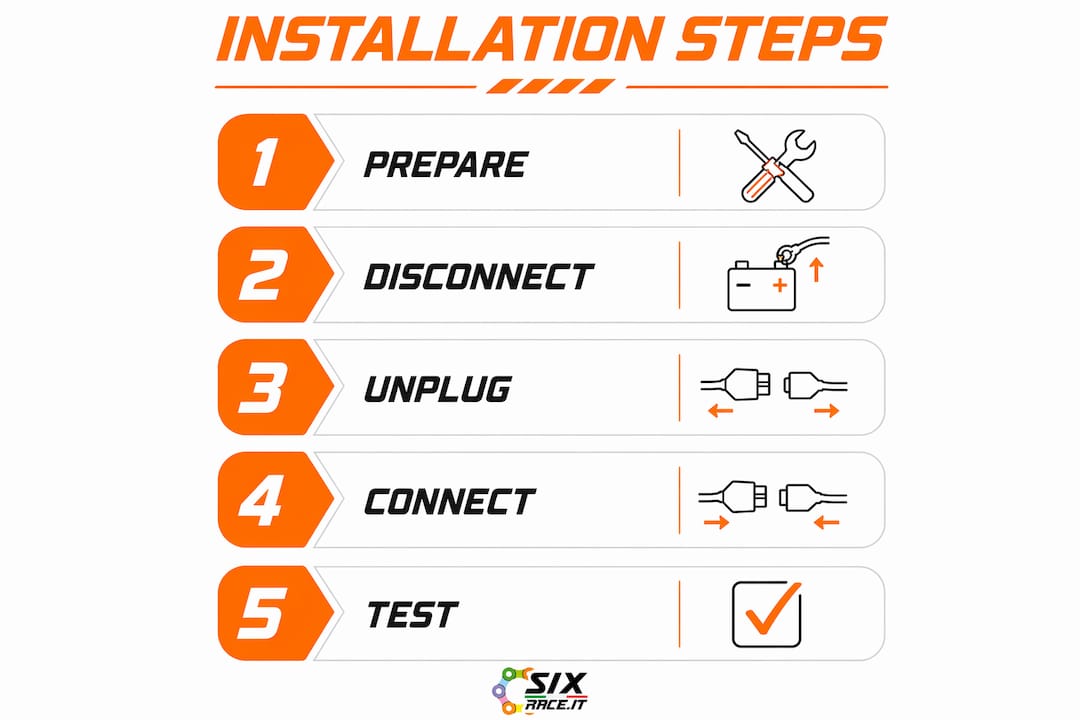
How to install a motorcycle fuel controller: step by step
The plug-and-play connection method uses OEM-style connectors throughout, so no splicing or soldering is required. The process below applies to the majority of modern fuel-injected motorcycles.
-
Remove the fuel tank or seat panel. Consult your service manual for the correct procedure. On most sport and naked bikes, the tank lifts after removing two bolts and disconnecting the fuel line. On touring models, a side panel may be sufficient to access the injector connectors.
-
Locate the injector connectors. Most inline-four engines have four injector plugs running along the top of the engine. V-twins typically have two, one per cylinder. Identify each connector before unplugging anything.
-
Locate the throttle position sensor (TPS) wire. The TPS connector is usually found near the throttle body. The fuel controller harness taps into this signal to read throttle position and adjust fuel delivery accordingly.
-
Connect the fuel controller harness. Unplug each injector connector from the stock loom. Plug the fuel controller harness in between, connecting the controller side to the injector and the pass-through side to the stock loom. Repeat for each injector. Connect the TPS tap as directed by the kit’s instructions.
-
Connect the ground wire. Route the controller’s ground wire directly to the battery negative terminal. A chassis ground point is acceptable only if it is clean, bare metal with no paint or corrosion.
-
Mount the controller module. Secure the module under the seat or near the airbox using the supplied adhesive mount and zip ties. Keep it away from the exhaust and any moving parts. The module should sit flat and not be under tension from the harness.
-
Reconnect the battery and run a pre-map check. Before loading any map, reconnect the battery and switch the ignition on. The controller’s indicator light (if present) should illuminate. Check that no fault codes appear on the instrument cluster.
-
Connect via USB and load the base map. Plug the USB cable between the controller and your laptop. Open the manufacturer’s software, select your motorcycle model, exhaust type, and air filter configuration, then upload the appropriate base map.
Pro Tip: Take a photograph of every connector before unplugging it. On complex wiring looms, it is easy to confuse injector connectors with sensor plugs, particularly on inline-four engines where the plugs sit close together.
Installation time averages 1–2 hours for most touring and sport models using basic hand tools. Riders with less experience should allow additional time for reading the service manual and double-checking connections before reassembly.

How do you tune a fuel controller after installation?
Loading a base map is the starting point, not the finish line. A base map provides a calibrated starting fuel profile for a known exhaust and intake combination, but your specific bike will benefit from further refinement.
The autotune process works as follows:
- Fit a wideband oxygen sensor to the exhaust (some controllers include this; others require a separate module)
- Ride over 50–100 miles across varied throttle conditions: town riding, motorway cruising, and hard acceleration
- The autotune function reads the air/fuel ratio in real time and adjusts the fuel map incrementally
- After the session, connect via USB and review the logged corrections in the software
Running an autotune session over 50–100 miles across varying throttle conditions produces a map tailored to your specific motorcycle, exhaust, and riding style. This is significantly more accurate than a static base map alone.
Dyno tuning is the most accurate alternative. A rolling road session with a trained tuner produces a fully optimised map in a controlled environment, typically within two to three hours. The cost is higher, but the result is a map that accounts for your specific engine’s tolerances.
Stock EFI maps are lean by design to meet emissions standards. Aftermarket tuning enriches the mixture, which improves performance but may affect fuel consumption and local emission compliance. Riders in regions governed by Euro 5 standards should note that newer fuel controllers apply emission-compliant tuning limits to remain street-legal, which restricts the range of adjustment compared to older devices.
Pro Tip: Save your stock base map as a separate file before making any changes. If you ever need to return the motorcycle to factory specification for a warranty claim or resale, you can reload the original map in minutes.
What are the most common fuel controller problems?
Most issues that appear after installation trace back to one of three causes: a poor ground connection, an incorrect map, or a loose harness connector.
Symptoms and solutions:
- Erratic idle or stalling: Check the ground wire first. A secure ground to the battery negative terminal eliminates the majority of intermittent faults. Recheck the TPS connector for a firm seat.
- No change in performance after installation: Verify the correct map is loaded. An incorrect base map (wrong exhaust or intake configuration) produces little or no improvement. Update the controller firmware via the manufacturer’s software.
- Fault codes on the instrument cluster: Disconnect and reconnect each injector harness plug. A partially seated connector triggers sensor fault codes on closed-loop EFI systems.
- Poor cold-start behaviour: Cold weather affects sensor readings. Some controllers allow cold-start enrichment adjustments in the software. Check that the coolant temperature sensor connector is undisturbed.
- Performance degradation over time: Inspect the harness routing for chafing against frame edges or the exhaust. Replace any damaged sections of the loom.
Riders fitting a fuel controller to a closed-loop EFI system should verify whether the system’s oxygen sensor corrections conflict with the controller’s adjustments. On some motorcycles, the stock ECU actively corrects the fuel mixture back toward the factory target, partially overriding the controller’s map. Disabling the closed-loop correction in the software, where the controller permits this, resolves the conflict.
Routine maintenance is straightforward. Check connector integrity every 5,000 miles and install firmware updates when the manufacturer releases them. Updates often include revised base maps for new exhaust systems and corrections for known software issues.
Key takeaways
A successful fuel controller installation depends on correct preparation, a clean ground connection, and post-installation tuning with a model-specific map.
| Point | Details |
|---|---|
| Preparation is critical | Gather all tools, the correct harness, and the base map file before starting. |
| No wire cutting required | The plug-and-play harness connects between stock injector plugs and the ECU loom. |
| Ground connection quality | Route the ground wire directly to the battery negative terminal to prevent faults. |
| Autotune over 50–100 miles | Ride varied throttle conditions to let the controller refine the fuel map accurately. |
| Fully reversible installation | Removing the controller and reloading the stock map restores factory specification. |
Why preparation matters more than the installation itself
I have seen riders spend hours troubleshooting a fuel controller that was installed in under 45 minutes. In almost every case, the problem was not the installation. It was the preparation, or the lack of it.
The most common beginner mistake is fitting the correct controller to the wrong map. A base map written for a full aftermarket exhaust system will run rich on a stock exhaust, producing worse throttle response than the factory ECU delivered. Always match the map to your exact hardware configuration, not just your motorcycle model.
The second mistake is treating the installation as permanent from the start. The reversibility of a piggyback controller is one of its genuine advantages over an ECU flash. If you are not satisfied with the result, or if a warranty claim requires factory specification, you can remove the unit and reload the stock map without any trace of modification. That flexibility is worth preserving by keeping the original harness connectors clean and undamaged throughout the process.
Performance tuning changes the engine’s combustion profile, affecting throttle response and emissions. Balance the gains against your local regulations and your manufacturer’s warranty terms before committing to an aggressive tune. A modest, well-matched map often delivers more usable performance than a maximum-enrichment tune that causes flat spots or emission issues.
Patience during the autotune process pays dividends. Riders who complete the full 50–100 mile autotune session consistently report smoother throttle response and better fuel efficiency than those who stop after 20 miles. The controller needs exposure to the full throttle range to build an accurate correction map.
— Matteo
Sixrace: fuel controllers and performance accessories
Sixrace carries a full range of Dynojet fuel controllers and HealTech tuning products, each matched by motorcycle make, model, and year to remove the guesswork from compatibility. Whether you ride a sport bike, an adventure tourer, or a motocross machine, the catalogue covers the components you need for a complete installation.
Sixrace customers across Europe benefit from competitive pricing, tracked shipping, and multilingual support. The motorcycle accessories catalogue includes installation tools, consumables, and replacement parts alongside the fuel management products themselves. Use the Sixrace reserved discount to get the best price on your next performance purchase.
FAQ
What is a piggyback fuel controller?
A piggyback fuel controller is a module that sits between the stock ECU and the fuel injectors, adjusting fuel delivery signals without overwriting the factory ECU programming. The stock ECU remains fully active, and the controller can be removed at any time to restore factory specification.
How long does a fuel controller installation take?
Installation averages 1–2 hours for most motorcycle models using a socket set, screwdrivers, and a torque wrench. Riders unfamiliar with their motorcycle’s wiring layout should allow additional time.
Will a fuel controller affect my motorcycle’s warranty?
Because the installation requires no permanent wiring modifications, removing the controller and reloading the stock map returns the motorcycle to factory specification. This preserves warranty flexibility in a way that an ECU flash does not.
Do fuel controllers work on closed-loop EFI systems?
Fuel controllers function on closed-loop EFI systems, but the stock ECU’s oxygen sensor corrections can partially override the controller’s adjustments. Disabling the closed-loop correction within the controller’s software resolves this conflict on systems where the feature is available.
Are fuel controllers street-legal in Europe?
Newer fuel controllers comply with Euro 5 emission standards by applying tuning limits that keep adjustments within street-legal boundaries. Riders should verify local regulations before using aggressive tune profiles, as modifications that increase emissions may affect road legality.
 Italiano
 Deutsch
 Français
 Español
 English
 Polski