
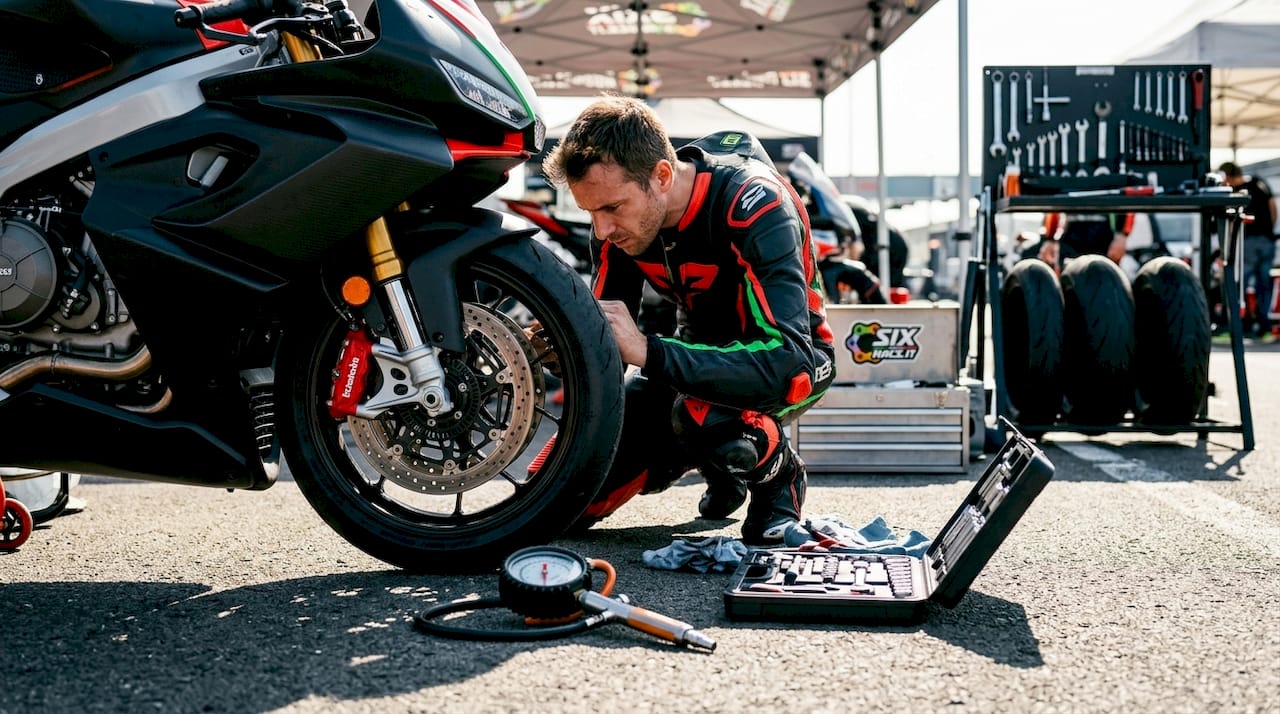
A motorcycle track prep safety inspection is a mandatory technical audit that determines whether your bike is safe and legal to enter the circuit. Every track day organiser requires riders to pass this check before they turn a wheel in anger. The standards are specific: minimum 2mm brake pad material, tyres no older than 4–5 years regardless of tread depth, and zero fluid leaks. The Motorcycle Safety Foundation’s T-CLOCS framework (Tires, Controls, Lights, Oil, Chassis, Stands) and AHRMA 2026 tech inspection standards form the two foundational references for any serious pre-track inspection checklist. Get this process right and you will breeze through the gate. Get it wrong and you will be watching from the pit lane.
What tools and materials do you need for a track day prep checklist?
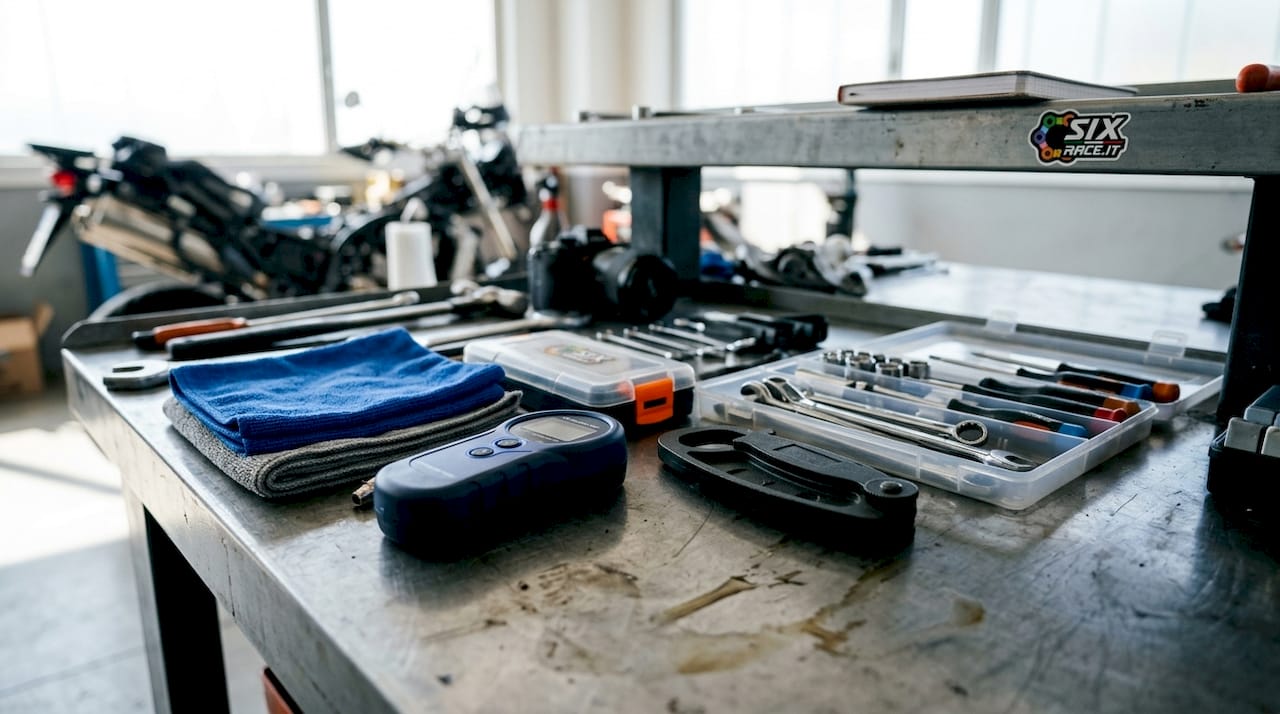
Arriving at the circuit without the right tools is the fastest way to fail a tech inspection on the spot. Gather everything before the day, not on the morning of the event.
Inspection tools:
- Brake pad gauge or feeler gauge (to verify the 2mm minimum)
- Tyre pressure gauge (digital, for accurate cold readings)
- Torque wrench (to check fastener tightness)
- Chain tension gauge or ruler
- Safety wire pliers and stainless steel safety wire
Consumables and fluids:
- Fresh DOT 4 or DOT 5.1 brake fluid
- Track-approved coolant (water or a wetting agent, since glycol is banned at most circuits due to contamination risk)
- Chain lubricant
- Brake cleaner and degreaser
- Clean cloths and a bucket
Compliance materials:
- Painters’ tape or electrical tape (for mirrors, headlights, and indicators)
- Cable ties and spare bolts
Pro Tip: Buy a dedicated track day kit bag and keep it stocked year-round. Restocking after each event takes ten minutes and saves hours of panic before the next one.
| Item | Purpose |
|---|---|
| Brake pad gauge | Confirms pads meet the 2mm minimum thickness |
| Tyre pressure gauge | Sets correct cold pressures for track conditions |
| DOT 4 or 5.1 brake fluid | Replaces degraded fluid before it causes brake fade |
| Painters’ tape | Covers mirrors and lights to prevent glass debris |
| Safety wire and pliers | Secures fasteners to AHRMA 2026 standards |
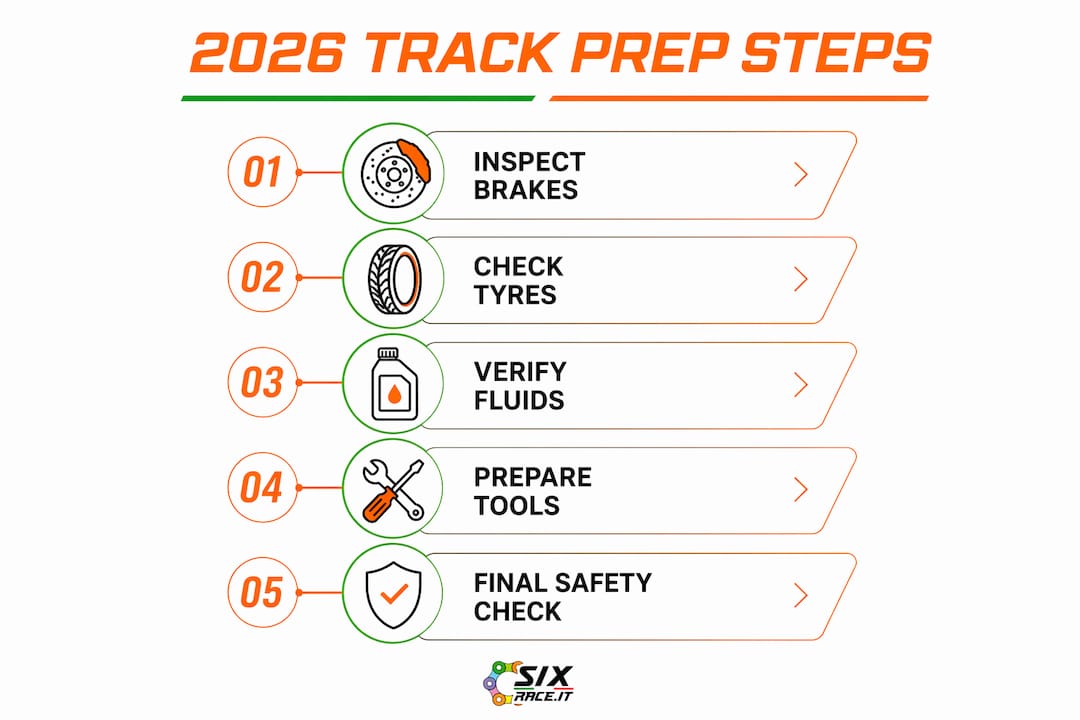
How to perform a complete mechanical inspection for 2026 track day standards
A thorough mechanical check follows a logical sequence. Skipping steps or working in a random order leads to missed faults.
Tyres and pressures
- Check the tyre sidewall for the manufacture date (the four-digit DOT code). Tyres older than 4–5 years must be replaced, even if the tread looks fine. Heat cycling degrades the rubber compound internally, and no inspector will pass an aged tyre.
- Inspect tread depth across the full width of the contact patch. Look for cuts, bulges, or flat spots from street riding.
- Set cold tyre pressures to track-specific values. Front pressure around 30 psi and rear around 28–30 psi are standard starting points, though your tyre brand’s data sheet and the specific circuit conditions will refine these figures.
Brakes and brake fluid
- Measure brake pad thickness front and rear. Anything below 2mm fails inspection immediately.
- Inspect brake discs for scoring, warping, or cracks.
- Check brake fluid colour and age. Fluid darkened by heat or age compromises stopping power at track speeds. Flush and replace with fresh DOT 4 or DOT 5.1 if the fluid is over one year old or visibly discoloured. You can source compliant brake fluids and pads to meet these standards.
- Squeeze both levers and check for sponginess, which indicates air in the system.
Pro Tip: Bleed your brakes at home two days before the event, not the night before. This gives you time to spot any issues with the caliper or master cylinder before you are under pressure.
Chain and drivetrain
Chains that are safe for street riding can bind or fail under the sustained high speeds of a track session. Track conditions impose extra mechanical stress that demands more stringent maintenance than routine road use.
- Clean the chain thoroughly with degreaser and inspect each link for stiff spots, corrosion, or damaged rollers.
- Check chain tension according to your owner’s manual. Adjust if the slack is outside specification.
- Lubricate with a quality chain lubricant after cleaning.
Controls, fasteners, and safety wiring
- Check throttle operation: it must snap closed immediately when released. Any sticking is an automatic rejection.
- Inspect brake and clutch levers for bends, cracks, or loose pivot bolts.
- Check foot pegs, heel guards, and rear sets for security.
- Inspect all visible fasteners. Per AHRMA 2026 standards, safety wire must be installed so the wire pulls fasteners in the tightening direction. Incorrect wiring direction can actually loosen a fastener under vibration, which defeats the purpose entirely.
Lights, mirrors, and compliance items
- Remove or tape over mirrors, headlights, indicators, and the number plate as required by your event organiser. Painters’ or electrical tape is the accepted method for lenses. The goal is to eliminate glass debris in the event of a crash.
- Replace glycol-based coolant with water or an approved wetting agent. Glycol on a track surface is a serious hazard for other riders.
What common mistakes cause failure at track day tech inspections?
Most tech inspection failures are avoidable. They share a common cause: riders treating the inspection as a formality rather than a genuine safety audit.
- Mirrors and lights left uncovered. Forgetting to tape mirrors is the single most common reason for rejection at the gate. Carry tape in your kit bag and apply it before you leave home.
- Old brake fluid. Brake fluid over one year old can boil under track braking loads, causing brake fade at the worst possible moment. Inspectors increasingly check fluid colour as a proxy for age.
- Tyres past their age limit. Riders often argue that their tyres have plenty of tread. The inspector does not care. The DOT date code is the deciding factor, not visual tread depth.
- Chain neglect. A chain that feels fine on the road can bind under sustained high-speed compression on track. Clean, tension, and lubricate the chain as a non-negotiable step.
- Hidden fluid leaks. Oil or coolant seeping from a gasket or hose joint will end your day immediately. A thorough pre-inspection wash reveals these leaks before the inspector does.
Thorough cleaning before inspection functions as a diagnostic tool. AHRMA 2026 guidance identifies cleaning as a vital step to prevent lost track time, because it exposes leaks, cracks, and loose fasteners that are invisible under road grime.
Skipping the wash is not saving time. It is hiding problems until the worst moment.
How to prepare your bike on the day of the track
The morning of a track day is not the time for major work. It is the time for a final, systematic check that confirms everything you did at home is still correct.
- Arrive early. Give yourself at least 90 minutes before your session. If the inspector finds a minor issue, you need time to fix it without missing your slot.
- Perform a T-CLOCS check. The Motorcycle Safety Foundation’s T-CLOCS system covers Tires, Controls, Lights, Oil, Chassis, and Stands. It takes 5–10 minutes and catches issues that routine maintenance misses. Run through it in order, every time.
- Recheck tyre pressures. Pressures change overnight, especially in cold weather. Set them cold before the bike moves.
- Confirm all tape is secure. Tape applied the night before can lift at the edges. Press it down firmly and add a second layer over any loose sections.
- Check for new fluid spots under the bike. A fresh oil patch on the floor of your van or trailer means something has changed since your workshop prep.
- Review flag signals and track protocols. Know what every flag means before you enter the circuit. A yellow flag means hazard ahead; reduce speed and do not overtake. A red flag means stop immediately and return to the pits. Understanding these signals is as much a part of track safety as any mechanical check.
Pro Tip: Photograph your bike from multiple angles before the event. If a marshal or inspector queries a pre-existing scratch or mark, you have timestamped evidence that it was not caused on track.
Key takeaways
A motorcycle track prep safety inspection is the single most effective step you can take to protect yourself, your bike, and other riders on circuit day.
| Point | Details |
|---|---|
| Brake pads and fluid | Replace fluid over one year old; confirm pads exceed the 2mm minimum before arrival. |
| Tyre age and pressure | Reject tyres older than 4–5 years; set cold pressures to approximately 28–30 psi rear and 30 psi front. |
| Chain maintenance | Clean, tension, and lubricate the chain specifically for track stress, not just street standards. |
| Compliance items | Tape mirrors, lights, and indicators before leaving home to avoid rejection at the gate. |
| T-CLOCS final check | Run the Motorcycle Safety Foundation’s T-CLOCS system on the day to catch overnight changes. |
The inspection mindset that actually makes a difference
I have seen riders arrive at circuits with immaculate bikes and still fail tech inspection. The bike looked perfect. The brake fluid was two years old. That is the gap between a clean motorcycle and a prepared one.
The most useful shift I made in my own approach was treating the tech inspection exactly as a pilot treats a pre-flight check. Not a box-ticking exercise. A genuine question: would I be comfortable at 180 km/h on this machine right now? If the answer has any hesitation in it, something needs attention.
Cleaning the bike thoroughly before inspection changed how I see preparation. Washing a motorcycle properly, not just hosing it down, reveals hairline cracks in the frame, weeping fork seals, and loose fasteners that are completely invisible under a layer of road grime. The wash is the inspection. Everything else is confirmation.
The other thing I tell riders who are new to track days: do not be embarrassed to ask the tech inspector what they are looking for. They are not trying to catch you out. They want you on track. A brief conversation before you queue for inspection can save you a failed check and a wasted morning.
— Matteo
Track-ready parts and accessories from Sixrace
Passing a tech inspection starts with having the right components on your bike before you arrive at the circuit.
Sixrace stocks a full range of track day accessories from established brands including R&G, Evotech Performance, and Acerbis, covering everything from frame sliders to brake lever guards. For consumables such as DOT 4 and DOT 5.1 brake fluids, chain lubricants, and track-approved coolants, the Sixrace consumables catalogue is organised by product type for quick selection. Riders who need replacement brake components will find pads, discs, and master cylinder parts matched to their specific make, model, and year. Use the Sixrace discount page to access your reserved offer on your next order.
FAQ
What is the minimum brake pad thickness for a track day?
The minimum accepted brake pad thickness at tech inspection is 2mm. Pads below this threshold cause immediate rejection and must be replaced before entry.
How old can my tyres be for a track day?
Tyres older than 4–5 years should be replaced regardless of remaining tread depth. The manufacture date is encoded in the four-digit DOT code on the sidewall.
What tyre pressures should I use for a track day?
Cold tyre pressures of approximately 30 psi front and 28–30 psi rear are the standard starting point for track use. Adjust based on your tyre manufacturer’s guidance and circuit conditions.
Why must I replace glycol coolant before a track day?
Glycol-based coolant creates an extremely slippery surface if spilled on the circuit, posing a serious hazard to other riders. Most track day organisers require it to be replaced with water or an approved wetting agent.
What is the T-CLOCS system?
T-CLOCS is the Motorcycle Safety Foundation’s pre-ride inspection framework covering Tires, Controls, Lights, Oil, Chassis, and Stands. It takes 5–10 minutes and is the recommended final check on the morning of any track day.
 Italiano
 Deutsch
 Français
 Español
 English
 Polski